Wednesday, June 30

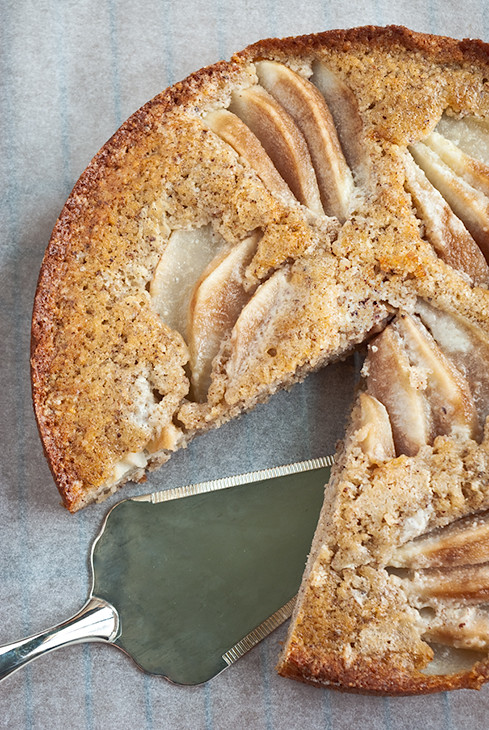
Pear & hazelnut torta

06_10---Pear-and-Hazelnut-Torta-2

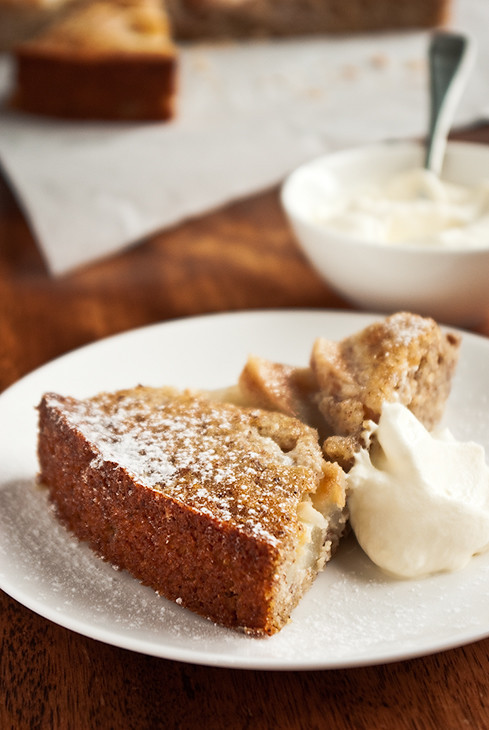
I seem to have an obsession with pears. Every second recipe I make seems to involve pears in some way or another. I suppose it's the season, pears are everywhere at the moment and I have too many to just eat. It's alright though because I can always find something to use them in. Last week it was an over-abundance of oranges, this week it's pears. I hope it's cherries and strawberries next week but that's unlikely!

This cake is really simple and tasty. It's by no means beautiful and lacks visual wow factor as it's all the same shade of brown but I'm a firm believer that taste trumps prettiness any day. It's best served on the day it's made as it gets uglier the more it ages. My pictures were taken the morning after the cake was baked and by then it was already losing visual appeal. Still, it tastes just as good as it did yesterday.

On another note, this cake is actually supposed to be baked in a fluted tart dish with a loose bottom, which would no doubt add to it's visual appeal immensely. My garage door jammed up the other day, leaving me with only the tins I had in the house (yes, the cake tins live in the garage...). Luckily I had a spring-form pan the right size but if I were to make this again it would definitely be made in a tart pan!

06_10---Pear-and-Hazelnut-Torta

I have to say it was nice to have a cake that used nut meal that wasn't almond. The hazelnut meal used in this recipe is a nice change from the ever present almond meal, though you could use almond meal if you prefer the taste. I'm sure it would still be good but a bit less nutty.

This is the kind of cake I would serve if I were having a casual meal with simple wholesome food. It's not rich and overpowering and it's not so decadent that you can only have a small slice. It's the kind of cake it's okay to have a hearty slice of and feel no shame or guilt. it's by no means good for you but it looks almost as though it could be.

06_10---Pear-and-Hazelnut-Torta-3

Pear & hazelnut torta

(from Delicious Magazine, May 2009)
makes one 26cm cake

100g (3.5 oz) hazelnut meal
110g (1/2 cup) granulated sugar, plus 2 tablespoons extra
50g (1/3 cup) plain flour
1/2 teaspoon baking powder
2 eggs
60ml (1/4 cup) milk
1 teaspoon vanilla extract
80g (2.8 oz) unsalted butter, melted and cooled
2 ripe pears

Preheat the oven to 170°C (340°F). Lightly grease the bottom of a 26cm (10 inch) tart pan or spring-form cake tin.

Combine the hazelnut meal, sugar, flour, baking powder, and a pinch of salt in a large bowl and whisk to combine. Beat the eggs in a separate bowl until they are just frothy. Whisk in the milk, vanilla, and cooled butter. Pour the egg mixture into the nut mixture and stir until well combined. Scrape the resulting batter into the prepared dish. and spread out evenly.

Peel, quarter, and core the pears. Cut each quarter into 4 to 5 equal pieces. Fan the slices slightly and then transfer to the top of the batter. Repeat with remaining pear slices. Sprinkle the extra sugar over the pears.

Bake the torta for 25-35 minutes, or until the batter is firm, puffed, and golden. If the top colours too quickly over it loosely with foil.

Transfer to a wire rack sift a thick-ish layer of icing sugar over the top. Allow to cool to lukewarm and then release from the pan. Sift more icing sugar over the top just prior to serving, if required. Serve with whipped cream.

Tuesday, June 22

Cinnamon, currant, & apricot buns

cinnamon, currant, and apricot buns

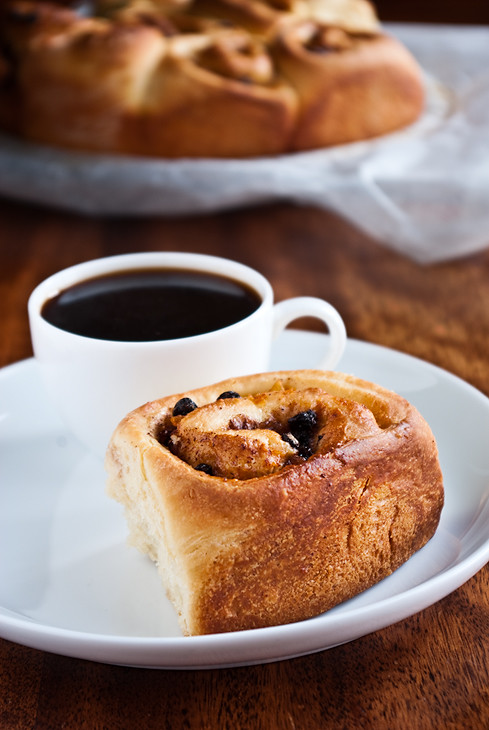
I think I lack the patience for yeast. I'm not very good at waiting for things to happen, when I set my mind to something I want it done as soon as possible. Waiting three-and-a-half hours for something to rise because it's so cold doesn't appeal to me, not one little bit. It makes me fret and worry and want to throw in the towel.

And I almost did, I almost declared these buns dead. Boy, am I glad I didn't.

The first rise was supposed to take just over an hour, however when I peaked at my dough after on the hour nothing had changed. Nothing. My dough was a sad little lump sitting in a bowl far to big for it. No growth, no nothing.

When I checked half-an-hour later it was the same story. Still a sad little lump. I was starting to fret, saying "Well, I knew yeast hated me. Why did I even start this obviously wasn't going to work"... blah, blah, blah.

However, today I wasn't going to be a giver-upper. I was going to be a winner.

So I moved by sad little dough into the bed and turned on the electric blanket. I tucked in the covers and set a timer.

cinnamon, currant, and apricot buns

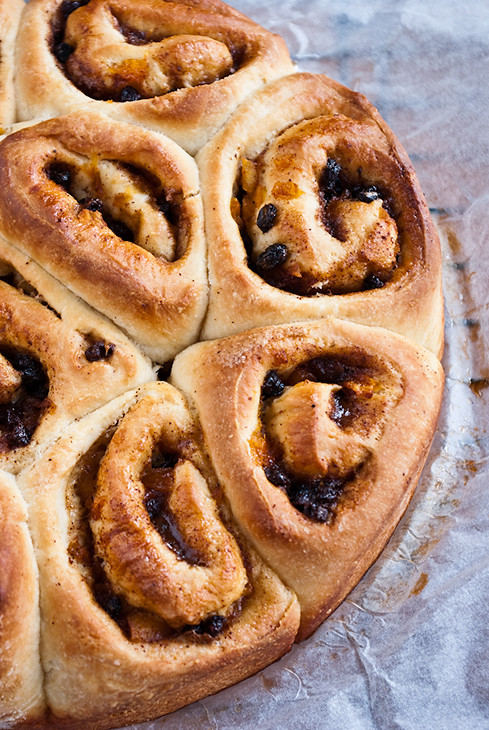
An hour or so later, I went to peak and my dough had risen but not enough. Still, a start is a start. So I turned up the bed and left it to rest, an hour later it had risen perfectly. The dough no longer seems to be for the bowl, in fact it seemed just right.

The next part was easy. Roll the dough, fill the dough, shape the dough, tuck it back into bed for 40 minutes, bake it, and then (finally) eat it. Though it took longer than expected it was absolutely worth it.

So, what did I learn today? Dough likes electric blankets as much as I do and be patient. Needless to say, I'll have forgotten the latter lesson by tomorrow.

Cinnamon, currant, & apricot buns

(adapted from The Art & Soul of Baking)
makes 10 buns

Dough

125ml (1/2 cup) tepid milk
50g (1/4 cup) sugar
1 1/2 teaspoons active dry yeast
or1 1/4 teaspoons instant yeast
1 large egg plus one egg yolk, at room temperature
355g (2 1/2 cups) all-purpose flour
1/2 teaspoon salt
115g (4 oz) unsalted butter, very soft

Filling

1 large egg, lightly beaten
115g (1/2 cup, firmly packed) brown sugar
2 teaspoons ground cinnamon
75g (1/2 cup) currants
55g (1/3 cup) dried apricots

Combine the warm milk and sugar in the bowl of a stand mixer and sprinkle the yeast over the top. Whisk by hand to blend well. Let the mixture sit for 5 to 10 minutes, until the yeast is activated. Add the egg and egg yolk and whisk, by hand, until well blended. Stir in the flour and salt.

Attach the dough hook to your mixer and knead, on low, for 2 minutes. Increase the speed to medium and knead for 1 minute. With the mixer still running, add the softened butter, 1 tablespoon at a time ensuring each addition is well blended before adding the next. Once all the butter is added, decrease the speed to low and continue to knead for 5-6 minutes, or until the dough looks soft and silky.

Lightly butter or oil a bowl, scrape the dough in, and brush the surface with a little butter. Cover in plastic wrap, or a damp cotton towel, and let the dough rise until doubled, about 1 to 1 1/2 hours. It is helpful to mark the starting level of the dough with a pencil or a piece of tape.

Lightly grease and line the base of a 25cm (10 inch) round cake pan. Coarsely chop the apricots, and place them in a small bowl with 1/3 cup boiling water.

Turn the dough out on to a flour dusted work surface. Press down firmly with your hands to expel as much gas as possible. Dust the top of the dough with flour and then roll it into a 25cm by 40cm (10 inch by 16 inch) rectangle. Position the dough so that the longest side is parallel to the edge of your work surface. Brush away any remaining flour.

Brush the dough evenly with a thin film of egg. In a small bowl, combine the brown sugar and cinnamon. Sprinkle this mixture on top of the egg glaze. Scatter the currants over the top. Drain the apricots and scatter them evenly on top of the currants.

Beginning with the edge closest to you, roll the dough into a cylinder, tucking and tightening as you go. Roll the dough backwards, so that the seam is facing upwards and pinch to seal the dough. Turn the seam side down and cut the dough into 10 equal pieces. With a cut side up, gently press down on each bun to flatten them slightly. place the buns in the prepared 25cm (10 inch) cake tin.

Cover the pan loosely with plastic wrap, or a damp tea towel, and set aside until the rolls have almost doubled in size, about 45 to 60 minutes.

Preheat the oven to 180°C (350°F), and position an oven rack in the center. Bake the buns for 30-35 minutes, or until deep golden brown. Transfer to a cooling rack and, after 5 minutes, turn the buns out of the pan. Serve warm or at room temperature.

Saturday, June 19

Gâteau à l'orange

Gâteau à l'Orange

J and I were given a giant bag of oranges, and by giant I mean giant. 10 kilos kind of giant. 10 kilos between 2 people is an a lot of oranges. It's just lucky that I like oranges a lot, and we're now down to the last 20 or so oranges. That's still a lot of oranges but I've got plans.

We've made a lot of juice, which is good because I've been feeling a bit under the weather lately and oranges make you strong... or something like that. Either way, there's only so much orange juice one can drink.

So, when life gives you oranges, make orange juice and then orange cake.

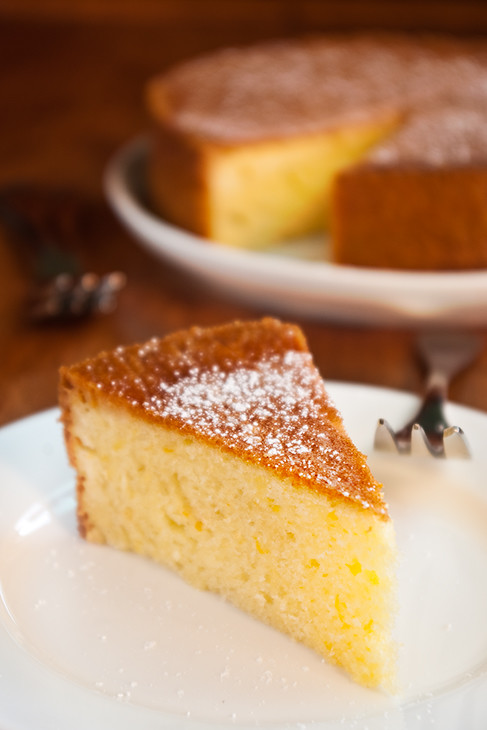
Orange cake is, in my view, one of the most underrated cakes. It's so underrated that none of my cook books had a single recipe that called for orange juice rather than just orange rind. Luckily the internet delivered better results leading me to this recipe from Passionate about Baking. I'm glad I found this recipe as I feel it will quickly become one of my favourites.

If I were to make this again I would make it in a larger pan. The recipe recommends a 16cm (6 inch) pan and even though I made mine in a slightly larger 18cm (7 inch) pan it was still to small and the cake peaked far to much. Next time I'll use a larger 20cm (8 inch) tin instead.

So, if life gives you oranges, make this cake.

orange cake

Gâteau à l'orange

(recipe from Passionate About Baking)

250ml (1 cup) freshly squeezed orange juice
zest of 1 orange
100g (3.5 oz) butter, softened
100g (3.5 oz) sugar
150g (5.3 oz) flour
3 eggs, separated
1 1/2 teaspoons baking powder
2 tablespoons Cointreau
a pinch of salt

Preheat the oven to 170°C (340°F), grease and line the base of an 20cm (8 inch) cake tin.

beat the butter and sugar together in a large bowl using an electric mixer until lightened in colour and texture, about 3 minutes. Add the egg yolks, one at a time, taking care to thoroughly combine each yolk before adding the next one. Beat until smooth.

Add the Cointreau and beat until combined.

In a separate bowl, whisk together the flour and baking powder. Reduce the speed mixer to low and add the flour gradually. Mix well. Pour in half the orange juice and all the orange rind. Mix until just combined.

In a separate bowl, beat the egg whites and a pinch of salt to firm peaks. Fold 1/4 of the egg whites into the batter to lighten it, then fold in the remaining egg whites.

Pour the batter into prepared pan and bake for 1 hour or until the cake is deep orange and firm to the touch.

Remove cake from the oven and slowly pour the remaining orange juice on to the cake whilst it is still warm. Cool in tin for 20 minutes and then unmold and place on a wire rack. Serve with icing sugar.

Wednesday, June 16

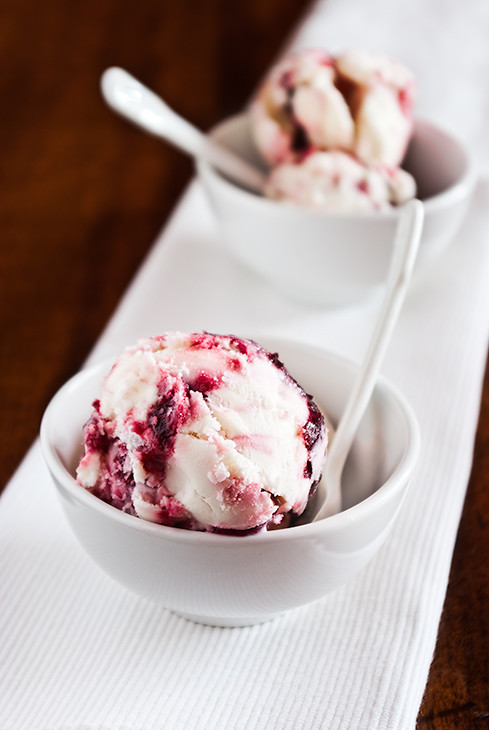
Frozen yoghurt with a cherry ripple

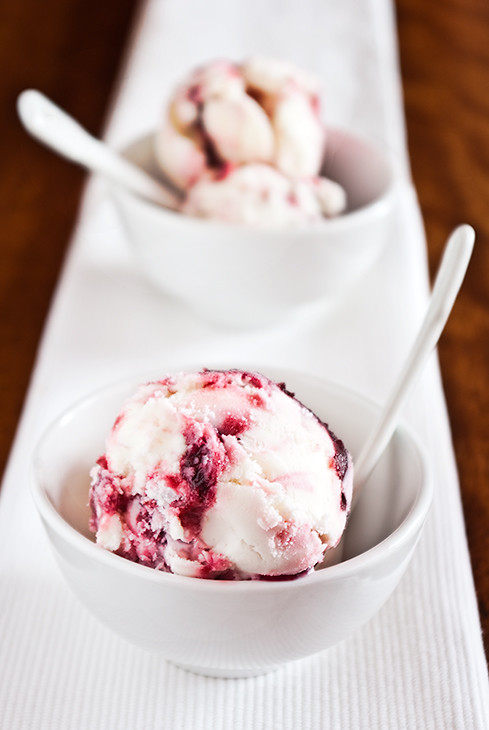
frozen yoghurt with cherry ripple

This is my first time photographing any kind of frozen food, up until now I've been terrified and in awe of those who regularly do it. I'm no longer terrified but definitely still in awe of those who do it well.

Late last year I was given the ice cream bowl attachment for my kitchen-aid mixer (which I was also given last year, thanks friends!) Since receiving it I've made ice cream and sorbet whenever I find an excuse. Now I'm venturing into the world of frozen yoghurt.

I've always loved frozen yoghurt, as a child my mother used to buy it on a regular basis and I used to scoff it down. Yet, up until yesterday I'd never had it freshly made and nor did I have the slightest inkling of just how easy it is to make.

Besides the home-made ice creams I've made I've really only had home-made ice cream once in my life. I would've been around 8 at the time and it was made using a hand cranked ice and salt mixer. I thought it was amazing. I can't remember what the ice cream tasted like but I do remember thinking just how great it was that you could actually make ice cream. It was like magic happening before my eyes. Of course, I didn't actually crank the ice cream maker so I had little appreciation of the effort involved - I still have little appreciation as I've never used an ice and salt ice cream maker!

frozen yoghurt with cherry ripple

Anyway, enough of that. Frozen yoghurt is amazing. The tangy-ness of the yoghurt offsets the sweetness of the cherries in this recipe, creating a delightful combination. if you've never made frozen yoghurt and you happen to own an ice cream maker, I highly recommend you make it now. The involved is absolutely minimal and the results are deliciously rewarding.

Frozen yoghurt with a cherry ripple

(adapted from Decadence: Desserts by Philip Johnson)
makes 600ml

For the frozen yoghurt

175ml (6 fl oz) whole milk
85g sugar (1/3 cup) caster sugar
35g (1/6 cup) glucose syrup
250ml (1 cup) Greek-style yoghurt
juice of 1/2 a lemon

For the cherry ripple

120g (1/2 cup) caster sugar
1 cup water
1 cup fresh or frozen cherries, pitted

Combine the milk, sugar, and glucose syrup in a small saucepan over medium heat and stir until the sugar has dissolved. Bring to the boil, then remove from heat and set aside to cool completely.

Put the yoghurt in a large mixing bowl. Whisk in the cooled milk mixture, then whisk in the lemon juice. Refrigerate until cold.

Meanwhile, combine the caster sugar and water in a small saucepan over a medium heat and stir until the sugar has dissolved. Add the cherries and crush them lightly using a wooden spoon to break them up slightly. bring to the boil and boil, without stirring, for 5-7 minutes or until the mixture is thick and syrupy. Remove from the heat and transfer to a small bowl. Cool to room temperature and then refrigerate until cold.

Once everything is cold, transfer the yoghurt mixture to the bowl of an ice cream machine, and churn according to the manufacturers instructions.

Once churned, transfer to a container for freezing, alternating between large scoops of the frozen yoghurt and small scoops of the cherry mixture. Freeze for an minimum of two hours.

Saturday, June 12

Poached pears with pain d'epice

poached pears with pain d'epice

Everyone seems to have a different way of poaching pears using completely different ingredients. I've tried a number of recipes some that use wine and some that don't, and this is my favourite. The poaching liquid can be made with or without wine, depending on what what happen to have on hand. I've done it both ways and have been equally happy with the taste.

Pears are one of my favourite fruits for cooking, I love the texture they get after they've been cooked and how the simply ooze taste. The great thing about poached pears is that it's incredibly simply to vary the flavours based upon your preferences. These pears taste distinctly of vanilla, cardamom, and lemon - all good things in my books. The original recipe is served with labneh and pistachios. I decided to serve them pain d'epice, making for a warming and spicy combination.

The poached pear recipe comes from Decadence: Desserts by Philip Johnson, which is one of my favourite books. I've made at least half the recipes over a number of years and I've only had one failure which was entirely my fault and still tasted amazing. The book itself isn't very large but the recipes are so good it just doesn't matter.

And now for the Pain d'Epice. traditionally contains rye flour, however I didn't have any in the cupboard so I had to resort to to using wholemeal flour. Texture-wise the top of this is kind of chewy and a little odd. I sliced off the top crust of mine as I didn't like it - the insides are quite tasty though. The aging it for a day or two helps to soften it up but, personally, I would prefer it it were softer from the beginning.

I greased and lined my tin but if I were to make this again I would omit the lining. The texture of the crust is much nicer in the parts that were directly in contact with the sides of the tin. I'm sure someone wiser than me knows why this is the case but until they tell me, I can't explain it!

Poached pears with pain d'epice

Poached pears

(adapted from Decadence: Desserts by Philip Johnson)

250ml (1 cup) water
250ml (1 cup) Sauvignon Blanc
300g (2 1/3 cups) caster sugar
4 cardamom pods, lightly crushed
1 cinnamon stick
2 star anise
Zest of half a lemon
1 vanilla bean, split lengthways, seeds scraped
3 medium sized ripe but firm pears

Combine the sugar, water, and wine in a medium sized saucepan over a medium heat and stir until the sugar has dissolved. Add the cardamom, cinnamon stick, star anise, lemon zest, vanilla bean, and vanilla seeds. bring to the boil, then reduce heat and simmer for 5 minutes.

Meanwhile, peel, halve, and core the pears leaving the stems intact.

Reduce the heat to low, add the pears, then cover with baking paper and a plate to keep the pears completely submerged. Poach gently for 12-15 minutes, or until tender. Using a slotted spoon, transfer the pears to a bowl, then pout half the poaching liquid over them. Set aside to cool.

Strain the remaining poaching liquid through a fine sieve and return to a saucepan over a medium heat. Discard the aromatics.

Bring the poaching liquid tot he boil, then reduce the heat and simmer until reduced by one-third. Set aside until required.

Pain d'epice

(adapted from Chez Panisse Desserts by Lindsey Shere)
makes one 23cm (9-inch) loaf.

160ml (2/3 cup) hot water
120ml (1/2 cup) honey
2 teaspoons granulated sugar
1/8 teaspoon salt
1 teaspoon baking soda
1/2 teaspoon baking soda
2 tablespoons cognac
1/2 teaspoon cinnamon
A pinch of ground cloves
A pinch of white pepper
Peel of 1 small orange
1/2 teaspoon freshly grated ginger
135g (1 cup) wholemeal flour
85g (3/4 cup) plain flour
70g (1/2 cup) lightly toasted, un-blanched almonds, coarsely chopped

Preheat oven to 200°C (400°F), grease a 23cm (9-inch) loaf pan.

In a large bowl, combine the 1/2 the wholemeal flour and 3/4 of the plain flour, whisking to combine.

Measure honey into a large jug and pour the hot water over, stirring well to combine. Stir in the sugar, salt, baking soda, and baking powder. Add the cognac, then all the spices and the orange peel.

Make a well in the center of the combined flours, and gradually whisk in the honey mixture, taking care that no lumps form. Whisk in the remaining flours, combine until the batter is just smooth. At this point, according to the recipe, the batter can be covered and set aside in a cool place for up to 5 days to age.

Just before baking, add the shopped almonds and stir until completely mixed. Scrape the batter into the prepared loaf pan. Bake in preheated oven at 200°C (400°C) for 10 minutes, then reduce the heat to 180°C (350°F) and continue to bake for 50 minutes or until well done an a skewer cones out clean.

Once cooked, remove the loaf from the pan and cool on a wire rack. brush loaves with warmed honey. Once cool, wrap the Pain d'Epice in plastic and age for 1-2 days before serving.

Tuesday, June 1

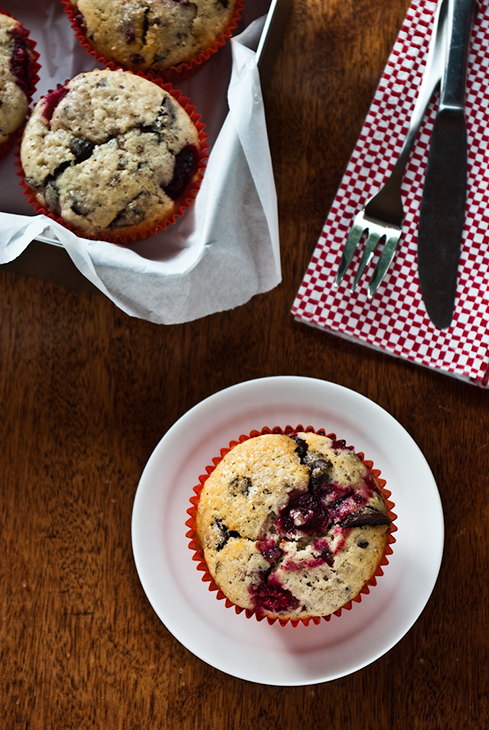
Dark chocolate & raspberry muffins

dark chocolate raspberry muffins

Muffins are hard to photograph. They're not inherently pretty in the same way layered cakes, individual tarts, and cupcakes are. Muffins are kind of messy and don't have a singular defining visual feature - or at least mine don't.

Nevertheless, what they lack in visual beauty they often make up for in taste.These muffins aren't elegant or stunning but they are amazingly tasty. They're packed full of raspberries and chocolate, two things that never fail disappoint me.

When I making these I honestly doubted that I would be able to fit all the raspberries in but I could and I did. Each muffin has around eight raspberries and a whole bunch of chocolate. Eight doesn't sound like that many raspberries but bear in mind that these are cooked in a standard muffin tin.

I used demerara sugar to sand the tops of these though, if you don't have any on hand, you can use raw sugar as suggested by the original recipe. I prefer the taste of demerara sugar and I think the large grains are quite beautiful. My muffins had quite a crisp top, I imagine raw sugar would give a similiar texture.

Truthfully, I don't really have much else to say about these muffins. They speak for them-self.

Dark chocolate & raspberry muffins

(adapted from Bourke Street Bakery by Paul Allam & David McGuinness)
makes 10 standard muffins

265g (1 + 3/4 cups) plain flour
1 + 1/3 teaspoons baking powder
200g (1 cup) caster sugar
205 (7.2 oz) butter
320ml (1 + 1/3 cups) buttermilk
2 eggs
150g (5 oz) dark chocolate, roughly chopped
140g (5 oz) raspberries, fresh or frozen
55g (1/4 cup) demerara sugar

Preheat the oven to 190°C (375°F). Line a 12-hole standard muffin tin with paper cases.

Place the flour, baking powder, and sugar in a bowl and whisk well to combine.

Melt the butter in a small saucepan over a low heat, then remove from the heat and stir in the buttermilk. Using a whisk, stir in the eggs, one at a time, whisking to combine. Pour the buttermilk mixture over the dry ingredients and whisk to combine, using a large spoon, gently fold through the chocolate.

Using a 1/4 cup spoon mixture into prepared muffin tins. Cover each muffin with raspberries, pressing them into the batter slightly. Spoon remaining batter over the raspberries. Sprinkle the tops with demerara sugar.

Reduce the oven temperature to 180°C (350°F) and bake for 25-30 minutes or until the muffins are well risen and firm.

Remove muffins from the oven and allow to cool for 10 minutes before eating. Muffins are best served warm.