Monday, December 27

Date, walnut, raisin, & red currant bundt cake

12_10---Walnut-Rasin-&-Currant-Buttermilk-Bundt-Cake

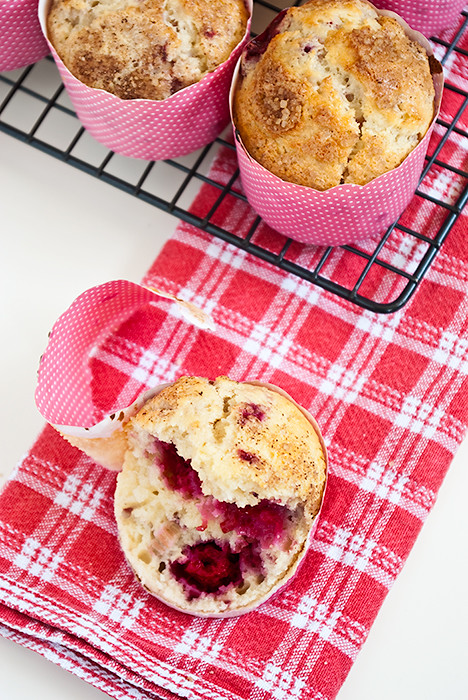
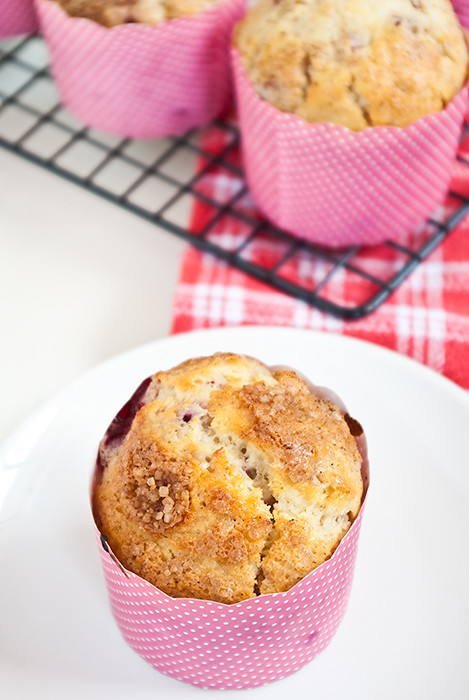
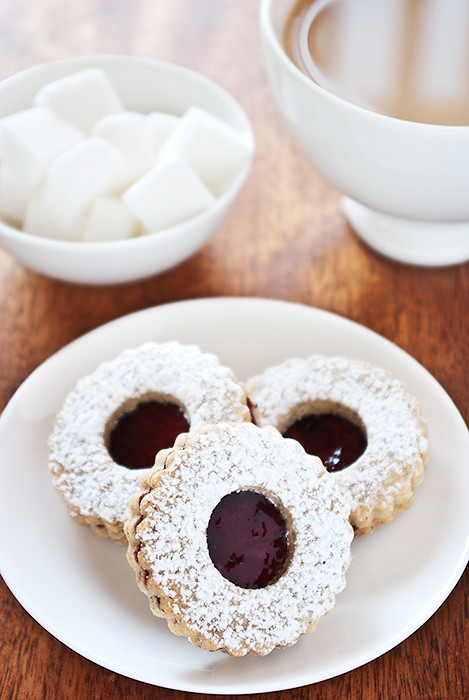
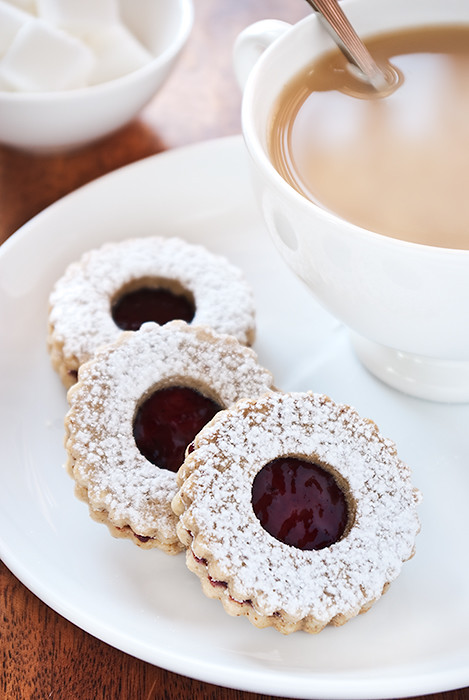
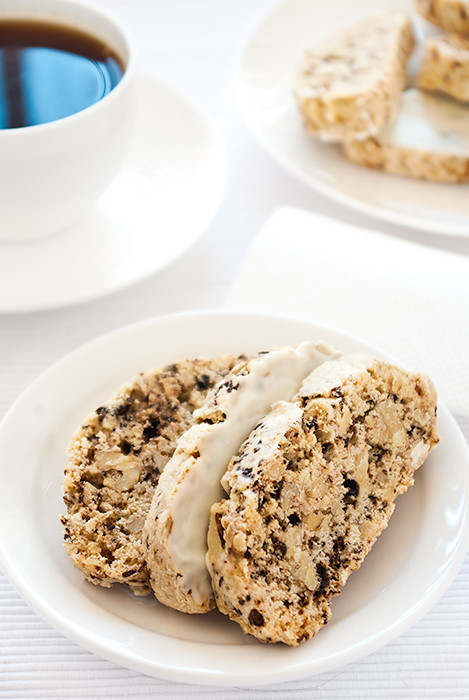
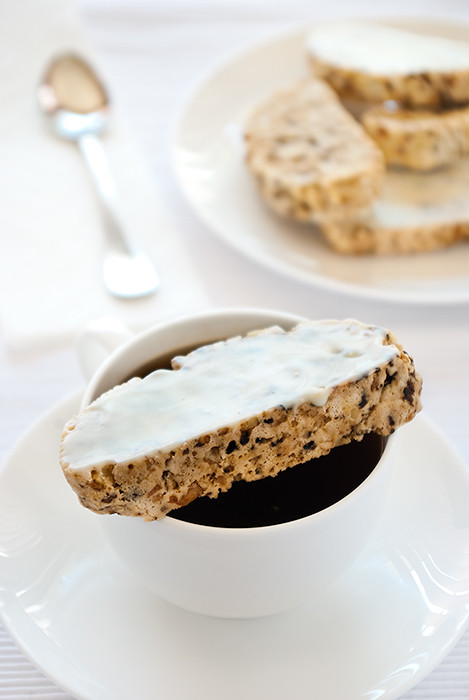
The best thing about Christmas is that it gives everyone a good excuse to get together and be merry. There's eating, drinking, chatting, and laughing. Hopefully there's good times had by all. And where there's all these things there's got to be dessert, and where there's dessert, there's me.

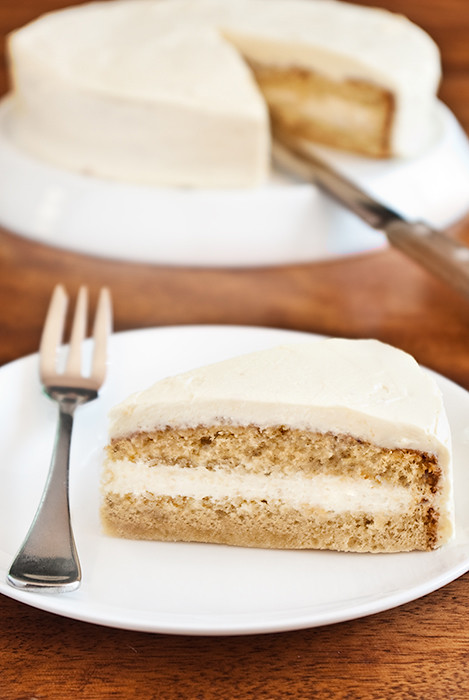
I'm always after an excuse to try new recipes, or to make something that feeds more than two people. Whenever I get together with my friends I always look forward to making a bundt cake. As I've said before, I'm not really a fan of fancy iced cake (unless there's mousse involved somewhere). On the whole, I prefer my cakes to be full of nuts and best served with a cup of coffee.

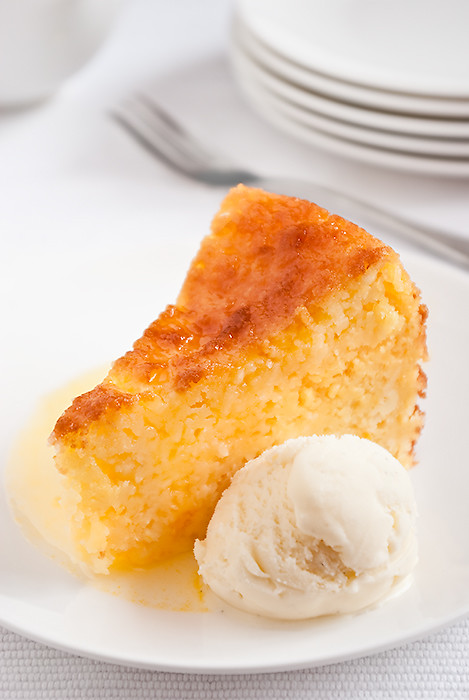
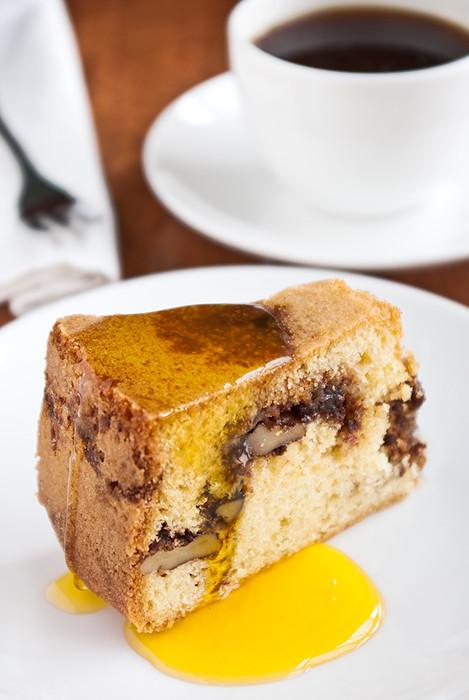
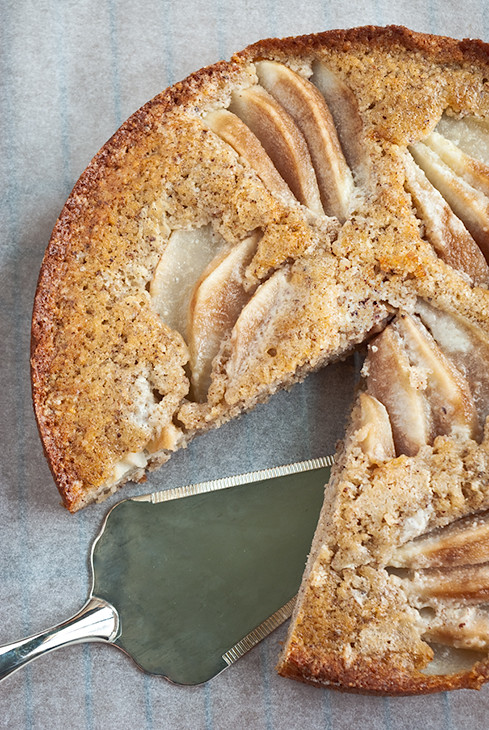
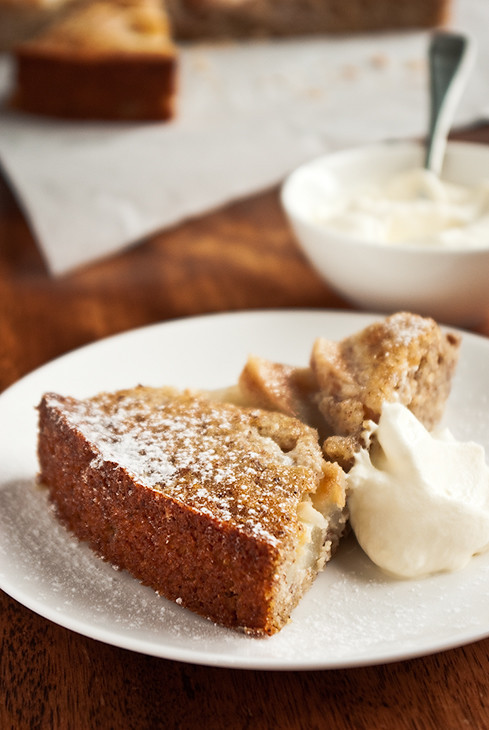
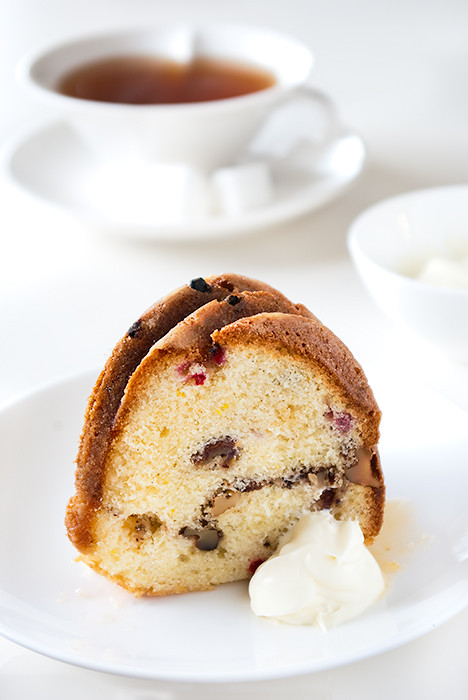
This cake fits the bill perfectly. It's dense but not dry. The fruit throughout adds flavour and texture, and syrup glaze makes it intensely orange-y.

12_10---Walnut-Rasin-&-Currant-Buttermilk-Bundt-Cake-2

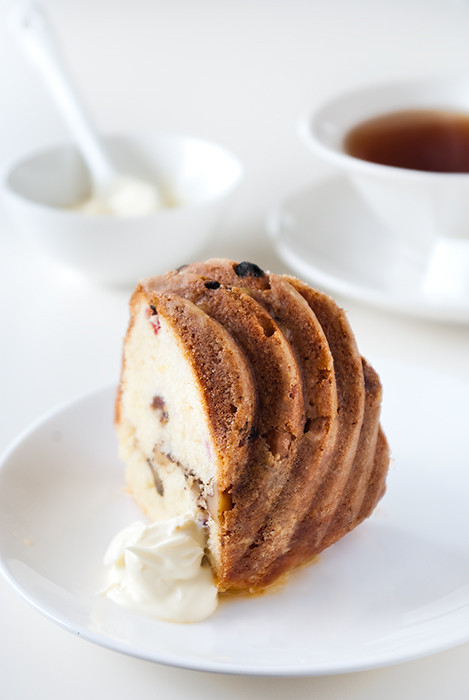
The original recipe called for cranberries but as it was Christmas eve the day I made this cake there were none to be found anywhere. Instead I substituted dates, raisins, walnuts, and fresh red currants. Really you could use anything you like. I found the addition of fresh red currants added am intense bite to to the cake which I enjoyed but the cake would be fine without them. Not everyone has gardening obsessed parents who give them all kinds of free stuff.

The recipe itself is very simple and quick, which is excellent when you've decided you want to make a cake on a whim.

Date, walnut, raisin, & red currant bundt cake

(adapted from Genesis of a Cook)
Makes one 10-12 cup bundt cake

120g (1/2 cup) unsalted butter, at room temperature
100g (1 cup) granulated sugar
2 large eggs
Zest of 1 medium orange
1 vanilla bean, seeds scraped
220g (2 cups) plain flour
1/2 teaspoon baking soda
1/2 teaspoon salt
160ml (2/3 cup) buttermilk
50g (1/2 cup) fresh dates, chopped
50g (1/2 cup) walnuts
40g (1/4 cup) raisins
2 medium sized bunches of fresh red currants, or 40g (1/4 cup) dried cranberries

Preheat the oven to 180°C (350°F). Thoroughly grease and flour a 10-12 cup bundt tin.

In a small bowl, combine the flour, baking soda, and salt. Whisk thoroughly.

Using a mixer fitted with a paddle attachment, cream the butter and sugar on medium-high speed until it is light a fluffy, about 3-5 minutes. Add the eggs, one at a time, beating well between each addition. Add the orange zest and vanilla bean seeds and beat until well combined.

Reduce the mixer to low, add half the flour mixture and mix until just combined. Add half the buttermilk and continue to mix until combined. Add the remaining half of the flour, and then the buttermilk. Remove the bowl from the mixer and fold in the dates, walnuts, raisins, and currants.

Spoon the batter into the prepared pan. Bake for 40-45 minutes, or until a skewer inserted into the centre comes out clean. Let the cake cool in the pan for about 10 minutes, then invert it onto a rack and let it cool for at least 20 minutes before glazing. Once cool, transfer the cake to a serving plate.

Orange Glaze

130g (1 cup) icing sugar
125ml (1/2 cup) freshly squeezed orange juice
1 tablespoon grated orange zest

For the glaze, combine the ingredients in a small pot over low heat. Whisk the glaze until the sugar has dissolved then pour glaze over cake. Serve at room temperature.

Friday, December 17

Raspberry & rhubarb breakfast muffins

12_10---Raspberry-Breakfast-Muffins-4

I'm sorry little blog, you've been neglected. Life called and I left you alone and un-updated for far too long. But now I'm back, in a new tiny unit that has a kitchen that is half the size of my previous one and is just as old. Still, it's all good. A place to live is a place to live. The kitchen might not be great, but the oven turns on and that's enough to keep me happy.

Anyway, when you're in the middle of unpacking there's not much time to make something fancy. This is especially the case when half your things are still in boxes and there aren't any fancy implements within arm's reach. When I made these muffins I hadn't even unpacked my muffin tray. luckily I had unpacked my favourite muffin papers and a single baking tray. I love these muffin papers because you don't need to put them into a muffin tin, you just place them on a tray and away you go. One less thing to clean, especially when you no longer have a dishwasher. I also had a few bowls unpacked, a couple of gadgets but no whisk or stand mixer. I also had a insatiable desire for muffins and was immensely curious as to whether or not the oven actually worked. Luckily, muffins only require a few bowls, and a spatula - hooray!

These muffins are super simple and delicious straight out of the oven. With a muffin in hand unpacking seems a whole bunch more approachable.

12_10---Raspberry-Breakfast-Muffins-3

Raspberry & rhubarb breakfast muffins

(adapted from The Art & Soul of Baking)
makes 9-12 standard muffins

285g (2 cups) unbleached plain flour
135g (2/3 cup) sugar, plus 1 tablespoon sugar
2 1/2 teaspoons baking powder
Pinch of salt
85g (3 ounces) butter
Finely grated lemon zest
125ml (1/2 cup) milk
65ml (1/4 cup) yoghurt
2 large eggs, at room temperature
1 1/2 teaspoons vanilla extract
1 cup frozen raspberries
1/2 cup finely chopped rhubarb
1/4 teaspoon ground cinnamon
Pinch of freshly ground nutmeg


Preheat oven to 200°C (400°F) and position an oven rack in the centre. Place 12 muffin papers in a muffin tin, or 9 self-standing papers on a baking tray.

Place the flour, 2/3 cup of the sugar, the baking powder, and salt in a large bowl and stir thoroughly.

In a medium fry-pan, melt the butter with the lemon zest. Turn off the heat. Add the milk and yoghurt and let the mixture stand for a minute or two. Pour the milk into a medium bowl, add the eggs and vanilla and whisk until well blended.

Make a well in the centre of the dry ingredients. Pour the milk mixture into the well and stir well with a spatula. Mix only until there are no streaks and the batter looks fairly smooth. A few lumps scattered throughout are fine. Gently fold through the raspberries and the rhubarb.

Divide the batter between the muffin cups. Stir together the remaining 1 tablespoon of sugar, cinnamon, and ground nutmeg and sprinkle over the tops of the muffins.

Bake for 18-20 minutes, or until the tops feel firm and a skewer inserted into the centres comes out clean. Transfer the muffin tin to a rack a let cool for 5 minutes. Then, remove the muffins from the tin and cool on a wire rack. Serve warm or at room temperature.

Thursday, November 25

Spiced éclairs with milk chocolate glaze

Spiced Chocolate Eclairs

Éclairs, éclairs, éclairs- you much maligned things. It's not your fault you're sometimes deemed as boring or passé. It's really not, and I know those hurtful words are untrue. I hope one day you become as popular as the macaron and there's a global trend to make you in all different flavours and wacky shapes. You deserve it. I wish my rendition of you would start this trend but alas, I have broken no new ground today.

Regardless, these éclairs are all round delicious and incredibly easy. A few months ago I was shocked to discover just how simple choux pastry was. I thought "wow, this couldn't be easier, why was I so afraid?" Little did know an easier recipe does exist because this recipe uses a stand mixer. A stand mixer! You don't even have to bet the eggs into the cooked dough yourself, seriously. It's that simple.

That being said, I actually like the other recipe better but maybe that's because I made it in a better kitchen, with better things, and a better oven. So it just seems better. Or maybe it was just a better recipe - I'm leaning towards the latter.

11_10---Spiced-Eclairs-2

Spiced éclairs with milk chocolate glaze

(adapted from The Art & Soul of Baking)

Vanilla crème pâtissière

375ml (1 1/2 cups) milk
1 vanilla bean
1 large egg
2 large egg yolks
85g (6 tablespoons) sugar
35g (1/4 cup) plain flour
30g (2 tablespoons) unsalted butter, cold

Pour the milk into a medium saucepan. Use the tip of a paring knife to cut the vanilla bean lengthwise. Turn the knife over and use the dull side to scrape the seeds into the saucepan, then add the pod. Heat the mixture until it just begins to simmer. Remove from the heat and let steep for 30 minutes.

Heat the milk to just below boiling point and remove from the heat. In a medium bowl, whisk together the egg, egg yolks, and sugar until well blended. Add the flour and whisk vigorously until the mixture is very smooth. Pour 125ml (1/2 cup) of the hot milk mixture into the yolk mixture, whisking constantly to temper the eggs. Slowly pour the yolk mixture into the remaining hot milk, whisking all the while.

Heat the mixture, whisking constantly to prevent it from lumping, until it reaches a boil. Continue to cook and whisk for another minute, until the pastry cream is very thick. Remove from the heat and whisk in the butter. Strain the cream through a fine strainer set over a medium bowl to remove any lumps.

Press a piece of cling wrap directly on to the surface of the pastry cream, then set aside to cool to room temperature. Once the pastry cream as completely cooled, transfer it to the refrigerator until required.

Pâte à choux

115g (4 oz) unsalted butter, chopping into 1cm (1/2") pieces
250ml (1 cup) water
1/4 teaspoon salt
140g (1 cup) plain flour
1 teaspoon cinnamon
1/4 teaspoon ground cloves
1 teaspoon sugar
4 large eggs, plus one egg extra

Preheat the oven to 200°C (400°F) and position two racks in the top and lower thirds of the oven. Line two trays with baking paper.

Cook the butter, water, and salt in a medium saucepan, stirring from time to time to ensure the butter melts evenly. When the butter as melted, increase the heat and bring to the boil. Immediately remove from the heat and add the flour, cinnamon, cloves, and sugar all at once. Beat vigorously with a wooden spoon until the dough comes together in a mass around it. Place the pan back over medium heat and continue to cook, beating it until the dough has dried out slightly and a thin film forms on the bottom of the pan, about a minute.

Transfer the dough to the bowl of a stand mixer. Beat on medium speed for 1 minute to slightly cool the dough. In a medium bowl, beat the 4 eggs together until you can't distinguish the yellow from the white. With the mixer on medium, add the eggs a couple of tablespoons at a time, allowing each addition to blend completely before continuing. When the eggs are incorporated, the mixer should be shiny and elastic.

Spoon the dough into a pastry bag fitted with a 1.25cm (1/2 inch) plain round tip. Pipe the dough into 12cm (4") by 2.5cm (1") rectangles. To disconnect the flow of dough slice a lightly oiled knife across the opening of the tip.

Lightly beat the remaining egg to blend thoroughly. Brush a light coating over the top of the piped dough, being careful that the egg does not drip down the sides as it will glue the eclairs to the baking paper. Bake both trays of eclairs for 20 minutes, then reduce the temperature to 180°C (350°F) and switch the trays between the racks. Bake for a further 20 minutes. Reduce the oven temperature again, to 150°C (300°F) and bake for 10-15 minutes longer to dry out the insides. The éclairs should be deep brown. Remove from the oven and transfer the eclairs to a rack to cool.

When completely cool, spoon the crème pâtissière into a clean and dry pastry bag fitted with a bismarck or plain 0.5cm (1/4") plain tip. If using a bismarck tip, make a small hole in one of the short ends of the éclair. Then, insert the end of the bismarck as far as it will go. Squeeze firmly as you slowly pull the tip out of the pastry. If using a plain tip, make two evenly spaced holes in the bottom of an éclair with the tip of a paring knife. Insert the plain tip into each one, squeezing firmly to fill the centre. Repeat to fill remaining éclairs.

Milk chocolate glaze

115g (4 oz) milk chocolate, finely chopped
125ml (1/2 cup) heavy whipping cream

Place the chocolate in a small bowl that is wide enough to accommodate an éclair. Bring the cream to the boil in a small saucepan. Immediately pour over the chocolate and let the mixture sit for 1 minute. Whisk the mixture until it is completely smooth and blended. Cool for 10 minutes before using.

Turn the éclairs upside down, dip the top of each one halfway into the chocolate glaze, then lift it and let the excess drip back into the bowl. Set the éclair right side up on a serving platter or lined baking tray and allow to set for 30 minutes. Refrigerate until required.

Monday, November 15

Orange & coconut syrup cake

orange and coconut syrup cake

It's hard being an obsessive baker when only two people live in your house. Actually, hard is probably the wrong word, the baking bit is easy whether you live in a household of two or ten. The hard it is finishing what you make, particularly on the weeks you don't have people around for whatever reason.

Luckily for me, we seem to have an endless number of people coming and going from our house so most things get eaten fairly quickly. Whipping out a slice of cake makes guests feel comfortable and welcome and it also prevents me from having any unwanted leftovers. It also means I can start on whatever recipe next strikes my fancy without feeling guilty.

I do try to reduce the quantity of most recipes but I'm either paranoid that I'll reduce too much or there's only so small a recipe will go. This recipe falls into the first category, I didn't want to reduce it too much just in case it was delicious (which it was) and I wanted to eat more than one slice of it (which I did). The original recipe made one 26cm (10 1/2") cake, mine makes one 20cm (8") cake. I probably could have reduced the quantity further (down to two eggs, from five) but I'm not sure I have a cake tin that small. Anyway, I'm glad I didn't because it there's all the more for me.

This cake is kind of surprising. Most coconut cake I've made contain desiccated coconut whereas this one contains shredded. As a result the cake has bits of coconut that you can feel as you bit into it throughout. It's weird but nice. I think it works well as the cake itself is super moist due to syrup, the shredded coconut gives it a noticeable texture.

Orange & coconut syrup cake

(adapted from Eating in by Philip Johnson)
makes one 20cm (8") cake

200g (7 oz) Greek-style yoghurt
70g (2.4 oz) cream cheese
90g (3 oz)unsweetened shredded coconut
Finely grated zest and juice of 1 orange
120g (4 1/4 oz) unsalted butter, softened
190g (6 3/4 oz) caster sugar
3 eggs
120g (4 1/4 oz) self-raising flour
1/4 teaspoon baking soda

Orange Syrup

120g (4 1/4 oz) caster sugar
Juice of 1 orange

Preheat the oven to 150°C (300°F). Grease and line the base of a 20cm (8") spring-form cake tin.

In a food processor or a blender combine the yoghurt, coconut, cream cheese, orange zest, and juice. Process until smooth, then set aside.

In the bowl of an electric mixer, cream the butter and sugar together until light and pale. Add the eggs, one at a time, beating well after each addition. Fold through the yoghurt mixture, incorporating it well. Sift the flour and baking soda over the top, then fold through.

Pour the cake mixture into the prepared tin and bake for 50-55 minutes, or until a skewer inserted into the middle comes out clean. Remove from the oven.

While the cake is cooking, prepare the orange syrup by combining the sugar and just enough water to cover it in a small saucepan over medium heat. Stir until the sugar dissolves. Add the orange juice, then remove from the heat.

Drizzle the syrup over the warm cake in a steady stream until it is absorbed, using a pastry brush to distribute the syrup evenly if necessary. Cool the cake to room temperature before removing from the tin. When ready to serve, slice and serve with ice cream.

Saturday, November 6

Chocolate-orange meringues with orange cream

11_10---Choc-meringue-3

So, needless to say I never got around to photographing my birthday cake which is a real pity because it was rather epic. On the plus side, it does mean I need to make it again some time in the future. Assuming I can afford all the ingredients; half a kilo of good chocolate, twelve eggs, and four cups of cream are not the core ingredients for a cheap cake. Nor are they the ingredients for a cake that you should consume on a regular basis, through part of me would like to try.

This cake of mine left me with a fair few egg whites to use up - so what better way than meringue? Especially considering prior to making these I had never made meringue before. Sure, I've made meringue based icings and what not but never meringue that is nothing more than meringue.

11_10---Choc-meringue

That said, I'd like to think that these are more than meringue because they are! They're meringue filled with cream. Admittedly that's really not a huge step up from plain old meringue but it's a step nonetheless. A small step for a small person, I guess.

Speaking of small steps - in about two-and-a-half weeks I have finished my degree. That's four years of degree over in a matter of weeks. Can anyone recommend any good celebration desserts? If they're somehow related to the number four, even better. Maybe your favourite four ingredient dessert, or maybe a cake that somehow uses four cups of cream? Help is appreciated!

Chocolate-orange meringues with orange cream

makes about 20

Chocolate-orange meringues

(adapted from Macaroons & Biscuits by the Women's Weekly)

3 egg whites
155g (3/4 cup) caster sugar
1 tablespoon sifted cocoa powder
2 teaspoons orange rind, finely grated
2 teaspoons orange liqueur

Preheat oven to 120°C (250°F), grease oven trays and line with baking paper.

Beat the egg whites in the bowl of an electric mixer until soft peaks form. Gradually add the sugar, beating until dissolved between each addition. Fold the cocoa powder, orange rind, and liqueur through the egg whites.

Transfer the mixture to a piping bag, then pipe equal sized rounds onto the lined trays. Bake for 1 hour, then cool on trays.

Orange cream

(adapted from Gourmet Traveller, July 2007)

65ml milk
2 tablespoons freshly squeezed orange juice
1 tablespoon Grand Marnier
3 pieces orange rind
1 egg yolk
60g (1/4 cup) caster sugar
15g (4 teaspoons) cornflour
100ml (3.4 fl. ounces) double cream

Combine the milk, orange juice, Grand Marnier, and orange rind in a small saucepan and bring to just below the boil. Remove from the heat and set aside for 15 minutes to infuse.

Combine the egg yolks and sugar in a bowl and whisk for 1-2 minutes, add the cornflour and whisk to combine.

Reheat the milk to just below the boil, then strain over the egg mixture, whisk to combine then return to the pan and whisk over medium heat for 3-4 minutes, or until thick and smooth. Transfer to a bowl, cover with plastic wrap and cool. When completely cold, whisk in the cream. Continue whisking until thick and smooth. Refrigerate until required.

Assembly

Using a teaspoon, scoop out the centre of the meringues and set aside. Fill a piping bag with orange cream, and pipe enough cream to fill the hole in the meringue. Sandwich two filled sides of meringue together and refrigerate until required.

Thursday, October 21

White chocolate & blueberry muffins

10_10---Blueberry-Lemon-Muffins

Stress baking can take two forms. When you stress bake you can either make something super complicated and inevitably mess it up a lot, or you can make something incredibly simple and mess it up but only a little bit. Yesterday I opted for the latter - what I ended up with were these muffins which, despite my small mishap, are delicious and fill some kind of void in my stomach.

I'm sure I'm not the only one who stress bakes (or cleans, or sews.) Stress baking helps to take my mind off whatever is causing the stress. And I end up with something to eat too - something that too often gets forgotten when I'm stressed or worried. We all have bad habits.

Stress baking is the same as nervous baking, which is the same as worry baking. They're all caused by different things but the result is essentially the same. Regardless of what brings on the kitchen frenzy, the result is always something tasty with something ever so slightly wrong with it. I do all these kinds of baking but mostly I do 'for fun' baking.

Truthfully, I wasn't stress baking at all yesterday. I was nervous/excited baking. Nervous baking is better than nervous giggling because no one else knows you're doing it.

What do you know when you're stressed or nervous about something?

So, this recipe is incredibly simple and will probably become one of my go to recipes when I need something quick and easy. When I made mine I accidentally doubled the oil, the recipe I've included has the correct amount of oil. If you do, for some reason, put in twice as much oil, don't worry, your muffins will be fine.

(Also, yesterday was my birthday which would make me 22 now. I'm currently making an awesome mousse cake - expect pictures!)

White chocolate & blueberry muffins

(adapted from Simple Essentials: Chocolate by Donna Hay)
makes 9 small muffins

150g (1 cup) self-raising flour, sifted
80g (1/3 cup) caster sugar
125ml (1/2 cup) sour cream
1 egg
1/2 teaspoon finely grated lemon zest
30ml (1/8 cup) vegetable oil
125ml (1/2 cup) milk
1 cup frozen blueberries
1/2 cup chopped white chocolate

Preheat oven to 180°C (350°F). Line 10 standard (125ml, approx) muffin cups with papers.

Place the flour and sugar into a bowl and mix to combine. Combine the sour cream, egg, lemon zest, vegetable oil, and milk in a separate bowl and whisk together. Stir the sour cream mixture into the flour mixture until just combined. Fold through the blueberries and white chocolate.

Spoon the batter into the muffin tins, then bake for 25-30 minutes or until a skewer inserted into the centre of a muffin comes out clean.

Tuesday, October 19

Savarin with poached pears

10_10---Savarin-Edit

Some things are so weird. This is one of them. It's so bizarre that I'm at a loss as to whether or not I like it. This is apparently savarin, I've never had (or made) savarin so I'm not sure if it's supposed to be as weird as my rendition is.

Probably more knowledgeable folks that I will have eaten savarin before made by someone who actually knows how to make it - someone who knows good and bad. Someone who is decisive about their likes and dislikes.

I feel I should like this because taste-wise it's rather nice, but texture-wise it's just weird. There's so much syrup in it that it's completely squishy. I'm not a squishy food kind of girl - I can't stand things like bread and butter pudding - the way the liquid filled solid thing squelches around in my mouth. Good description there?

Anyway, looking at the picture (not my picture, the picture in the magazine) there's looks just as squishy. That's good, I suppose?

Though I'm umm-ing and ahh-ing about the savarin, I am definitely not torn about my feeling towards the poached pears. They're delicious, and this is coming from a girl who claims not to enjoy red wine. They're sweet, pretty, soothing delicious.

Savarin with poached pears

(from Gourmet Traveller & Decadence by Philip Johnson)
makes 8-10 savarin and 8 poached pears

For the savarin

175g plain flour, sifted
2 teaspoons caster sugar
3/4 teaspoon dried yeast
125ml lukewarm milk
2 eggs, at room temperature
60g butter, softened and coarsely chopped
30g raisins

Preheat the oven to 180°C, butter eight 7cm savarin moulds or six 10cm bundt tins.

Combine flour, sugar, yeast, and a pinch of salt in the bowl of an electric mixer fitted with a dough hook. With the mixer on low, add the milk and the eggs and mix until smooth, about 3-4 minutes. Add the butter and beat on medium-high speed until the dough is smooth and homogeneous, about 8-10 minutes. Add the raisins and mix to combine. Then half-fill the prepared savarin moulds or tins and stand in a warm place until risen, around 10-15 minutes. Bake until golden and well risen, about 6-10 minutes. When cooked, turn the savarin out on to a wire rack, piece each one several times with a thin skewer, then transfer to a deep tray.

For the syrup

250g caster sugar
500ml water
60ml light bodied red wine

While the savarin is rising, begin the syrup.

Combine the sugar and water in a saucepan and stir over medium-high heat until the sugar has dissolved, then bring to the boil. Remove from the heat, add the red wine, then pour the syrup over the cooked savarin. Stand, occasionally turning the savarin, until they are puffed and saturated, or 5-6 hours.

When you are ready to serve, transfer the savarin to a non-stick pan and pour over any remaining syrup. Warm gently over low heat. Serve with poached pears or ice-cream.

For the poached pears

Zest of 1/2 lemon, peeled into strips
1 cinnamon stick
100g caster sugar
375ml (1 1/2 cups) light bodied red wine
250ml (1 cup) water
4 ripe but firm pears, halved, peeled, and cored

Combine the lemon zest, cinnamon stick, caster sugar, wine, and water in a large saucepan over medium heat and stir until the sugar has dissolved, then reduce to a simmer. Immerse the pears and cover with baking paper and a plate to keep them submerged. Poach for 15-20 minutes, or until tender.

Allow the pears to cool in the poaching liquid, then transfer them to a bowl and set aside. Strain the poaching liquid through a fine sieve and return to the saucepan - discarding the aromatics. Return the pan to medium heat and simmer until reduced by one-third. Pour the syrup over the pears and refrigerate until required.

Friday, October 8

Brown sugar sponge cake with cream cheese icing

10_10---Sponge-Cake-with-Cream-Cheese

Always make sure your camera battery is charged before you set up a photo. In fact, always make sure your camera battery is charged before you even think about taking pictures. Don't go to check if it's charged after you've set up a picture. Worst of all, don't set up a picture, discover your camera battery isn't charged, charge it for under 10 minutes, and expect to be able to take more than 6 shots. Just don't do it, it won't work, you'll just be disappointed.

Can you tell I just did this? In fact, I do it all the time, I rarely charge my camera battery unless I actually need my camera and, as you would expect, when I actually need my camera is when I want to take photos. But I can't because I forgot to charge the battery, as usual. You would think I would just get into the habit of charging my camera after I use it. Or, even forbid, keeping one battery charged at all times. That's right, there's more than battery... and they're both flat. All the time.

This cake is pretty flat too, but that's only because it's small. Small and delicious. So delicious I wanted to be able to share more than one picture of it with you, but I can't because I forgot to charge my camera battery. Surely I'm not the only one like this?

I made this cake for J because he likes sponge cake and I normally don't. I do, however, like brown sugar and cream cheese. J likes brown sugar and cream cheese too so this keeps us both happy.

I wouldn't say this is a sweet cake, in fact it's rather tart. That'd be the pomegranate molasses I decided to add on a whim. The pomegranate molasses I explicitly went out to buy for a reason then promptly forgot what that reason was. My life has a bit of a theme at the moment and that theme is forgetting things.

Anyway, I'm glad I didn't forget to take this cake out of the oven. Really glad.

Brown sugar sponge cake with cream cheese icing

(adapted from Gourmet Traveller
makes one 20cm cake layer

3 eggs, at room temperature
40g (1.5 oz) brown sugar
40g (1.5oz) caster sugar
1/2 teaspoon vanilla extract
75g (2.5oz) plain flour, triple sifted
1/16 teaspoon baking powder (or just a pinch)
30g (1 oz) butter, melted then cooled

Preheat the oven to 180°C (350°F). Butter one 20-diameter cake tin, then line the base with baking paper.

Whisk the eggs, sugars, and vanilla using an electric mixer on high speed until the mixture has tripled in volume and holds a trail, about 60-8 minutes.

Sift half the flour and the baking powder over the egg mixture, and fold gently through. Sift over the remaining flour and fold to combine, then fold in the butter.

Transfer the mixture to the prepared tin and bake for 20-25 minutes, or until the cake is dark golden and the centre springs back when gently pressed. Cool slightly in tin and then turn out and cool complete on a wire rack.

For the icing

125g cream cheese, at room temperature
250ml (1 cup) pouring cream
1/2 teaspoon vanilla
1 teaspoon pomegranate molasses
30g (1 oz) brown sugar

In the bowl of an electric mixer, using the paddle attachment, beat the cream cheese until it is soft and malleable. Swap to the beater attachment, then add the cream, vanilla, pomegranate molasses, and brown sugar. Beat on medium speed until soft peaks form. Refrigerate until required.

To assemble the cake

Slice the cooled cake horizontal into two equal halves. Remove the top half, then spread the lower half with cream cheese icing. Sandwich the two halves. Ice the outside with remaining icing mixture, then refrigerate until required.

Monday, October 4

Blueberry linzer biscuits

01_10---Blueberry-Spice-Biscuits

I think I like biscuits more than I like cake, maybe it's because they're not so heavy, or maybe it's because you an eat more of them and not feel guilty. I don't know. Maybe it's because biscuits are often ridiculously cute.

As a child my favourite biscuits were jam fancies, however as an adult they're not quite as exciting. Like wagon wheels they don't quite live up to expectation. They're still pretty good though, I don't know what it is I like so much about them. I know I shouldn't enjoy them so much but I just can't help it.

I'm a big fan of the good ol' jam filled biscuit so these blueberry linzer biscuits certainly hit the spot. The original recipe calls for raspberry jam, I chose blueberry because it compliments the slight spiciness of the biscuit. I'm sure they're great with raspberry jam too.

10_10---Blueberry-Linzer-Biscuits

Blueberry linzer biscuits

(adapted from The Modern Baker by Nick Malgieri)
makes about twenty-five 5cm (2 inch) biscuits

225g (8 oz) butter, softened
140g (2/3 cup) granulated sugar
100g (1 cup) almonds, finely ground in the food processor
385g (2 2/3 cups) all-purpose flour
1 teaspoon ground cinnamon
1/2 teaspoon ground cloves
2/3 cup blueberry jam
icing sugar, for sprinkling

Combine the butter and sugar in the bowl of an electric mixer. Beat with the paddle on medium speed until soft and light in colour, about 5 minutes. Decrease the speed to low and beat in the ground almonds.

Mix together the flour, cinnamon, and cloves. Beat into the butter mixture, continue beating until the dough holds together.

Remove the bowl from the mixer and, using a spatula, give the dough a final mix. Scrape the dough on to a piece of plastic wrap then shape it into a round 1cm (1/2 inch) thick. Wrap and refrigerate for 1-2 hours, or up to 3 days.

When you are ready to bake the biscuits, set the racks in the upper and lower thirds of the oven and preheat to 180°C (350°F). Line two biscuit trays with baking paper.

Remove the dough from the refrigerator and divide into 3 equal parts. Place 1 piece on a lightly floured work surface; return the remaining pieces to the refrigerator. Lightly flour the dough and press it gently with a rolling pin to soften before rolling.

Roll the dough about 6mm (1/4 inch) thick. Using a 5cm (2 inch) round biscuit cutter, cut the dough into disks. Arrange the disks 5cm (2 inches) apart on the prepared trays. Repeat with the remaining pieces of dough, gently kneading in the scraps as you go.

Using a 1.5cm (1/2 inch) round cutter, make a hole in the centre of half the biscuit bases. Bake the biscuits until they are firm and golden, about 15-20 minutes. About halfway through place the pan from the lower third of the oven on to the upper one and vice versa, turning the pans back to front at the same time. Once cooked, remove the biscuits from the oven and transfer to a wire rack to cool.

When cool, dust the windowed cookies with icing sugar. Turn the bases over so the flat side is facing upwards, spread with blueberry jam when sandwich the bases and tops together.

Sunday, September 26

Walnut & coffee biscotti with white chocolate

09_10---Walnut-&-Coffee-Biscotti-2

It's been a week of baking failures, first I tried to make baked ricotta cheesecake (disaster!) and then I tried to make chocolate and beetroot cake (even more of a disaster!) So, needless to say, I was feeling rather disheartened. It's not fun to fail!

So, to cheer myself up I decided to make something that couldn't possibly go wrong - biscotti. Luckily for me, nothing did go wrong and I redeemed myself in the eyes of well... myself.

I love biscotti, there's something lovely about it. Maybe it's the fact that it needs to accompany a cup or tea or coffee, two things that I rather like. This biscotti isn't bad, but it's certainly let down by the fact that it contains instant coffee, however I'm not sure how to get the coffee flavour and the speckled look without using it. This biscotti is certainly pretty and the use of white chocolate rather than dark makes it deliciously sweet - nicely offsetting the bitterness of the coffee.

If you don't mind the instant coffee taste, this biscotti is rather good. Dripped in coffee it makes for a tasty, tasty afternoon treat.

09_10---Walnut-&-Coffee-Biscotti

Walnut & coffee biscotti with white chocolate

(adapted from Biscuits and Macaroons by the Australian Women's Weekly)
makes about 20

110g (1/2 cup) caster sugar
1 egg
75g (1/2 cup) plain flour
35g (1/4 cup) self-raising flour
4 teaspoons instant coffee
100g (1 cup) walnuts, coarsely chopped
60g (2 oz) white chocolate

Preheat the oven to 180°C (350°F), line an oven tray with baking paper.

Whisk the sugar and egg in a medium bowl until combined. Sift the flours over the egg mixture, then stir through. Stir in the coffee granules and walnuts. Shape the dough into a 20cm (8 inch) log and place it on the prepared tray. Bake for 30 minutes, then cool on tray.

Reduce the oven to 150°C (300°F).

Using a serrated knife, cut the log diagonally into 1cm (1/2 inch) slices. Place the slices, in a single layer on to the tray. Bake for 30 minutes, turning the biscotti halfway through so ensure both sides are cooked. Cool on wire racks.

Melt chocolate in a heatproof bowl over freshly boiled water. Spread one side of each biscotti and stand at room temperature until set. Serve with coffee.

Thursday, September 9

Amaretti ice cream - churned and non-churned versions

09_10---Almond-Icecream

It's not often that I make something that doesn't go down well with J. His ability to eat and enjoy almost everything is astonishing. I'm incredibly picky about what I eat, whereas he's the exact opposite. There's not much he doesn't like.

When, on the odd occasion, I hear loud spluttering noises coming from the kitchen I know I'm done something monstrously stupid. I may have mixed up the salt and the sugar or accidentally added two tablespoons of baking soda when all I needed was two teaspoons. You get the gist.

So, when I heard said spluttering noises coming from the kitchen last night I was incredibly confused. I knew I hadn't left anything I'd made on the counter to be gobbled.

I rushed in to see what was the matter - hoping J wasn't dying or something equally dramatic. Imagine my surprise when I find him waving his arms around and pointing at the amaretti biscuits I've left neatly (ahem..) in their packet.

"Whoa, what's wrong?" I said.

"Those biscuits!" he said, "They're awful!"

"No, they're not" I tell him "they're just awful strong."

etcetc.

09_10---Almond-Icecream-2

It seems I managed to find something J doesn't like. In fact, I would go so far as to say I've found something he loathes. I don't mind though, the ice cream I used the biscuits in turned out quite nice. Slightly on the creamy side of too creamy, but nice none the less.

The recipe was originally for a no-churn ice cream but I decided to churn half of mine for fun. As expected the churned half is less icy. The non churned half isn't had either.

Honestly, sometimes I prefer not the share. This time is one of them.

Amaretti ice cream

(adapted from Delicious magazine, May 2009)
makes 2 litres

250ml (1 cup) double cream
375ml (1 1/2 cup) single cream
100g (2/3 cup) icing sugar, sifted
80ml (1/3 cup) amaretto liqueur
1 teaspoon vanilla extract
2 egg whites
1/4 teaspoon salt
110g (4 oz) amaretti biscuits, coarsely chopped

Non-churned version

Place the creams and icing sugar in a bowl and beat with electric beaters until soft peaks form. Gently whisk in the amaretto and vanilla, then chill until required.

Place the egg whites and salt in a bowl and beat until soft peaks form.

Remove the cream from the fridge, give it a quick whisk if it has lost some of its body. Gently stir in the biscuits, then fold in the beaten egg whites. Pout into a 2 litre container and chill for 6 hours, or until firm.

Churned version

Place the creams and icing sugar in a bowl and beat with electric beaters until the cream reaches the ribbon stage. Whisk in the amaretto, vanilla, and salt, then gently fold in the egg whites. Chill until cold.

Remove the mixture from the fridge and churn according to the manufacture's instructions. Add the amaretti biscuits in the last few minutes of churning.

Transfer the ice cream to a two litre container and freeze for a minimum of 2 hours.

Wednesday, September 1

Sour cream coffee cake

08_10---Coffee-Cake

So, this cake was supposed to be more a BBQ. A BBQ that I never attended, a BBQ that I made potato salad, juice, and a cake for. Why I didn't attend, I'm not sure - these things happen. You know those times when you just don't feel like doing anything or going anywhere? I had one of those. It was nothing to do with the company, or the weather, or my inability to choose something to wear. I had no reason not to go, except sometimes I'm slack.

So, I felt a bit bad about not going. Rather than sulking about my own inaction, I decided to have a piece of cake.

After my slice of cake I felt better. Why? Because this cake is amazing, it's so delicious that it makes you wonder how something can possibly be so delicious. it's one of those things that makes you stop and think how damn amazing it is that a few simple ingredients can be combined to create a myriad of different things. Or maybe that was just my weird mood talking. Either way, it's a fascinating world.

It's not secret that delicious things make me happy, and making me happy is what this cake did exceptionally well that day. It's definitely going to be promoted to 'one of my favourites' status. The texture is spot on and the contrast between the nuts and the cake crumb making for a fun eating experience.

You should definitely add this too your repertoire.

Next time I'll share (and take better pictures!), I promise.

Sour cream coffee cake

(from The Modern Baker by Nick Malgieri)
makes one 25cm (10 inch) tube cake

For the filling

1/3 cup light brown sugar
2 teaspoons ground cinnamon
1/4 teaspoon freshly ground nutmeg
100g (4 oz) walnut pieces, coarsely chopped

For the batter

2 cups all purpose flour
1 cup granulated sugar
1 teaspoon baking powder
1 teaspoon baking soda
140g (5oz) butter
2 large eggs, at room temperature
2 large egg yolks
225g (8 oz) sour cream

Set a rack in the lower third of the oven and preheat to 160°C (325°F), grease a 25cm (10 in) tube pan and set aside.

For the filling, combine the sugar, cinnamon, nutmeg, and walnuts in a small bowl and set aside.

For the cake batter, combine the flour, sugar, baking powder, and baking soda in the bowl of an electric mixer. Stir well, by hand, to mix. Add the butter, then beat at a low speed until the mixture is a smooth heavy paste, 1 to 2 minutes. If you find your mixture is too crumbly add a tablespoon or two of water.

In a separate bowl, whisk the eggs, egg yolks and sour cream until well combined. Increase the speed of the mixer to medium and beat 1/3 of the egg mixture into the butter and flour. Beat for 1 minute.

Stop, scrape down the bowl, and then beat in another half of the egg mixture. Beat for 2 minutes. Repeat with the last of the egg mixture.

Remove the bowl from the mixer and, using rubber spatula, give the batter a final mix to ensure everything is combined.

Scrape half the batter into the prepared tin and smooth the top. Scatter the nut and sugar.

mixture over the top. Scrape the remaining batter over the sugar and nut mixture and smooth the top.

Bake the cake until it is well risen and firm, and a tooth pick inserted next to the central tube comes out clean, about 1 hour.

Remove the cake from the oven and cool in the tin for 5 minutes. Invert a rack over the tin and turn the cake out. Cool the cake completely before slicing.

Thursday, August 19

Mexican chocolate crackle biscuits

08_10---Mexican-Crackle-Biscuits2

Dear internet, meet my new favourite biscuit. New favourite biscuit, meet the internet. Don't be shy, introduce yourself. It's not that hard to say "hi, all name is Mexican chocolate crackle biscuit".

I've developed quite and affinity for these biscuits, just looking at them makes me feel pleasant. It's not an irrational attraction I'm feeling towards these biscuits either. My attraction is perfectly justified; these biscuits are darn good.

I bookmarked this recipe many months ago with the intention of making them as soon as I could. Needless to say, like many of my plans, I never got around to it. In the meantime I made many other things. The truth is, I completely forgot about my plans to make these biscuits. I wish I hadn't.

08_10---Mexcian-Crackle-Biscuits

I've made biscuits that look just like these before but they were never as good as these are. I think I could eat a whole batch of these myself, but I won't because I fear my teeth will fall out. The wonderful combination of chocolate, cinnamon, and ancho chile keeps me coming back for more. Not to mention the sugar, oh the sugar. There's nothing good for you about these biscuits but they taste so lovely that it's completely ok.

I think next time I have an event of some form I'm going to hand these out as thank you for coming presents. That way more people will get to try them. Spread the love, or something.

Mexican chocolate crackle biscuits

(adapted from The Art & Soul of Baking)
makes about 20 biscuits

20g (1 1/2 tablespoons) butter
2 teaspoons coffee liqueur
85g (3 oz) bitter-sweet chocolate, roughly chopped
1 large egg
50g (1/4 cup) granulated sugar, plus 50g (1/4 cup) extra
50g (1/3 cup) all-purpose flour
45g (1/4 cup) whole almonds, lightly toasted
1/2 teaspoon cinnamon
1/4 teaspoon baking powder
1/4 teaspoon anco chile powder
45g (1/3 cup) unsifted icing sugar

Bring 5cm (2in) water to the boil in a small saucepan. Place the butter, liqueur, and chocolate in a heat-proof glass bowl. Turn off the heat, then set the glass bowl over the steaming water. Stir with a spatula until the mixture is smooth. Remove from saucepan and let cool slightly whilst you whip the eggs.

Place the eggs and 50g (1/4 cup) of the granulated sugar in the bowl of a mixer and whip, on high speed until the mixture is very light in colour, about 5 to 6 minutes. Scrape the melted chocolate mixture into the eggs and whip until well blended, about 1 minute. Scrape down the bowl.

Place the flour, nuts cinnamon, baking powder, and chile powder in the bowl of a food processor and process until the nuts are finely chopped, about 60 to 90 seconds. Add the flour mixture to the eggs and beat on low speed until just combined. Stir mixture gently with a spatula to ensure all the flour is incorporated. At this point the dough should vaguely resemble a thick mousse. Cover the bowl and refrigerate for 1 to 2 hours, or until firm.

Preheat the oven to 160°C (325°F), line a biscuit tray with baking paper.

Roll tablespoon sized amounts of dough into balls. Place the remaining 50g (1/4 cup) of granulated sugar in a small bowl and the icing sugar in another. Roll each ball of dough in the granulated sugar and then in the icing sugar. Be generous with the icing sugar, ensuring that each ball enough is cover with enough icing sugar so that you cannot see the dough underneath. Space the balls 5cm (2in) apart on the baking trays.

Bake the biscuits for 11-14 minutes, rotating the tray halfway through. The biscuits should be puffed and cracked when they are fully baked, if you nudge them they should slide on the tray rather than stick. Transfer to a wire rack and let cool completely.

Monday, August 9

Lime & ricotta baked doughnuts

Lime and Ricotta Baked Doughnuts

I'm not sure how I feel about these. There's something a little off about baked doughnuts, something not quite right about them. I get the same feeling from these doughnuts I get when I accidentally buy low-fat sour cream, or fat free yoghurt. it comes from the knowledge that someone is telling a lie when they say the 'healthier' alternative is just as good as the real thing.

I'm not converted to baked doughnuts. It's not that these don't taste nice, because they do, it's just that they don't taste right. They're shaped like doughnuts, sugar coated like doughnuts, coloured like doughnuts but they're not doughnuts. If you put a plate of these next to a plate of real doughnuts, everyone would spot the impostor in an instant.

08_10---Lime-and-Ricotta-Baked-Doughnuts2

Nevertheless, these aren't bad - in fact they're pretty good. They're just not doughnuts. The lime flavour goes rather well with the ricotta. I'm definitely going to make lime doughnuts again in the future but it certainly won't be with this recipe. The orange and cinnamon doughnuts I made earlier cry out to be lime flavoured and filled with ricotta.

I'm definitely a deep fried doughnut kind of girl.

Anyway, I'm making it sound like these were bad but really they weren't. they were actually thoroughly enjoyable, I'm just a bit of a negative nelly sometimes! I also love deep fried things, so there in lies the problem with these doughnuts. It's not them, it's me.

Lime & ricotta baked doughnuts

(adapted from Gourmet Traveller)
makes about 12 small doughnuts

For the doughnuts

375g plain flour
70g caster sugar
4g instant dried yeast
Finely grated rind of 1 lime
125ml milk, lukewarm
40ml yoghurt
1 egg, at room temperature
15g butter, melted
Oil, for greasing
Milk, for brushing

For the ricotta filling

125g ricotta
25g caster sugar
Finely grated rind and juice of 1/2 a lime

For the lime sugar

80g caster sugar
Finely grated rind of 1/2 a lime
50g butter, melted

For the doughnuts, combine the flour, sugar, yeast, and lime rind in the bowl of electric mixer fitted with a dough hook.

In a large jug, whisk together the milk, yoghurt, egg, and melted butter and, with the motor running, add to the flour mixture. Mix on low-medium speed until the dough is smooth and elastic, about 4-5 minutes. Shape the dough into a ball and place in a lightly oiled bowl. Cover with plastic wrap and stand in a warm place until the dough has doubled in size, about 1-1 1/2 hours.

meanwhile, process all the ingredients for the lime ricotta filling in a food processor or a blender until smooth. Transfer to a bowl and refrigerate until required.

Once the dough is fully risen, knock it back and turn it out on to a lightly floured surface. Roll the dough 5mm thick then, using 5cm and 6cm cutters, cut an equal number of rounds out of the dough. Place the smaller rounds on a lined baking tray. Place heaped teaspoons of ricotta filling in the centre of each round. Brush the edges of each round with a small amount of milk, then cover with the larger rounds and press to seal the edges. Trim with a a 5cm cookie cutter if required. Stand the dough in a warm place until well risen, about 1-1 1/2 hours.

Preheat the oven to 190°C (375°F). Bake the doughnuts for 8-10 minutes, or until just golden.

Whilst the doughnuts are baking, prepare the lime sugar. Combine the lime zest and sugar in a bowl, then spread out on a tray. Once the doughnuts are baked, dip them in the melted butter and toss in lime sugar. Serve hot.

Wednesday, August 4

Almond, ricotta, & raspberry cakes

07_10---Almond,-raspberry,-and-ricotta-cakes

Sometimes I like to imagine that I'm a champion for ugly food. I pretend I'm battering down conventional norms of beauty with my ill-formed and slightly bizarre creations. It's my way of reassuring myself that it's okay if things aren't perfect.

My imaginings make me feel better, they stop me worrying about my seemly constant ability to create ugly food. Still, I don't consciously set out of create food that looks odd, it just happens again, and again, and again.

The comforting thing about ugly food is that it's not necessarily bad food. In fact, there's something wondrous about imperfect food. Sure, you don't want to be served it at a restaurant, but if a friend makes it for you it becomes oddly comforting. It says: "hey, I made this for you and you alone." You can tell it came out of the oven of someone who is as imperfect as the food they're giving you, someone who as imperfect as you are. You don't feel awkward when you get crumbs everywhere, or when you greedily go back for more.

Ugly food is utterly unpretentious (unlike me, I'm hugely pretentious). It sets the mood for an unpretentious event. In a world where there's so much showing off, ugly food says "don't worry, I'm not perfect either."

07_10---Almond,-raspberry,-and-ricotta-cakes2

Yet, when I serve ugly food I find myself trying to justify why it's ugly over and over again. I'll say "it wasn't meant to look like this, it's because I didn't have the right ingredients" or "they would have risen properly if I used the right pan", or whatever reason I have this time. I'm completely insecure, utterly paranoid that my creations won't be enjoyed because they're not as pretty as they could have been. It's a challenge to accept that, frankly, no one else really cares what they look like.

Essentially, what I'm trying to say is that these cakes aren't pretty but they taste damn good.

Anyway, if you do make these, I highly recommend you make them in the specified metal moulds. I made the error of baking half of mine straight into paper cups and found they didn't rise particularly well and, despite being cooked, sunk as soon as I removed them from the oven. The cakes baked in metal moulds fared much better and did not sink. I transferred the ones in metal moulds to paper cups once they were cool enough to handle.

Almond, ricotta, & raspberry cakes

(adapted from Gourmet Traveller)
makes 9

90g butter, softened
120g caster sugar
65g brown sugar
Zest of 1/2 an orange
2 eggs
50ml milk
100g gluten free plain flour
80g almond meal
1 teaspoon baking powder
300g ricotta
50g sour cream
40g caster sugar, extra
50g raspberries, fresh or frozen
50g toasted almonds, roughly chopped

Preheat oven to 180°C, grease and flour nine 180ml metal dariole moulds and place them on a baking tray.

Beat butter, sugars, and orange zest using an electric mixer until lightened in colour and texture, about 3-4 minutes. Add the eggs, one at a time, beating well between each addition. Scrape down the sides of the bowl then add the milk and beat to combine.

Stir in the flour, hazelnut meal, and baking powder. Spoon into prepared dariole moulds and set aside.

Process ricotta, sour cream, and extra caster sugar in a blender or food processor until smooth. Divide evenly among the batter filled moulds. Scatter mixture with raspberries and almonds.

Bake cakes until they are well risen and golden brown, about 30-35 minutes. Cool cakes in moulds for 5-10 minutes, then run a small knife around the sides of the moulds and careful remove cakes. Transfer to paper baking cups, if desired. Cool on wire rack.

Tuesday, August 3

Poffertjes with mandarin jam

08_10---Poffertjes-with-Mandarin-Jam

Poffertjes machines went through a bit of a craze over Christmas, every catalogue featured one and many, many shops had awful bulky machines for sale. The kind of speciality machine that gets pulled out every once in a while and used to make things that will never be appreciated to their full extent. Coupled with the frenzy for the machines, there was a frenzy for pre-packaged poffertjes mix.

I've tried pre-packaged poffertjes mix myself (it came with my poffertjes pan, needless to say) and didn't find it particularly impressive. I'm by no means immune to the ease of pre-packaged mixes - or the lure of owing a poffertjes pan, or that matter. I justify mine by telling myself: well, at least it's smaller than an electric machine. I say this about my crepe pan and waffle iron too, why one person needs so many speciality kitchen... things, I don't know. It's quite tragic, really.

It saddens me to think that the many, many people who bought poffertjes pans will only ever use pre-packaged mix. It's not the fact that it's pre-packaged that saddens me, it's merely that poffertjes made with yeast taste so, so much better. When made with yeast, poffertjes are just like little doughnuts. Yum!

Sure, pre-packaged mixes are easy but so is this recipe! Admittedly, you do need prepare the batter in advance as the recipe contains yeast. In the grand scheme of things an hour isn't a long time and, if you can't spare an hour, you can always make the mix the night before and leave it in the fridge to mature. By the time you wake up, it'll be ready to go.

08_10---Poffertjes-with-Mandarin-Jam-2

The thing I like about poffertjes is that, once the mixture is made, they're quicker than pancakes to make. By the time you've finished squeezing the batter into the holes, the poffertjes are ready to be turned. There's hardly any waiting around. It's bam, bam, bam, done! Not to mention people are always seem to be exceedingly pleased when you feed them poffertjes. They react as though you've made something difficult, when you've actually made something even easier than pancakes.

So, essentially, this recipe is quite fantastic. If you have a poffertjes pan that's crying out to be loved, I implore you to pull it out and make some poffertjes totday. You won't be disappointed. The jam is by no means mandatory but it's pretty delicious.

Poffertjes with mandarin jam

(from Gourmet Traveller)
serves 4

Buckwheat poffertjes

90g (1/4 cup) golden syrup
375ml (1 1/2 cups) milk
150g (1 1/4 cups) plain flour
150g (1 1/4 cups) buckwheat flour
1 3/4 teaspoons instant dried yeast
2 teaspoons ground ginger
Finely grated rind of 1 lemon
3 eggs
Icing sugar, to dust

In a small saucepan over low heat, or in the microwave, combine the milk and golden syrup. Heat the milk until it is lukewarm. Stir to dissolve the golden syrup.

Combine flours, dried yeast, lemon rind, and a pinch of salt in a large bowl and whisk to combine then make a well in the centre. Add the eggs and half the milk mixture, stir until the batter is smooth. Add the remaining milk and beat, using a spoon, to combine. Cover and stand in a warm place for 1 hour. Alternatively, cover and place the mixture in the refrigerator overnight.

Transfer poffertjes mixture to a large sauce bottle. Heat poffertjes pan over medium high heat. Brush a bit of butter into each cavity and then, when it is sizzling, fill each cavity with batter. Cook for 1-2 minutes, then turn and cook for an additional 30 seconds, or until cooked through. Dust poffertjes with icing sugar and serve with mandarin jam.

Mandarin jam

Makes about 350ml

6 mandarins, peeled with pith removed
340g (11 oz) caster sugar
Juice of 1 lemon
2 teaspoons fresh ginger finely chopped

Break mandarins into pieces and combine in a large saucepan with all the remaining ingredients. Stir over medium heat until the sugar dissolves. Bring mixture to a simmer and stir occasionally until the mixture is thick and jammy, about 15-20 minutes. Transfer to a sterilised jar, cool, and then refrigerate until required.

Friday, July 30

Gingerbread pancakes with maple pears

gingerbread pancakes with maple pears

You know those mornings when you wake up and you feel far worse than you did the night before, the mornings when you head is ringing, your mouth is dry, and your eyes are glued shut from sleep? Yeah, I know what you're thinking, I know you're thinking "it's called a hangover!", which would be right except I'm talking about the mornings you wake up feeling like you'e got the worst hangover in the world but you had nothing to drink the night before, or the night before that, or even the night before that. It's punishment without a crime.

Can you tell I had one of those mornings? It's okay though because bad mornings are easily fixed with a delicious breakfast and these pancakes do a superb job!

There's nothing quite like pancakes for breakfast. There's something utterly indulgent having enough time in the morning to make a breakfast that doesn't consist of just cereal or toast.

That being said, ordinarily I would make plain ol' jane pancakes with blueberries, if I'm got any in the house. However, when I was standing in the kitchen drinking a cup of tea and feeling sorry for myself I knew ordinary pancakes would not do. After hunting around a bit, I came across this recipe for gingerbread pancakes I knew they were destined to be my breakfast. Coupled with maple roasted pears they're a delicious morning treat.

The only problem with these pancakes? I had to make them myself.

Gingerbread pancakes with maple pears

serves 1-2

Gingerbread pancakes

(adapted from What Megan's Making)

100g (3/4 cup) plain flour
40g (1/4 cup, packed) brown sugar
1 1/2 teaspoons baking powder
1/4 teaspoon baking soda
1/4 teaspoon salt
1/4 teaspoon ginger
a pinch of nutmeg
a pinch of cloves
65ml (1/4 cup) water
65ml (1/4 cup) milk
1 large egg
30g (1/8 cup) butter, melted
1 tablespoon lemon juice

In a medium bowl, whisk together the flour, baking powder, baking soda, salt, and spices. Make a well in the centre of the mixture.

In a separate bowl or jug, combine the water, milk, egg, melted butter, and lemon juice. Whisk to combine and pour into the well in the centre of the dry ingredients. Whisk gently until the mixture is just combined and then stand for 15 minutes.

Brush a non-stick fry pan or crepe pan with a small amount of butter and then heat until hot but not smoking.

Working in batches pour 1/4 cup amounts of batter on to the frypan and cook for 1-2 minutes, or until bubbles appear on the surface the undersides are slightly brown. Flip pancakes and cook for a further 1 minute, or until the pancakes are cooked through and the edges are slightly brown. Transfer cooked pancakes to a plate, cover in aluminium foil, and keep warm in the oven until required. Repeat process until all the batter is used up.

Serve with maple pears and cream.

Maple pears

(adapted from Gourmet Traveller)

125ml (1/2 cup) maple syrup
thinly peeled rind and juice of half a lemon and half an orange
1 firm, but ripe, pears

Peel, core, and quarter the pears. Sprinkle with a small amount of lemon juice and set aside.

Combine the maple syrup, citrus rind and juice in a medium sized frypan. Bring to a simmer over medium heat and then add the pears. Cook for 10-12 minutes, or until the pears tender and the maple mixture is thick and syrupy. Transfer to a serving dish and keep warm in the oven until required.

Tuesday, July 27

Raspberry & lemon friands

raspberry friands

Friands, friands, friands. I'm never sure what I think about you, sure you're simple to make but you demand expensive ingredients such as almond meal and berries. Yes, you're a good way to use up excess egg whites but are you really worth it? Apparently my friends think you are, I still remain unsure.

Friands are an Australian and New Zealand treat, but like most things they're an adaptation of something else. Apparently they're based off financier; my source for this information is, naturally, wikipedia. Any information beyond this little snippet of trivia is hard to find.

In Australia you can buy tins specificity for making friands, they're typically oval shaped. However, it's not the shape that makes a friand a friand, it's the ingredients. Friands come in many shapes and sizes - why the oval shape has become associated with the friand I have no idea. I personally prefer to bake mine in cute paper cases because they're so easy to clean up when you've finished as there's no tray, except for a flat baking tray, to wash up.

07_10---Raspberry-Friands-3

I think these friands could use the addition of coconut, however everyone I mentioned this idea to shook their heads at me and said "no!" rather loudly. Next time I'll make them with coconut and we'll see how everyone reacts.

Raspberry & lemon friands

(adapted from Use Real Butter)
makes approximately 8

125g (4 oz) unsalted butter
110g (1 cup) almond meal
235g (1 2/3 cups) icing sugar
115g (3/4 cup) plain flour
1/2 teaspoon baking powder
1 teaspoon finely grated lemon zest
5 egg whites
45g (1/3 cup) frozen raspberries

Preheat oven to 180°C (350°F), place paper baking cups on a flat tray.

Melt butter in a small saucepan over low heat. Cook the butter until it is light golden in colour, remove from heat and set aside.

Combine the almond meal, icing sugar, flour, baking powder, and lemon zest in a medium bowl and whisk to combine. Stir in the egg whites and mix until well combined. Pour in the butter and stir until completely combined.

Spoon batter into paper baking cups, filling each cup just over 3/4 full. Scatter a few berries on top of each friand, resist pushing them into the batter. Bake friands for 15-20 minutes, or until they are golden on top. Cool on a wire rack.

Wednesday, July 14

Profiteroles with lemon cream

Profiteroles with Lemon Creme

This is the second time I've tried to make profiteroles. The first time was around two and a half years ago and they were a disaster. Somehow I managed to make 2.5cm (1 inch) rounds that were completely solid. They were like little rocks. I have no idea what went wrong but from then on I was too nervous to try again.

I've grown up since then and conquered many of my bizarre fears; I no longer duck and cover when a magpie even glances my way, I've learnt that duck bites don't actually hurt, I finally believe that the sea can only rise so much during high tide, and, most recently, that profiteroles aren't out to get me. In fact, profiteroles are quite easy.

Except my pastry cream was a disaster, you can't have everything I suppose. It tasted good, so that's a plus one but it was a weird consistency so that's a minus one.

No one cared though, I took these to my friends house as an after dinner snack and all sixteen of them and they were gone in the blink of an eye. It feels good to see a plate cleared completely, they even ate the caramel that had stuck to the plate!

07_10-Choux-with-Lemon-Pastry-Cream2

This recipe was a bit unclear to follow, Gourmet Traveller sometimes formats their recipes a bit funny. I've reworked it a bit so that all the mistakes I almost made don't happen to you. There's nothing more infuriating than getting halfway through a recipe, realising you have 100gm of sugar that you haven't used yet, and not having a clue what to do with it. It just causes freak-outs and freak-outs are best avoided.

Profiteroles with lemon cream

adapted from Gourmet Traveller, July 2007
makes about 16

Lemon cream filling

200ml (7 fl oz) milk
20ml freshly squeezed lemon juice
6 pieces of lemon rind, removed with a peeler
3 egg yolks
40g (1.5 oz) caster sugar
15g (0.5 oz) cornflour
200ml (7 fl oz) double cream

Combine the milk, lemon juice, and lemon rind in a saucepan and bring to just below the boil. Remove from heat and stand for 15 minutes to infuse.

Combine the egg yolks and sugar and whisk for 2-3 minutes, add the cornflour and whisk to combine. Return milk mixture to the heat, bring to just below the boil and strain over the egg mixture. Whisk to combine, then return the mixture to the pan.

Whisk mixture of medium heat for 3-4 minutes, or until thick and smooth. Transfer to a bowl and cover closely with plastic wrap, cool to room temperature then refrigerate until cold. When completely cold, whisk to break up slightly, add the cream and whisk until thick and smooth. Refrigerate until required.

Choux pastry

100g (3.5 oz) unsalted butter, coarsely chopped
1 teaspoon salt
250ml (1 cup) water
30g (1 oz) caster sugar
150g (1 cup) plain flour
4 eggs

Preheat the oven to 220°C (430°F), line a large tray with baking paper.

Combine butter, salt, water, and sugar in a large sauce pan and bring to the boil over high heat. Add the flour and stir continuously with a wooden spoon until the mixture comes together in the centre of the pan. Remove from the heat and stand for 5 minutes.

Add the eggs, one at a time, beating with the wooden spoon after each addition. The mixture will become matte when the egg is fully incorporated.

Spoon mixture into a piping bag fitted with a large 1cm (1/2 inch) nozzle. Pipe 5cm-diameter mounds about 4cm high on the paper-lined oven tray. Bake for 15 minutes, then reduce heat to 180°C (350°F) for another five minutes. Remove from oven and carefully transfer to a wire rack. Cool to room temperature.

Lemon caramel

140g (5 oz) caster sugar
50ml (1/8 cup) lemon juice
75ml (1/4 cup) water

Combine the sugar, lemon juice, and water in a small saucepan and stir over medium heat until the sugar has dissolved. Increase heat and bring to the boil, cook for 5-6 minutes or until the mixture in a caramel colour. Remove from heat.

To assemble the profiteroles

Whist the caramel is cooking, spoon cooled lemon cream into a piping bag fitted with a 0.5cm (1/4 inch) round nozzle. Pipe lemon cream into choux puffs and place on a plate or return to the wire racks. Once the caramel is cooked, careful dip the tops of the profiteroles in it and arrange the finished arrange profiteroles on a plate. Serve fresh.

Tuesday, July 6

Lemon cream pots

07_10---Lemon-Cream-Pots

Last week I mentioned the abundance of pears in my house and how I was hoping that this abundance would give way to an abundance of cherries or strawberries. Well, that didn't happen - instead I now have an abundance of lemons. Two grocery bags full of them, it's great. We'll be eating lemon flavoured food for the next week or two, if they even last that long.

Last weekend a few friends and I took a trip to the south coast, as a simple getaway. Much to our pleasure we found the lemon trees at the house we were staying in had a huge crop of lemons. Between us we picked close to one hundred lemons and that wasn't even all of them. Needless to say, many gin and tonics were consumed over the weekend. Yum!

It must be a good year for lemons because even the tree in my backyard, the tiny stumpy thing it is, is having lemons. It's only got three or four branches, but even they have lemons. I think there's more lemon than tree at the moment.

07_10---Lemon-Cream-Pots-2

These lemon cream pots are the first of my lemon adventures. Well, they're the second thing I've made but the first to make it to the blog. You know how it is, right?

I'm not sure how to describe these. On one hand, they're incredibly simple but on the other they had odd, complex layers of texture. The first layer reminds me of an aero bar, the second is much firmer, and then you reach the bottom and it's like eating lemon curd. If I owned a blow torch I would add a layer of brûlée for an extra degree of decadence. That being said, these are thoroughly enjoyable just as they are.

I used single cream for these, though I'm fairly positive the original recipe called for double/heavy cream. My cream pots turned out just fine, I imagine they would be far richer with double/heavy cream.

07_10---Lemon-Cream-Pots-3

Lemon cream pots

(adapted from les petits plats de trinidad)
makes four 125ml (4 fluid oz) servings

75ml (1/3 cup) fresh lemon juice
75ml (1/3 cup) single (whipping) cream
2 large eggs
100g caster sugar

Preheat oven to 150°C (300°F). Half-fill a large roasting pan with hot water and place it on the lowest rack of the oven. Place another rack in the centre.

Whisk the eggs and sugar until frothy and then whisk in the cream, keep whisking until the mixture is well combined and aerated. Then gradually whisk in the lemon juice.

Spoon the mixture into four 125ml (4 fluid oz) ramekins. Place the ramekins on centre rack of the oven, above the roasting pan, and bake for 30 minutes or until the creams are set around the outside but still wobble slightly in the center. Cool cream pots to room temperature and then refrigerate until cold. Be careful not to cook them at too high a temperature or the texture will end up grainy.

Wednesday, June 30

Pear & hazelnut torta

06_10---Pear-and-Hazelnut-Torta-2

I seem to have an obsession with pears. Every second recipe I make seems to involve pears in some way or another. I suppose it's the season, pears are everywhere at the moment and I have too many to just eat. It's alright though because I can always find something to use them in. Last week it was an over-abundance of oranges, this week it's pears. I hope it's cherries and strawberries next week but that's unlikely!

This cake is really simple and tasty. It's by no means beautiful and lacks visual wow factor as it's all the same shade of brown but I'm a firm believer that taste trumps prettiness any day. It's best served on the day it's made as it gets uglier the more it ages. My pictures were taken the morning after the cake was baked and by then it was already losing visual appeal. Still, it tastes just as good as it did yesterday.

On another note, this cake is actually supposed to be baked in a fluted tart dish with a loose bottom, which would no doubt add to it's visual appeal immensely. My garage door jammed up the other day, leaving me with only the tins I had in the house (yes, the cake tins live in the garage...). Luckily I had a spring-form pan the right size but if I were to make this again it would definitely be made in a tart pan!

06_10---Pear-and-Hazelnut-Torta

I have to say it was nice to have a cake that used nut meal that wasn't almond. The hazelnut meal used in this recipe is a nice change from the ever present almond meal, though you could use almond meal if you prefer the taste. I'm sure it would still be good but a bit less nutty.

This is the kind of cake I would serve if I were having a casual meal with simple wholesome food. It's not rich and overpowering and it's not so decadent that you can only have a small slice. It's the kind of cake it's okay to have a hearty slice of and feel no shame or guilt. it's by no means good for you but it looks almost as though it could be.

06_10---Pear-and-Hazelnut-Torta-3

Pear & hazelnut torta

(from Delicious Magazine, May 2009)
makes one 26cm cake

100g (3.5 oz) hazelnut meal
110g (1/2 cup) granulated sugar, plus 2 tablespoons extra
50g (1/3 cup) plain flour
1/2 teaspoon baking powder
2 eggs
60ml (1/4 cup) milk
1 teaspoon vanilla extract
80g (2.8 oz) unsalted butter, melted and cooled
2 ripe pears

Preheat the oven to 170°C (340°F). Lightly grease the bottom of a 26cm (10 inch) tart pan or spring-form cake tin.

Combine the hazelnut meal, sugar, flour, baking powder, and a pinch of salt in a large bowl and whisk to combine. Beat the eggs in a separate bowl until they are just frothy. Whisk in the milk, vanilla, and cooled butter. Pour the egg mixture into the nut mixture and stir until well combined. Scrape the resulting batter into the prepared dish. and spread out evenly.

Peel, quarter, and core the pears. Cut each quarter into 4 to 5 equal pieces. Fan the slices slightly and then transfer to the top of the batter. Repeat with remaining pear slices. Sprinkle the extra sugar over the pears.

Bake the torta for 25-35 minutes, or until the batter is firm, puffed, and golden. If the top colours too quickly over it loosely with foil.

Transfer to a wire rack sift a thick-ish layer of icing sugar over the top. Allow to cool to lukewarm and then release from the pan. Sift more icing sugar over the top just prior to serving, if required. Serve with whipped cream.

Tuesday, June 22

Cinnamon, currant, & apricot buns

cinnamon, currant, and apricot buns

I think I lack the patience for yeast. I'm not very good at waiting for things to happen, when I set my mind to something I want it done as soon as possible. Waiting three-and-a-half hours for something to rise because it's so cold doesn't appeal to me, not one little bit. It makes me fret and worry and want to throw in the towel.

And I almost did, I almost declared these buns dead. Boy, am I glad I didn't.

The first rise was supposed to take just over an hour, however when I peaked at my dough after on the hour nothing had changed. Nothing. My dough was a sad little lump sitting in a bowl far to big for it. No growth, no nothing.

When I checked half-an-hour later it was the same story. Still a sad little lump. I was starting to fret, saying "Well, I knew yeast hated me. Why did I even start this obviously wasn't going to work"... blah, blah, blah.

However, today I wasn't going to be a giver-upper. I was going to be a winner.

So I moved by sad little dough into the bed and turned on the electric blanket. I tucked in the covers and set a timer.

cinnamon, currant, and apricot buns

An hour or so later, I went to peak and my dough had risen but not enough. Still, a start is a start. So I turned up the bed and left it to rest, an hour later it had risen perfectly. The dough no longer seems to be for the bowl, in fact it seemed just right.

The next part was easy. Roll the dough, fill the dough, shape the dough, tuck it back into bed for 40 minutes, bake it, and then (finally) eat it. Though it took longer than expected it was absolutely worth it.

So, what did I learn today? Dough likes electric blankets as much as I do and be patient. Needless to say, I'll have forgotten the latter lesson by tomorrow.

Cinnamon, currant, & apricot buns

(adapted from The Art & Soul of Baking)
makes 10 buns

Dough

125ml (1/2 cup) tepid milk
50g (1/4 cup) sugar
1 1/2 teaspoons active dry yeast
or1 1/4 teaspoons instant yeast
1 large egg plus one egg yolk, at room temperature
355g (2 1/2 cups) all-purpose flour
1/2 teaspoon salt
115g (4 oz) unsalted butter, very soft

Filling

1 large egg, lightly beaten
115g (1/2 cup, firmly packed) brown sugar
2 teaspoons ground cinnamon
75g (1/2 cup) currants
55g (1/3 cup) dried apricots

Combine the warm milk and sugar in the bowl of a stand mixer and sprinkle the yeast over the top. Whisk by hand to blend well. Let the mixture sit for 5 to 10 minutes, until the yeast is activated. Add the egg and egg yolk and whisk, by hand, until well blended. Stir in the flour and salt.

Attach the dough hook to your mixer and knead, on low, for 2 minutes. Increase the speed to medium and knead for 1 minute. With the mixer still running, add the softened butter, 1 tablespoon at a time ensuring each addition is well blended before adding the next. Once all the butter is added, decrease the speed to low and continue to knead for 5-6 minutes, or until the dough looks soft and silky.

Lightly butter or oil a bowl, scrape the dough in, and brush the surface with a little butter. Cover in plastic wrap, or a damp cotton towel, and let the dough rise until doubled, about 1 to 1 1/2 hours. It is helpful to mark the starting level of the dough with a pencil or a piece of tape.

Lightly grease and line the base of a 25cm (10 inch) round cake pan. Coarsely chop the apricots, and place them in a small bowl with 1/3 cup boiling water.

Turn the dough out on to a flour dusted work surface. Press down firmly with your hands to expel as much gas as possible. Dust the top of the dough with flour and then roll it into a 25cm by 40cm (10 inch by 16 inch) rectangle. Position the dough so that the longest side is parallel to the edge of your work surface. Brush away any remaining flour.

Brush the dough evenly with a thin film of egg. In a small bowl, combine the brown sugar and cinnamon. Sprinkle this mixture on top of the egg glaze. Scatter the currants over the top. Drain the apricots and scatter them evenly on top of the currants.

Beginning with the edge closest to you, roll the dough into a cylinder, tucking and tightening as you go. Roll the dough backwards, so that the seam is facing upwards and pinch to seal the dough. Turn the seam side down and cut the dough into 10 equal pieces. With a cut side up, gently press down on each bun to flatten them slightly. place the buns in the prepared 25cm (10 inch) cake tin.

Cover the pan loosely with plastic wrap, or a damp tea towel, and set aside until the rolls have almost doubled in size, about 45 to 60 minutes.

Preheat the oven to 180°C (350°F), and position an oven rack in the center. Bake the buns for 30-35 minutes, or until deep golden brown. Transfer to a cooling rack and, after 5 minutes, turn the buns out of the pan. Serve warm or at room temperature.