Wednesday, December 28

Lemon & plum cake

Lemon plum cake

Despite the cold at the moment it's still plum season and as result I've inadvertently ended up with a huge bucket of them. Initially they went into my mouth, then this cake, and finally into jam as a way of keeping them around for longer. Despite how nice they were, there's only so many plums two people can eat in a week. I would write about the jam but it's quite a simple process and cake is much more fun.

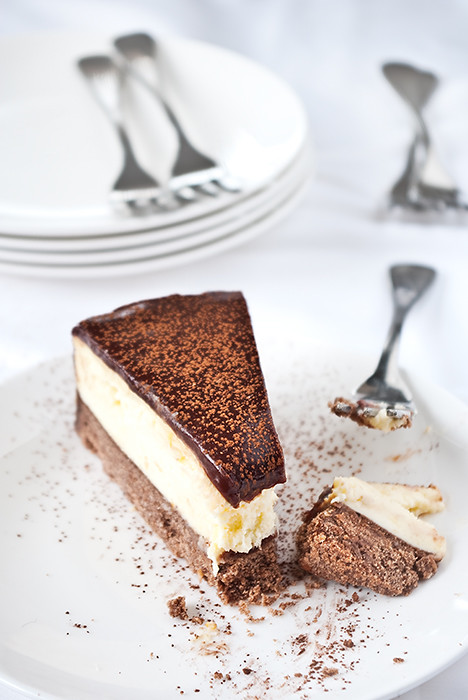
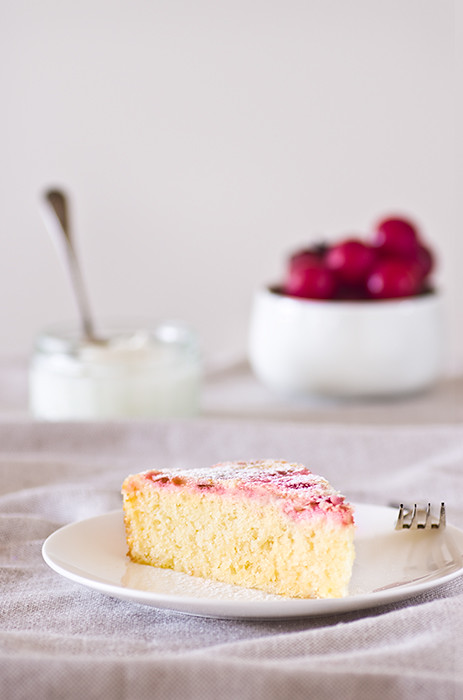
This cake served as a good way to turn the plums into something different once you've reached the point of having eaten too many on their own. Originally an olive oil, lemon, and cherry cake I decided to add my own twist on it. Out with the olive oil and cherries, in with the macadamia oil and plums. The plums definitely take a back seat to the lemon, as the cake is extremely lemony making it a simultaneously sweet and tart experience.

Macadamia oil isn't strictly necessary as I'm not sure how easy to find it is outside of Australia, and in all honesty the only reason I used it was because I couldn't find walnut oil at my local shops. I'm sure you could even use a mild olive oil as the recipe intended. I didn't as I'm not sold on olive oil in cakes.

Lemon plum cake

Lemon & plum cake

Adapted from Desserts by Pierre Herme by Pierre Herme & Dorie Greenspan

Makes one 25 cm cake

  • 1 3/4 cups plain flour
  • 1 1/2 teaspoons baking powder
  • 1 cup sugar
  • Zest of 2 lemons
  • 4 large eggs, at room temperature
  • 3 tablespoons whole milk, at room temperature
  • 1 tablespoon freshly squeezed lemon juice
  • 100g (3 1/2 ounces) unsalted butter, melted but still warm
  • 2/3 cup macadamia oil
  • 1 cup fresh plums, pitted and chopped
  1. Center a rack in the oven and preheat the oven to 180°C (350°F). Butter a 25cm (10") round springform pan, dust the inside with flour and tap out the excess.
  2. Sift the flour and baking powder together,set aside.
  3. Place the sugar and chopped lemon zest in the bowl of an electric mixer. Rub the ingredients together between your fingers until the sugar is moist and aromatic. Fit the bowl to the mixer with the whisk attachment in place. Add the eggs and beat on medium-high speed until the mixture is pale and thick, about 3 minutes.
  4. Set the mixture to its lowest speed and beat in the milk. Add the sifted dry ingredients, beating only until they are incorporated, then add the lemon juice, warm melted butter and macadamia oil. Beat until the ingredients are just blended.
  5. Pour about 1/3 of the batter into the prepared pan. Top with enough plums to cover the batter, the pour the rest over the top. Smooth the batter with a spatula.
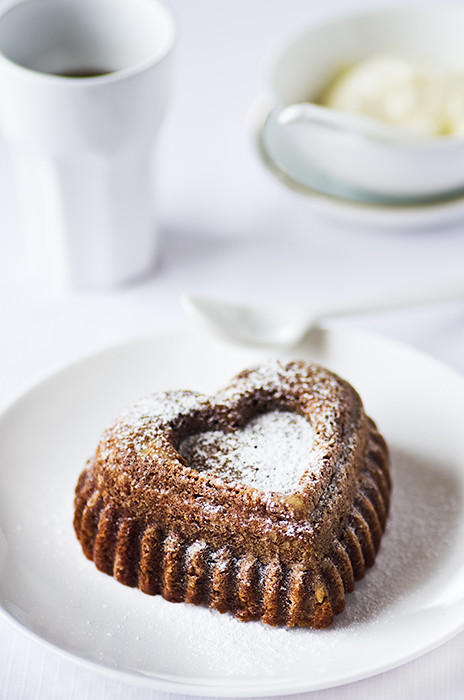
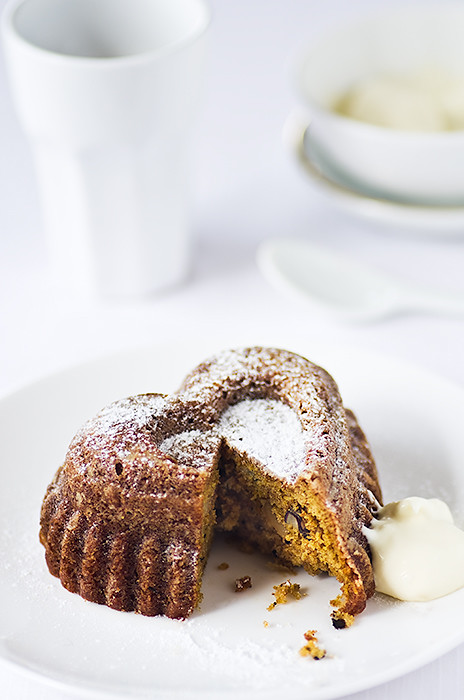
  6. Bake the cake for 30-35 minutes, or until it is golden and pulls away from the sides of the pan. Remove the cake from the oven and immediately unmold it. Invert the cake so that it is the right way up and allow to cool to room temperature. Once cooled, dust with icing sugar and serve with mascarpone.

Monday, November 14

Lime cheesecake ice cream with gingerbread

Lime and cheese cake icecream

The weather is finally warm enough for ice cream here in Australia, so once again it's time to start making it. Homemade ice cream is exciting because you can make whatever flavour you like. There are barely any restrictions when it comes to what you can make at home. Super fun.

I have this terrible, terrible love for this incredible bad for me lime cheesecake yoghurt they sell at the super markets. There's nothing good in it whatsoever; it's got tons of sugar and an odd fake flavour about it. This weird yoghurt, that I love but shouldn't, inspired me to make this ice cream.

09_11-limecheesecakeicecream-2

Luckily this ice cream doesn't have a weird fake flavour about it. It's much nicer than cheesecake flavoured yoghurt I hold so dearly. The creamcheese and lime complement each other nicely, and the gingerbread on the side go pretty well too. All and all a lovely treat, perfect for the spring weather.

If I were to change anything about this recipe it would be to infuse lime peel in the milk. I thought about doing it for my ice cream but totally forgot about it by the time I got around to making the recipe. Infusing the lime with the milk would make the lime taste much stronger and, in my view, much more delicious!

Lime cheesecake ice cream with gingerbread

From The Perfect Scoop by David Lebovitz

Makes about 700ml

  • 225g cream cheese, at room temperature
  • 1 teaspoon lime
  • 250ml sour cream
  • 125ml full cream milk
  • 1 teaspoon vanilla extract
  • 1/2 teaspoon salt
  • 1 tablespoon white sugar

Cut the cream cheese into 1cm pieces. Zest the lime directly into the blender or food processor, then add the cream cheese, sour cream, milk, sugar, and salt and puree until smooth. Chill in the refrigerator until cold.

Once cold, strain the cream cheese mixture through a fine mesh strainer. Transfer the strained mixture into an ice cream maker and cheese according to the manufacturer's instructions.

Once frozen, transfer to a container and freeze for a minimum of 3 hours.

Thursday, October 6

Pumpkin & walnut cake

09_11---Pumpkin-&-Walnut-Cake

It's been a good long while since I've posted but in my defence it's only been partially due to laziness. The main cause was in fact that I've been on holidays. I have one more post already lined up after this one, using photos I took and edited about a month ago. In the rush of getting ready to go away I didn't get a chance to write an entry.

Last month I visited the USA for the first time and had a wonderful series of first experiences. I didn't the typical tourist thing and went to Las Vegas and Disney World, then scooted up to Washington DC and New York City. Each place was so different and enjoyable in it's own way. I ate amazing food everywhere except Disney World (sorry, Disney!). The rich variety of food available was astounding. I don't know if I went anywhere particularly famous but that's irrelevant.

09_11---Pumpkin-&-Walnut-Cake-2

I also went on a bit of a supermarket tour, just because. I visited both the saddest looking supermarkets and the most impressive. In the end I felt a bit envious of the variety of places to buy groceries in the USA, it's hard not to when you come from a country that is essentially dominated by two major players. I 'premium' supermarkets in the USA are so much nicer than the ones here, but the less 'premium' ones are far worse. I suppose you can't have it all.

It's a bit mean to say but I'd always heard food in the USA wasn't great so I went with a few prejudices. I have to say though, on first the night there were blown away. I won't let anyone tell me food in the USA is bad ever again!

When I was over there I had the most delicious pumpkin cake so when I got home I naturally had to make some for myself. This isn't the recipe for the one I had but it's just as tasty.

Pumpkin & walnut cake

From The Cake Bible by Rose Levy Beranbaum

Makes 6 one cup bundt cakes

  • 125g plain flour
  • 1 teaspoon baking soda
  • 1 teaspoon ground cinnamon
  • 1/2 teaspoon freshly grated nutmeg
  • 1/4 teaspoon ground cloves
  • 1/4 teaspoon salt
  • 60g coarsely chopped walnuts
  • 2 eggs
  • 165g brown sugar
  • 110g macadamia oil
  • 240g puréed pumpkin, fresh or tinned

Preheat the oven to 180°C (350°F). Grease and lightly flour 6 one cup cake tins of any shape.

In a small bowl, combine the flour, baking soda, spices, and walnuts. Whisk to blend.

In a large bowl, beat the eggs, sugar, and oil until very smooth, about 2-3 minutes. Add the pumpkin and beat until just smooth. Add the flour mixture and beat until it is just moist.

Scrape the batter into the prepared cake tins and cake for 25-30 minutes, or until a skewer inserted into the thickest part comes out clean. Remove cakes from the oven and cool for 10 minutes in the tins then invert on to a wire rack and cool to room temperature.

Sunday, July 17

Blueberry cheese danishes

07_11---blueberry-danishes-2

My poor blog has been a little neglected as of late and it's not for a lack of baking either. In the past little while I've made English muffins (yum), crumpets (disaster), buttermilk pudding (yum), chocolate biscuits (yum), and danishes (yum). Out of all these things the only one I photographed were these danishes. I feel bad for the other things I've made, except maybe the crumpets because they were seriously awful.

When I went looking for danish recipes I was surprised by how few were for actual danish dough, after reviewing them I understood why. Danish dough seems scary; the recipes has a lot of steps and the time estimates often exceeded 5 hours. There's yeast and a butter block involved because they're not bad enough on their own. After reading the recipes and various tips and tricks I was terrified, terrified but committed. I can't get a decent danish within walking distance and I had the urge.

I set my standards low, saying to myself if I could make a danish that was on par with one Baker's Delight I'd be happy. Danishes from Baker's Delight are disappointing to say the least but sometimes I eat them anyway. I always feel guilty and ripped off afterwards.

07_11---blueberry-danishes

In the end I was pleasantly surprised by the whole dough making process. My danishes weren't perfect but they were tasty. The dough did take a lot of time but a fair amount of it was simply waiting. Making danish dough reminded me a lot of making ice cream, there's a lot of time between when you start and when you finish but not a whole lot of actual effort. Sure, you have to be around the house all day but when it's bitterly cold and you don't want to go outside anyway it's fine.

For a first attempt, I'm pretty proud and I'd encourage everyone else who has had even the slightest inkling to attempt danish dough to give it a shot. It's super fun and you'll impress all your friends when you show up with danishes for dessert.

That being said, I'm not sure if it's characteristic of homemade danishes or if I did something wrong but as these cooled they got a little harder. Maybe it was the butter solidifying in the cold or maybe I messed up along the way but the store bought, margarine filled, danishes were similar to mine in hardness when at room temperature. Any tips to combat this or are homemade danishes just best when hot?

Blueberry cheese danishes

(From The Art and Soul of Baking)
makes 12 danishes

For the danish dough
Dough block

1/4 cup warm milk
1 tablespoon plus 1/2 a teaspoon sugar
1 1/2 teaspoons instant yeast
1 large egg, cold
85g milk, cold
250g plain flour
1/2 teaspoon salt

Butter block
170g cold, unsalted butter, cut into 1 cm pieces
20g plain flour

For the filling

225g cream cheese, softened
70g sugar
1 large egg yolk
1 1/2 tablespoons plain flour
finely grated zest of 1 orange
1/2 teaspoon vanilla extract
50g fresh blueberries

To make the danish dough

Pour the warm milk into a small bowl and whisk in 1/2 teaspoon of sugar. Whisk in the yeast and set aside for 10 minutes, or until the mixture is activated and cloudy.

In the bowl of a stand mixer, whisk together the remaining sugar, egg, and cold milk. Whisk in the yeast mixture. In a separate bowl, whisk together the the flour and salt until well blended. Add the flour mixture into the egg mixture, attach the dough hook to the stand mixer,and mi of the lowest speed for 1-2 minutes, or until a very rough mass has formed. Dust a work surface with flour and turn the dough on to it. Knead the dough 3 to 5 times, to just bring it together. The dough will not be smooth or elastic but it will come together during the rolling and turning stages. Wrap the dough in cling wrap and refrigerate for 30 to 60 minutes.

To make the butter block, toss the butter in the flour and refrigerate for 20 minutes. Fit the paddle attachment to your stand mixer, and in a clean bowl, beat the floured butter on medium speed for 1 to 2 minutes, or until the butter is a smooth mass. You do not want to beat air into it, rather just make a it smooth and pliable. Scrape the butter on to a piece of cling wrap and refrigerate while you roll out the dough.

Lightly dust a work surface with flour. Set the refrigerated dough in the center and dust the top with flour. Roll the dough into a 20cm by 15 cm rectangle with the short side parallel to the edge of your surface. Brush any flour from the top and visually divide the dough into 3 sections. Spread the cold butter evenly over the top 2/3 of the dough, leaving a 1cm border around the edges.

Fold the empty bottom third up over the center. Then fold the top third down over center. Pinch the seams along the bottom and sides and then gently roll your rolling pin over the top a few times.

At this point, you can either refrigerate the dough for an hour, to re-frim the butter or, if you have worked fast enough, continue with the second turn.

Position the dough with the short side parallel to the edge of your work surface and the long fold on the left-hand-side. Dust the dough with flour and roll it into a 25cm by 15cm rectangle. Brush any remaining flour from the top.

Fold the two short edges into the center of the dough, leaving a 1/2 cm crevice between them. Line up the edges and square the corners. Now fold one side over the other, as if you were closing a book. Roll your pin lightly across the top of the dough a few times to seal it. Wrap the dough in plastic and refrigerate it for an hour.

Remove the dough from the refrigerator, dust it with flour, and roll it into a 25cm by 15cm rectangle. Brush any flour from the top and then visually divide the dough into 3, fold the bottom third up over the center and the upper third down over the top. Roll your pin across the top a few times. Refrigerate the dough for a minimum of two hours or up to 24 hours before proceeding with cutting and shaping it.

To make the cream cheese filling

Cut the cream cheese into 8-10 pieces and put it in the bowl of a stand mixer. Add the sugar and beat on medium until smooth. Scrape down the bowl, add the egg yolk, and beat until combined. Beat in the flour, orange zest, and vanilla. Transfer to the refrigerator until required.

To assemble the danishes

Dust your work surface with flour and place the dough in the center. Dust the top with flour, then roll the dough into a 40cm by 30cm rectangle. Using a ruler and a knife, mark the dough at 10cm intervals along all four sides. Cut the dough into 12 squares.

Place a tablespoon of cream cheese filling in the center of each square. Spread in an oval toward two of the diagonal corners. Place 3-5 blueberries on each side of the cream cheese filling.

Fold one of the empty corners over the filling. Moisten the top with a dab of water. Bring the opposite corner over the first and press to seal. Transfer the danishes to a lined baking trays.

Cover the trays loosely in cling wrap and place them in a cool room temperature spot until they have doubled in size, about 1 hour.

Preheat the oven to 200°C and position a rack in the center. Chill the trays of danishes in the freezer for 10 minutes. Bake the danishes, a tray at a time, for 14-16 nminutes. Turn the trays halfway through the baking process. Once cooked, transfer the danishes to a a cooling rack and cool to room temperature


Sunday, June 5

Chocolate & orange cheesecake

06_11---Chocolate-orange-cheesecake2

I came home the other day super stressed (thanks work, I love you but sometimes you kill me!) and with an intense hankering for cheesecake. Unwilling to go out and buy a cheesecake I decided to make one knowing full well it wouldn't be done by the end of the day. I also knew the next day would be busy and so coming home to an almost finished cheesecake would be good. Knowing I would be able to finish it the next day made me very happy because at least it meant I would have finished something over that course of the week.

I've written before about the wonders of stress baking and my attitude hasn't changed. Baking (or doing anything productive really) is a great way to unwind after a busy week.

Sure, baking is sometimes really stressful in itself but it's enjoyable and distracting stress that results in tasty treats. The other benefit of stress baking late at night is that you get to have something tasty, decadent, and downright bad for you for breakfast. Like cheesecake. Cheesecake for breakfast is like the grown up version of ice cream or doughnuts for breakfast.

06_11---Chocolate-orange-cheesecake

This cake is crazy rich, as many cheesecakes are. The chocolate glaze however takes it to the next level so it may not be for everyone. However, if you're after something decadent this is an unmistakable winner.

The recipe is predominately from Tartelette with the super sweet chocolate topping coming from Gourmet Traveller.

Chocolate & orange cheesecake

adapted from Tartelette & Gourmet Traveller
Makes one 26cm (10") cheesecake

For the base
  • 125g butter, very cold and cut into cubes
  • 40g sugar
  • 150g plain flour
  • 10g cocoa powder

Preheat the oven to 180°C (350°F). Grease and line the base and sides of a 26cm (10") springform pan.

Work the butter, sugar, flour, and cocoa with a food processor or your fingers until it resembles damp sand. Pour the mixture into the prepared pan and using your fingers or the back of a spoon press it firmly into the bottom of the pan. Bake for 40 minutes, then cool completely on a wire rack without removing it from the pan.

For the cheesecake batter
  • 500g cream cheese, softened
  • 70g butter, softened
  • 3 tablespoons creme fraiche
  • 125g sugar
  • Zest of one orange
  • 1 1/2 tablespoons cornflour, sifted
  • 3 eggs, seperated

Preheat the oven to 160°C (325°F). Place a large toasting tray full of freshly boiled water on the lowest rack of the oven. Position another rack in the centre of the oven.

Combine the cream cheese, butter, creme fraiche, sugar, orange zest, and cornflour in the bowl of an electric stand mixer. Beat on medium-low to combine, being careful not to incorporate too much air. Add the egg yolks on at a time beating until just combined between each addition. Set the cream cheese mixture aside.

Beat the egg whites until stiff peaks form. Gently fold into the cream cheese mixture.

Pour the batter over the prepared base. Wrap the springform pan tightly in aluminium foil. Place the springform pan on the middle rack of the oven and bake for 1 1/2 hours. When the time is elapsed, turn the oven off and open the door a crack. Allow the cake to cool in the oven for 30 minutes. Transfer the cake to a wire rack and cool to room temperature, then refrigerate it for a few hours or overnight.

For the chocolate topping
  • 185ml water
  • 130g castor sugar
  • 15g citruspectin
  • 30g liquid glucose
  • 75g 70% cocoachocolate, roughly chopped

Heat the water in a small saucepan to 60°C, add 25g of sugar and all the pectin, whisk continuously until the mixture comes to the boil.

Add the glucose and remaining sugar, continue to whisk until the mixture once again comes to the boil and starts to thicken. Remove the saucepan from the heat and stir in the chocolate. Allow to cool for 5 minutes.

Pour the chocolate mixture over the prepared cheesecake. Cool to room temperature then cover with cling wrap, being careful that it does not touch the surface, and refrigerate until set.

Monday, May 23

Cranberry nougat shortbread

05_10---Shortbread

I'm a sucker for shortbread, particularly the cheap, super sweet, shop bought stuff with sugar on top that show sup everywhere around christmas. I love it. I can eat it by the packet and because of this I never buy it. I know if I were to buy it I would eat it all.

To fulfil my craving for shortbread I decided to make my own. These are not quite like the shop version, which might be a good thing. I'm not sure.

The original recipe claims you can use rice flour, corn flour, or potato starch as the additional starch. I used corn flour but I think I would have preferred to use something else as I'm not much of a fan of the texture of cornflour. Rice flour apparently gives the biscuits more crunch, which I would have enjoyed.

05_10---Shortbread-2

As far as the actual shortness of the biscuit is concerned this are definitely spot on. They're super flake-y, and if you made them without nougat they would just fall apart in your mouth. I like the crunch the nougat and nuts brings but everyone is different.

This recipe calls for super soft butter, I softened mine in the microwave as it's freezing at the moment and I doubted that it would soften at room temperature. Apparently a tiny amount of melting isn't a problem but don't over do it!

Cranberry nougat shortbread

Adapted from Tartine by Elisabeth M. Prueitt & Chad Robertson
Makes about 36 biscuits

  • 225g (1 cup + 2 tablespoons) very soft unsalted butter
  • 1/2 teaspoon salt
  • 255g (1 3/4 cup + 2 tablespoons) plain flour
  • 75g (1/2 cup + 1 tablespoons) corn, rice, or potato flour
  • 200g (7oz) soft cranberry nougat
  • 70g (1/3 cup) granulated sugar
  • 55g (1/4 cup) granulated sugar, extra

Preheat the oven to 160°C (325°F), grease a line a 15cm by 25cm (6" by 10") baking tin.

In a small bowl, sift together the flour and chosen starch. Remove 1/4 of a cup and place in a small bowl with the nougat.

Rub the nougat and flour together with your hands until lumps to size of peas form. Set aside.

Place the butter in a separate mixing bowl. The butter should be very soft, about the consistency of mayonnaise or whipped cream. Add the salt and mix well with a wooden spoon so that the salt dissolved completely. Add first lot of sugar to the butter and mi until just combined, then add the flour and mix until a smooth dough forms. Finally, add the nougat pieces and mix until just combined.

Pat the dough evenly into the prepared baking dish. The dough should be no more than 1.5cm (2/3") thick. Bake until the top is lightly browned, about 30 minutes. The middle of the shortbread should remain fairly light. Let cool on a rack until warm to touch.

Sprinkle the remaining sugar over the shortbread, tilting the dish so that the sugar fully and evenly coats the top. Tip out any excess sugar. With a thin, sharp knife, cut the short bread into rectangular fingers about 1cm (1/2") wide and 5cm (2") long. It is best to cut the shortbread while it is still warm. Cool completely before removing from the baking dish,

The first biscuits may be difficult to remove but the remainder should come out easily. Store in an airtight container for up to 2 weeks.

Tuesday, May 10

Fudgy brownies

05_11---Brownies

Daylight savings is the bane of my existence sometimes. I really, really want to photograph what I make, talk a walk round the lake, feed the ducks, and generally enjoy the sunshine but I can't because as I drive home everyday the sun is rapidly sinking behind the horizon and often by the time I get out of the car it's completely gone.

As I'm by no means an early riser the entire point of daylight savings is lost on me. When I leave for work, daylight savings for not, it's light anyway. I would much rather it were light(ish) when I returned home. Still, no point whining as someone out there probably benefits from it and even if I don't at least I have a window at work. Better windows then I have at home, in fact. I wish I could take my photos there but that would be really, really weird.

05_11---Brownies-3-Edit-copy

So daylight savings makes it does make it hard to get things that require light done. And as I don't own any lighting equipment and can hardly justify buying any it means so many things I make neve g et photographed.

Anyway no point whining because, as you can probably see, there's brownies to be had. Tasty, tasty, fudgy chocolate brownies. Yum. It might be cold and dark but it's totally okay.

Fudgy brownies

(From The art and soul of baking by Cindy Mushet)
Makes one 20cm (8") brownie

115g (4 oz) unsalted butter
115g (4 oz) bitter-sweet chocolate
55g (2 oz) unsweetenedchocolate
200g (1 cup) sugar
2 eggs, at room temperature
1 1/2 teaspoons vanilla extract
70g (2 1/2 oz) plain flour
pinch of salt
105g (3 3/4 oz) chocolate chips or chunks
55g (2 oz) macadamia nuts

.

Preheat the oven to 180°C (350°F). Line a 20cm (8") cake pan with baking paper across the bottom and up two of the sides, then lightly coat with non-stick spray

Bring 5cm (2") of water to the boil in a saucepan. Place the butter, bitter-sweet chocolate, and unsweetened chocolate in a heatproof bowl and set it over the water. Turn off the heat and stir the chocolate until it is melted and the mixture is smooth.

Remove the chocolate mixture from the heat and whisk in the sugar. Whisk in the eggs, one at a time, stirring well to incorporate. Whisk in the salt and flour. Stir until the batter turns from dull and broken to smooth and shiny. Whisk in the chocolate chips and nuts.

Scrape the batter into the prepared tin and spread evenly. Bake for
35 to 40 minutes or until a skewer inserted into the middle comes out with a few moist crumbs clinging to it. Transfer to a rack and cool completely.

When the brownie is cool, run a thin knife around the edges of the pan. Grasp the edges of the baking paper and gently pull upward. Set the brownies on a cutting board and slice into 16 even pieces, then serve or store in an air tight container for up to 3 days.

Monday, April 18

Blackberry crème caramel

04_11---Blackberry-creme-caramel-Edit-copy

Crème caramel isn't something I see often in flavours outside of the usual vanilla, unlike it's seemly more popular cousin the crème brulee for which I've seen seemly numerous (and delicious sounding!) variations.

There was a time last year where it seemed like every man, woman, and dog wanted a blow torch to make crème brulee. Everyone just had to have one because they just had to make crème brulee. At this time I was working in a cookware shop and we'd regularly sell out of blow torches (Masterchef, you make Australian's mad!). I would have so many stressed out people looking desperately hunting for the last blow torch in the area. "I'm sorry, we're all sold out" I'd say, "you could try crème caramel instead, it's just as easy." Sometimes people would respond well to this, but most of the time they'd be adamant that they just had to make crème brulee. I suppose I can't blame them really, I know what it's like to be utterly determined to make something.

04_11---Blackberry-creme-caramel-2

That being said, I honestly do think crème caramel is just as easy. Sure, there's caramel to make and if you're anything like me making caramel makes you extremely paranoid and scared of messing it up. I've made caramel many times before but even so, every time I freak out. What if it crystallizes, or burns, or catches on fire? I know in reality it doesn't really matter if any of these things happen because I'd just wash the pot and start again. But still, the mere thought of it.

In fact, I did crystallise the caramel for this. Massively so. So, I stamped my feet a bit and down the sink it went. Then I started again. And, voila, no crystallisation. Sure, I undercooked the caramel a bit and it wasn't quite as golden as it should have been but who cares?

So, after puckering on I had crème caramel. That was blackberry flavoured. That was also rather weird but mostly delicious. Seriously folks, time to move beyond the usual vanilla flavoured treats into the realm of berries, ginger, coconut, or anything really.

Also, I'm wondering how normal, more skilled people than I remove crème caramels from their containers? Every book I'm read says to carefully loosen them out with a knife but I just can't do this without ruining them. Instead, I just whack a plate on top, invert, and shake, shake, shake until I hear a satisfying sound that resembles a suction cap coming loose. Is it an elegant technique? No, no really so if you have a better one, let me know!

Down side is that after making this I have even more egg whites to use up. Time to continue on my quest to find an awesome biscuit that uses lots of egg whites.

Blackberry crème caramel

(adapted from Desserts by Christine Manfield)
makes six 150ml creme caramels

For the syrup

125ml water
200g castor sugar
1/4 teaspoon cream of tartar

for the custard

350ml pouring cream
50ml water
150ml blackberry pureee
2 eggs
6 egg yolks
75g castor sugar
Freshly boiledwater, extra

Preheat the oven to 150°C (300°F).

Pour sugar, water, and cream of tartar for the syrup into a medium saucepan. Place over medium heat and stir until the sugar has dissolved and the liquid is clear. Increase the heat to high and boil rapidly, without stirring, until the caramel turns a deep golden brown.

Remove from the heat and immediately divide among the custard cups, swirling each cup to distribute the caramel halfway up the sides. Set aside to cool for 10 minutes.

To make the custard, place the cream in a small saucepan, place the blackberry puree and the water in another saucepan and bring both pans to just below simmering point.

In a separate bowl, gently whisk the egg yolks, eggs, and castor sugar. Slowly pour the hot cream into the egg mixture, stirring constantly. Add the hot blackberry mixture in the same way. Pass the custard through a fine sieve into a jug, then pour it into the prepared custard cups.

Place the custard cups in a roasting tray and transfer it into the oven. Fill the roasting rack with freshly boiled water so that it comes halfway up the sides of the custard cups. Bale for 45 minutes or until just set. Remove the custards from the oven and leave them to sit in the water bath until cool. Once cooled, stand on a tray and cover in plastic wrap then refrigerate for 5 hours to set before serving.

To serve, suspend each crème caramel in hot water for 30 seconds, then place a plate on top and invert - shaking gently if required.

Monday, April 4

Basbousa

Basbousa

I'm taking a short detour from my barely started quest to find the perfect egg white biscuit recipe to bring you what is probably one of simplest things I've made in a long time. This tasty slice is a breeze to make and, providing you have a sweet tooth, down right delicious.

As it's really quick to make this is an excellent dessert for an impromptu dinner with guests. You know,the ones where you decide an hour or two beforehand that you want to have a guest or two around for dinner and somehow you have to cook a meal, make a dessert, set the table, and make the house presentable. The kind of dinners you can only have with close friends because otherwise you look flustered and slightly disorganised and, in my case, everyone knows that's already the case so there's no harm done.

When I cook I try to make things I've never had before and this is no exception. I've had very similar things but they've always been more complicated to make, involving hot pots, stoves, and all that jazz. Is this really requires for the cake is a minute or two of time and a bowl. The syrup is done in a pinch too. What more can you ask for?

Basbousa

Basbousa

(from Food Safari by Maeve O'meara)
makes 25-30 pieces

For the cake

2 1/2 cups coarse semolina
1 cup dessicated coconut
1 cup (220g) caster sugar
1/2 cup (75g) self-raising flour
200g thick yoghurt
200g unsalted butter, melted
1 teaspoon vanilla extract
25-30 blanched almonds
milk, if required

For the syrup

1 1/2 cups (330g) sugar
1 cup (250ml) water
1 teaspoon lemon juice
1 teaspoon rosewater

Preheat the oven to 190°C (375°F), grease and line the base of a 30cm x 20cm x 4cm (12" x 8" x 1") baking tin.

Mix the semolina, coconut, flour, yoghurt,melted butter, and vanilla in a bowl. The mixture should be stiff but not dry, if it is too difficult to stir add a little milk.

Spread the mixture into the baking pan, then cut it diagonally into diamonds about 5cm (1") wide. Place an almond in the centre of each diamond.

Bake the cake for 3040 minutes, or until golden on top.

Whilst the cake is cooking, begin the syrup. Combine the sugar and water in a small saucepan over medium heat, stirring until all the sugar has dissolved. Bring the mixture to the boil, then reduce the heat and simmer for 5 minutes. Remove from the heat and stir in the lemon juice and rosewater.

Saturday, March 19

Chocolate, walnut, & hazelnut macaroons

03_11---choc-hazelnut-macaroons

I'm on a mission. That mission is to find the best biscuit made with egg whites and no yolks. The problem is, I don't even know where to start. Sure, I can make macarons, macaroons, or tuiles but I'm after something more homely. Something more biscuit-y; something squishy and awesome.

There biscuits aren't quite there but they're pretty good. I mean, with chocolate, almonds, and hazelnuts you can't exactly go wrong. They're somewhat squishy but not biscuit-y enough for me. But that's okay because my hunt has only just started, and it wouldn't be much fun if my quest was over after the first attempt, would it?

So if any of you lovely people out there have recipes for biscuits that use egg whites but no egg yolks send them my way! I'm super keen to give whatever wonderful recipes you have a shot.

03_11---choc-hazelnut-macaroons2

Chocolate, walnut, & hazelnut macaroons

(adapted from Biscuits and Macaroons by the Australian Women's Weekly)
makes about 20 biscuits

100g almond meal
100g hazelnut meal
2 egg whites
110g (1/2 cup) caster sugar
1 teaspoon vanilla
1 tablespoon gluten free flour
4 teaspoons cocoa powder
90g (3 oz) dark chocolate, finely chopped
60g (2 oz) white chocolate

Preheat the oven to 150°C (300°F). Grease two oven trays and line them with baking paper.

Beat the egg whites until soft peaks form, gradually add the sugar, beating until dissolved after each addition. Stir in the vanilla extract, sifted flour, ground almonds & hazelnuts, and chopped chocolate in two batches.

Transfer the resulting batter into a piping bag and pipe evenly sized rounds about2.5cm (1 inch) in diameter on to the prepared trays. Bake for about 25 minutes, then cool on trays.

Once cool, melt the white chocolate, and spread over the bases of the macaroons. Place chocolate side down, on a tray lined with a fresh piece of baking paper and stand at room temperature to set. Once set, peel from the baking paper and store in an air tight container for up to a week.

Thursday, March 3

Green apple sorbet

03_11---Green-Apple-Sorbet2

I first made green apple sorbet was about a year and a half ago and it wasn't anything to write home about. I'd just received a stand mixer and an ice cream bowl attachment and I was super excited about using it. I picked a recipe and started making it. Not knowing anything about making ice cream and sorbet I didn't realise just how smooth a puree needs to be to make creamy ice cream. I neither pureed the apples enough nor strained them. The result was a gritty sorbet with a weird, weird texture. Sure, it tasted good but how it felt in your mouth was all wrong.

One and a half years later, with fond memories of the taste of my ill-fated sorbet, I've given it another shot. This time I've come out successful, the texture of this sorbet is much nicer and the taste is wonderful.

There are a few things I liked about the original recipe that, unfortunately, didn't carry over into the second attempt. The first recipe used frozen apples rather than cooked and pureed, this meant that the sorbet was a vibrant green without the use of food colouring. I also liked how with the original recipe, you just chucked the apples in the freezer, pureed them once they were frozen, and then whacked them in the ice cream maker - none of this cooking and cooling business. But then, despite these things I liked the actual sorbet was the wrong texture so there's no use lamenting. It also went brown if you let it thaw out - eww.

03_11---Green-Apple-Sorbet

Essentially this recipe is much better than my first attempt and I'm just being picky.

If you make this, don't freak out if your apple mixture is super bright green prior to it being frozen in the ice cream machine - it's perfectly normal. I didn't realise this when I was making mine and freaked out about the green monstrosity I was about to create. The mixture lightens up a lot as it freezes, resulting in a pleasing light green. I just used plain old liquid food colouring for mine but those of you with fancier food dyes then I could use those too.

I've only ever seen recipes for green apple sorbet but now I'm starting to to wonder how gala, fuji, pink lady, or even heirloom varieties of apples would go in sorbet. I think I could have a whole blog dedicated to apple sorbet if I felt so inclined - yum.

Green apple sorbet

(adpated from Decadence by Philip Johnson)
makes about 1.5 litres (6 cups)

750g (1.6lbs) granny smith apples, unpeeled, cored, and quartered
juice of 1/2 a lemon
250ml (1 cup) water
375g (1.5 heaped cups) caster sugar
3 teaspoons calvados, optional
1/8 teaspoon liquid green food colouring, optional

Place the apples, lemon juice, water, and sugar in a medium saucepan over high heat. Bring to the boil, then reduce to a simmer. Cook the apples until they are extremely soft, about 20 minutes. Remove from the heat and allow to cool to room temperature.

Once the apples have cooled transfer them to a blender and blend until the mixture becomes a smooth puree. Strain the mixture through a fine sieve. Stir through the calvados and green food colouring, if using. Refrigerate the apple mixture until cold.

Remove the mixture from the fridge and churn in an ice cream machine according to the manufacture's instructions.

Once adequately frozen, transfer the sorbet to a container, cover tightly, and place in the freezer for a minimum of 4 hours.

Sunday, February 20

Lemon madeleines with rhubarb and strawberry jam

02_10---Lemon-Madeleines

Are madeleines still madeleines if they're not shaped like shells? Or are they one of those things whose name is determined by their shape and not by the ingredients used to create them? My source of all knowledge (that is, wikipedia) describes madeleines as "very small sponge cakes with a distinctive shell-like shape", if wikipedia is too be believed then a cake using the madeleine batter without the shell shape wouldn't be a madeleine at all. Do you think this is the case? Would it be wrong to call my square little cakes madeleines and, if so, what should they be called instead?

Naming conventions aside, these little lovelies do taste like madeleines. They're quite soft and light. Out of all these recipes I've tried so far this one is probably my favourite. Flavour-wise, they're just plain old lemon which when paired with delicious jam is perfectly acceptable.

I paired my madeleines with rhubarb and strawberry jam. Rhubarb and strawberry is a much appreciated combination, and for a good reason. It never fails to deliver a nice punch of flavour. Jam is so simple to make that it surprises me that more people don't do it. Maybe there's some kind of myth that it's a complex process which requires special equipment and that if you don't get it right you'll end up ruining everything and wasting all your delicious ingredients? Or maybe people do make jam and just don't tell me about it because they know I'll eat it all? I'm actually leaning towards the latter!

02_10---Lemon-Madeleines-2

Lemon madeleines with rhubarb and strawberry jam

Lemon madeleines

(from Chelsea Bakes)
makes 24 madeleines

100g (2/3 cup) plain flour
1/4 teaspoon baking powder
100g (1/2 cup) butter, melted
2 eggs
1/2 teaspoon lemon zest
1/2 teaspoon lemon juice
130g (1 cup) icing sugar
melted butter, extra
icing sugar, extra

Using the extra melted butter, grease two 12 hole madeleine tins. Preheat the oven to 160°C (350°F)

In a small bowl, sift together the flour and baking powder. Set aside.

in the bowl of an electric mixer, beat the eggs, lemon zest, and juice on high speed until light and pale; about 5 minutes. Gradually add the icing sugar and beat for a further 5 minutes, or until thick.

Turn off the mixer and gently fold the sifted flour into the egg mixture until smooth and no lumps remain. Transfer the mixture to a piping bag pitted with a 1cm (1/2 inch) tip. Pipe the mixture into the madeleine tins, filling each hole about 2/3 full.

Bake the madeleines for 8-10 minutes, or until golden. Remove from the oven and cool for 1-2 minutes. Loosen the biscuits with a knife and then invert on to a wire rack. Cool completely then sprinkle with icing sugar just prior to serving

Rhubarb and strawberry jam

(adapted from One More Bite
makes approximately 800ml)

300g rhubarb
360g strawberries
2 lemons
300g white sugar
100g brown sugar
1 teaspoon ground nutmeg

Wash the rhubarb, then trim off the poisonous leaves and discard them. Chop the rhubarb into 1-2.5cm (1/3-1 inch) pieces. Hull the strawberries, and cut them into similar sized pieces as the rhubarb. Leave some whole, if desired.

Peel the lemons using a vegetable peeler, then squeeze the lemons into a bowl lined with muslin. Bundle up if muslin so that it contains the seeds of the lemons and the juice is left in the bowl.

Place the fruit, sugars, lemon juice, lemon rind, nutmeg, and bundle of lemon seeds in a heavy-based saucepan and stir to combine.

Increase the heat. When the mixture begins to boil and froth, turn the heat down and cook the jam over lower heat for 30-40 minutes. Place a plate in the freezer for testing the consistency later on, or alternatively use a thermometer.

Whilst the jam is cooking, wash your jars thoroughly in hot soapy water and dry upside down on a rack, or in a 100°C (210°F) oven.

To test the jam; drop a spoonful on a cold plate, wait for 30 seconds, then run your finger through it. If the jam stays split down the middle, it's ready. If you are using a thermometer, the jam will be ready when the temperature reaches 104°C (219°F).

Ladle the jam into your pre-washed jars, filling approximately 1.5cm (1/2 inch) from the top. Place the lids on. At this point, you can either turn the jars upside down and leave them until them until the seals pop, or pasteurise them by wrapping the jars in cloth and placing them in a saucepan of boiling water for 15 minutes. If you pasteurise the jars by boiling, make sure the water level is always a couple of centimetres (or about an inch) higher than the top of the jars. Leave then to cool in the water then store in the cupboard until required.

Friday, January 21

Chocolate, walnut, & oat biscuits

01_11---Chocolate,-walnut,-and-oat-biscuits

It is so hot right now. It's so hot that after three hours of sitting at room temperature the chocolate on these biscuits has not solidified. When I go to pick one up and end up with melted chocolate all over my hands, not that that's a bad thing, it's just is messy.

In heat like this I'm mad to have the oven on to begin with, especially in a house that lacks all forms of air-conditioning. I don't even own a fan. However, I'm not one to resist a craving for chocolate chip biscuits. There are times when not having chocolate chip biscuits is worse than heatstroke.

Apparently I'm never allowed to make these again as, according to J, they are "too delicious" and it's "impossible not to eat the whole batch". If that's not a seal of approval, I don't know what is. It's safe to say what these biscuits lack in beauty they more than amply make up for in taste.

Chocolate, walnut, & oat biscuits

(from Tartine by E. M. Prueitt & C. Robertson)
makes about twenty-four 6 cm (2 1/2 inch) biscuits

170g (6 oz) bitter-sweet chocolate
145g (1 cup) plain flour
1/2 teaspoon baking powder
1/2 teaspoon baking soda
85g (1 cup) traditional rolled oats
115g (1/2 cup) unsalted butter, softened
175g (1/2 cup + 1/3 cup) sugar
2 teaspoons treacle
1 large egg
1 tablespoon milk
1 teaspoon vanilla extract
1/2 teaspoon salt
60g (1/2 cup) walnuts, coarsely chopped

Coarsely chop the chocolate into 1/2 cm (1/4 inch) pieces using a serrated knife. Place chopped chocolate in a bowl and chill in the freezer until required.

In a mixing bowl, stir together the flour, baking powder, baking soda, and oats.

Using a stand mixer fitted with the paddle attachment, beat the butter on medium high speed until light and creamy. Slowly add the sugar and beat on medium speed until light in the mixture is fluffy and light in colour. Stop the mixer and scrape down the slides as required. Add the treacle and beat until well combined. Add the egg and combine well. Beat in the milk, vanilla, and salt, then stop the mixer and scrape down the sides of the bowl.

Add the flour mixture and beat on low speed until well incorporated. Stop the mixer, scrape down the sides, then fold in the chocolate and walnuts using a spatula.

Turn the dough out on to a surface covered in baking paper. Shape it into a log about 4cm (1 1/2 inches) in diameter. Wrap the log in baking paper or cling wrap and place in the freezer for at least 4 hours, or overnight.

When you are ready to bake, preheat the oven to 180°C (350°F). Line two flat trays with baking paper.

Remove the dough from the freezer and slice it into 1/3cm (1/4 inch) rounds and arrange on the lined baking trays about 4cm (1 1/4 inches) apart. Bake for 8-10 minutes, or until the biscuits are lightly browned but the centres remain pale. Cool on trays for 10 minutes, then transfer to a wire rack.

Tuesday, January 11

Walnut & cinnamon slices

walnut & cinnamon slices

Biscuits, biscuits, biscuits. How I love to snack on you. When I should probably make myself a healthy, tasty lunch, you fill the void and allow me to keep on doing whatever it is I'm doing. How hard it is to get through a working day when I know I had you all ready to come with me to work but I stupidly let you on the bench. It's saddening knowing that you're sitting at home, all wrapped up and ready.

Obviously I made biscuits the other day, and then I meant to take them to work but I forgot them and it was all very sad. Well, not that sad really because I just ate them when I got home.

These biscuits are really quite nice, the flavours are quite simple and the nuts add a lovely texture. You could any nuts you choose for this recipe and if I were to make them again I should incorporate in some macadamias. I think that would be sublime.

01_11---Walnut-&-Cinnamon-Slices2

Because these biscuits are simple, they go wonderfully with tea or coffee. Though it could be argued that I think almost everything is enhanced by a cup of something considering just how regularly I use the words "goes well with tea/coffee" both here on this blog and in real life. That being said, don't stop yourself enjoying with with hot chocolate or a plain ol' glass of milk. In fact, these biscuits are perfectly good without any kind of drink.

This is the first recipe I've made from Tartine, a book I acquired recently after many months of simply forgetting to purchase it. I'm very glad it's finally on my book shelf and I think in the next coming months it's going to get quite a work out. I'm excited, I hope you're excited too.

Walnut & cinnamon slices

(from Tartine by E. M. Prueitt & C. Robertson)
Makes about 36 biscuits

255g (1 3/4 cups) plain flour
1/2 teaspoon ground cinnamon
1/4 teaspoon baking soda
150g (5 1/2 oz) butter, at room temperature
130g (2/3 cup) sugar
1 egg
1/2 teaspoon salt
85g (3/4 cup) walnuts, coarsely chopped

Sugar coating

2 egg yolks
30ml (2 tablespoons) heavy cream
200g (1 cup) sugar

Sift together the flour, cinnamon, and baking soda into a mixing bowl, then set aside.

In a stand mixer fitted with the paddle attachment, beat together the butter and sugar until it is blended and creamy but not too aerated. In a small bowl, whisk together the egg and salt. Slowly pour the egg mixture into the butter mixture, still beating on medium speed. Reduce the speed to low and add the flour mixture. Beat until a dough forms. Switch off the mixer and stir the walnuts through.

Turn the down on to a baking tray lined the baking paper. Form into a rectangle about 2.5cm (1 inch) thick. Wrap tightly and refrigerate until firm, about 4 hours.

Preheat the oven to 160°C (325°F). Line a tray with baking paper.

Unwrap the rectangle of dough and, using a sharp knife, slice lengthwise into 5cm (2 inch) wide rectangular logs. To make the sugar coating, whisk the egg yolks and cream together in a small bowl. Spread the sugar on a baking tray. Brush the logs well but sparingly with the egg wash. One at a time, dredge the longs in the sugar, coating evenly on all sides. Cut crosswise into 1/4 cm (1/8 inch) - 1/2cm (1/4 inch) thick slices. Arrange the rectangles on the prepared baking sheet.

Bake the biscuits until the edges are golden but the centres remain pale, about 7 minutes. Transfer the biscuits to a wire rack and let cool.