Showing posts with label almonds. Show all posts

Saturday, March 31

Chocolate and nut muffins

03_12---chocolate-nut-muffins

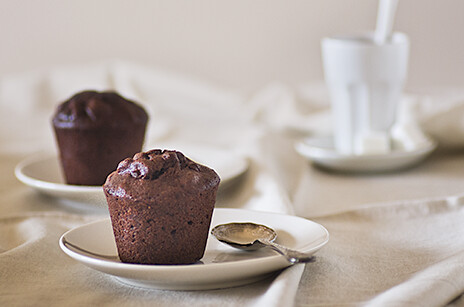
Typically I like my muffins light and fluffy with a crispy top, but there are times when I crave something dense and packed with delicious. Something that feels wicked in a way a light muffin never could. I think for those times I found the perfect recipe.

The recipe for these muffins was originally meant for a loaf tin, but mid-way through making I realised I didn't actually own a loaf tin. I know most people check these things before they start a recipe but, hey, I thought I owned one and the recipe calls for 10 minutes of beating so I figured I could grease and line the pan then.

Not owning a loaf pan didn't strike me as a big deal, I figured I could just make muffins instead... Then I realised I don't own a muffin pan either. Seriously, what kind of kitchen do I have? Fortunately, I do own a lot of dariole tins so I figured they would do, unfortunately they don't fit any of my cute muffin papers. Muffins without cute papers wrapping their bases taste the same but they're nowhere near as cute. So I vowed to buy a muffin tin, which I haven't done yet and probably won't do.
03_12---chocolate-nut-muffins-2

Not one to be deterred by a lack of appropriate equipment I decided to pucker on and boy was it worth it. These are chocolate and nut central. Yum yum.

If you do own the right equipment you can of course make this in a load pan. According to the recipe you'll need a 22cm x 12 cm (9" x 5") loaf pan and you'll need to bake the load for 60-70 minutes rather than 30-40.

Chocolate and nut muffins

  • 210g (1 1/3 cups) all-purpose flour
  • 7 tablespoons Dutch-processed cocoa powder
  • 1/2 teaspoons baking powder
  • 130 (2/3 cup) sugar
  • 140g (5 ounces) almond paste
  • 4 large eggs
  • 2/3 cup milk
  • 65g (1/3 cup) almonds, blanched and chopped
  • 70g (1/3 cup) pecans, toasted and chopped
  • 55g (1/3 cup) walnuts, chopped
  • 85g (3 ounces) bittersweet chocolate, chopped into small chunks
  • 185g (6 1/2 ounces) unsalted butter, melted and cooled

Centre an oven rack and preheat the oven to 180°C (250°F). Grease or line 12 standard muffin cups.

Sift together the flour, cocoa powder, and baking powder.

Put the sugar and almond paste in a mixer fitted with the paddle attachment and beat on medium speed until the almond paste breaks up and mixes with the sugar; it would resemble damp sand. Add the eggs one at a time, beating for about 2 minutes after each addition.

Replace the paddle attachment the paddle with the whisk attachment, increase the speed to high, and beat for 8-10 minutes, until the ingredients have formed an emulsion - the batter should resemble mayonnaise and the whisk will leave tracks.

Reduce the mixer speed to low and add the milk, mix until combine, and then add the dry ingredients. Continue mixing until everything is combined.

Working with a rubber spatula, fold in almonds, followed by the pecans, walnuts, and chocolate. Lastly, gently fold in the melted butter.

Spoon the batter into the prepared muffin tin. Bake for 30-40 minutes, or until a skewer inserted into the middle comes out clean.

Remove the muffins from the oven and let the cakes cool in the tin for 10 minutes before unmolding. Remove the muffins from the tins and cool to room temperature. The muffins can be served the same day, or wrapped in plastic wrap and allowed to 'ripen' for a day before serving.
Monday, April 4

Basbousa

Basbousa

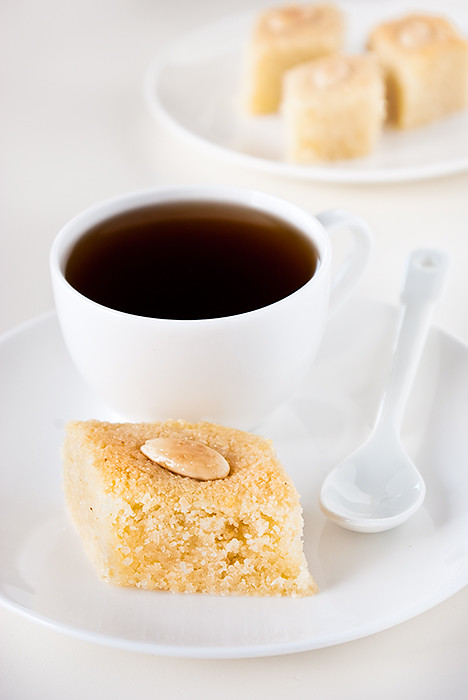
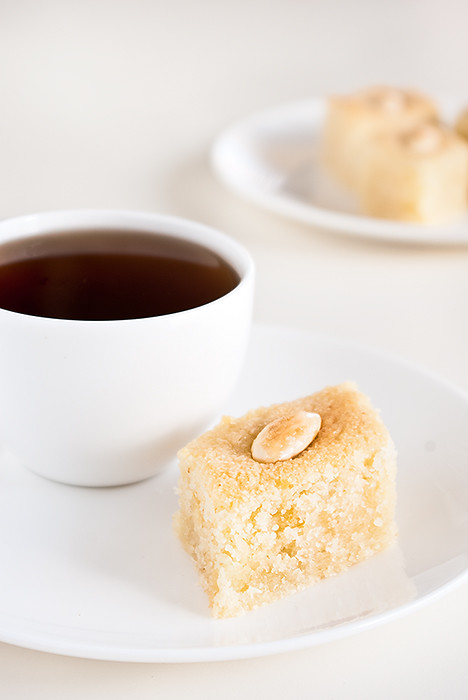
I'm taking a short detour from my barely started quest to find the perfect egg white biscuit recipe to bring you what is probably one of simplest things I've made in a long time. This tasty slice is a breeze to make and, providing you have a sweet tooth, down right delicious.

As it's really quick to make this is an excellent dessert for an impromptu dinner with guests. You know,the ones where you decide an hour or two beforehand that you want to have a guest or two around for dinner and somehow you have to cook a meal, make a dessert, set the table, and make the house presentable. The kind of dinners you can only have with close friends because otherwise you look flustered and slightly disorganised and, in my case, everyone knows that's already the case so there's no harm done.

When I cook I try to make things I've never had before and this is no exception. I've had very similar things but they've always been more complicated to make, involving hot pots, stoves, and all that jazz. Is this really requires for the cake is a minute or two of time and a bowl. The syrup is done in a pinch too. What more can you ask for?

Basbousa

Basbousa

(from Food Safari by Maeve O'meara)
makes 25-30 pieces

For the cake

2 1/2 cups coarse semolina
1 cup dessicated coconut
1 cup (220g) caster sugar
1/2 cup (75g) self-raising flour
200g thick yoghurt
200g unsalted butter, melted
1 teaspoon vanilla extract
25-30 blanched almonds
milk, if required

For the syrup

1 1/2 cups (330g) sugar
1 cup (250ml) water
1 teaspoon lemon juice
1 teaspoon rosewater

Preheat the oven to 190°C (375°F), grease and line the base of a 30cm x 20cm x 4cm (12" x 8" x 1") baking tin.

Mix the semolina, coconut, flour, yoghurt,melted butter, and vanilla in a bowl. The mixture should be stiff but not dry, if it is too difficult to stir add a little milk.

Spread the mixture into the baking pan, then cut it diagonally into diamonds about 5cm (1") wide. Place an almond in the centre of each diamond.

Bake the cake for 3040 minutes, or until golden on top.

Whilst the cake is cooking, begin the syrup. Combine the sugar and water in a small saucepan over medium heat, stirring until all the sugar has dissolved. Bring the mixture to the boil, then reduce the heat and simmer for 5 minutes. Remove from the heat and stir in the lemon juice and rosewater.

Saturday, March 19

Chocolate, walnut, & hazelnut macaroons

03_11---choc-hazelnut-macaroons

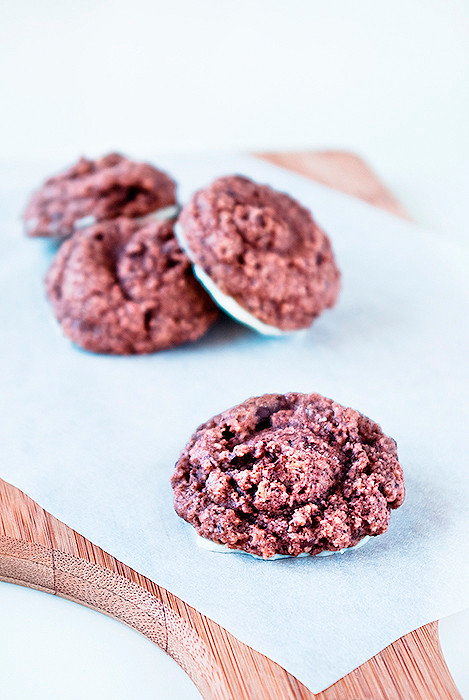
I'm on a mission. That mission is to find the best biscuit made with egg whites and no yolks. The problem is, I don't even know where to start. Sure, I can make macarons, macaroons, or tuiles but I'm after something more homely. Something more biscuit-y; something squishy and awesome.

There biscuits aren't quite there but they're pretty good. I mean, with chocolate, almonds, and hazelnuts you can't exactly go wrong. They're somewhat squishy but not biscuit-y enough for me. But that's okay because my hunt has only just started, and it wouldn't be much fun if my quest was over after the first attempt, would it?

So if any of you lovely people out there have recipes for biscuits that use egg whites but no egg yolks send them my way! I'm super keen to give whatever wonderful recipes you have a shot.

03_11---choc-hazelnut-macaroons2

Chocolate, walnut, & hazelnut macaroons

(adapted from Biscuits and Macaroons by the Australian Women's Weekly)
makes about 20 biscuits

100g almond meal
100g hazelnut meal
2 egg whites
110g (1/2 cup) caster sugar
1 teaspoon vanilla
1 tablespoon gluten free flour
4 teaspoons cocoa powder
90g (3 oz) dark chocolate, finely chopped
60g (2 oz) white chocolate

Preheat the oven to 150°C (300°F). Grease two oven trays and line them with baking paper.

Beat the egg whites until soft peaks form, gradually add the sugar, beating until dissolved after each addition. Stir in the vanilla extract, sifted flour, ground almonds & hazelnuts, and chopped chocolate in two batches.

Transfer the resulting batter into a piping bag and pipe evenly sized rounds about2.5cm (1 inch) in diameter on to the prepared trays. Bake for about 25 minutes, then cool on trays.

Once cool, melt the white chocolate, and spread over the bases of the macaroons. Place chocolate side down, on a tray lined with a fresh piece of baking paper and stand at room temperature to set. Once set, peel from the baking paper and store in an air tight container for up to a week.

Wednesday, August 4

Almond, ricotta, & raspberry cakes

07_10---Almond,-raspberry,-and-ricotta-cakes

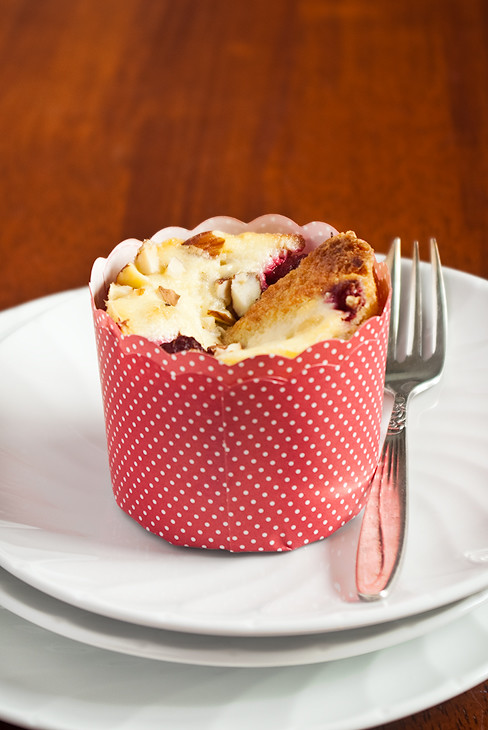
Sometimes I like to imagine that I'm a champion for ugly food. I pretend I'm battering down conventional norms of beauty with my ill-formed and slightly bizarre creations. It's my way of reassuring myself that it's okay if things aren't perfect.

My imaginings make me feel better, they stop me worrying about my seemly constant ability to create ugly food. Still, I don't consciously set out of create food that looks odd, it just happens again, and again, and again.

The comforting thing about ugly food is that it's not necessarily bad food. In fact, there's something wondrous about imperfect food. Sure, you don't want to be served it at a restaurant, but if a friend makes it for you it becomes oddly comforting. It says: "hey, I made this for you and you alone." You can tell it came out of the oven of someone who is as imperfect as the food they're giving you, someone who as imperfect as you are. You don't feel awkward when you get crumbs everywhere, or when you greedily go back for more.

Ugly food is utterly unpretentious (unlike me, I'm hugely pretentious). It sets the mood for an unpretentious event. In a world where there's so much showing off, ugly food says "don't worry, I'm not perfect either."

07_10---Almond,-raspberry,-and-ricotta-cakes2

Yet, when I serve ugly food I find myself trying to justify why it's ugly over and over again. I'll say "it wasn't meant to look like this, it's because I didn't have the right ingredients" or "they would have risen properly if I used the right pan", or whatever reason I have this time. I'm completely insecure, utterly paranoid that my creations won't be enjoyed because they're not as pretty as they could have been. It's a challenge to accept that, frankly, no one else really cares what they look like.

Essentially, what I'm trying to say is that these cakes aren't pretty but they taste damn good.

Anyway, if you do make these, I highly recommend you make them in the specified metal moulds. I made the error of baking half of mine straight into paper cups and found they didn't rise particularly well and, despite being cooked, sunk as soon as I removed them from the oven. The cakes baked in metal moulds fared much better and did not sink. I transferred the ones in metal moulds to paper cups once they were cool enough to handle.

Almond, ricotta, & raspberry cakes

(adapted from Gourmet Traveller)
makes 9

90g butter, softened
120g caster sugar
65g brown sugar
Zest of 1/2 an orange
2 eggs
50ml milk
100g gluten free plain flour
80g almond meal
1 teaspoon baking powder
300g ricotta
50g sour cream
40g caster sugar, extra
50g raspberries, fresh or frozen
50g toasted almonds, roughly chopped

Preheat oven to 180°C, grease and flour nine 180ml metal dariole moulds and place them on a baking tray.

Beat butter, sugars, and orange zest using an electric mixer until lightened in colour and texture, about 3-4 minutes. Add the eggs, one at a time, beating well between each addition. Scrape down the sides of the bowl then add the milk and beat to combine.

Stir in the flour, hazelnut meal, and baking powder. Spoon into prepared dariole moulds and set aside.

Process ricotta, sour cream, and extra caster sugar in a blender or food processor until smooth. Divide evenly among the batter filled moulds. Scatter mixture with raspberries and almonds.

Bake cakes until they are well risen and golden brown, about 30-35 minutes. Cool cakes in moulds for 5-10 minutes, then run a small knife around the sides of the moulds and careful remove cakes. Transfer to paper baking cups, if desired. Cool on wire rack.

Tuesday, July 27

Raspberry & lemon friands

raspberry friands

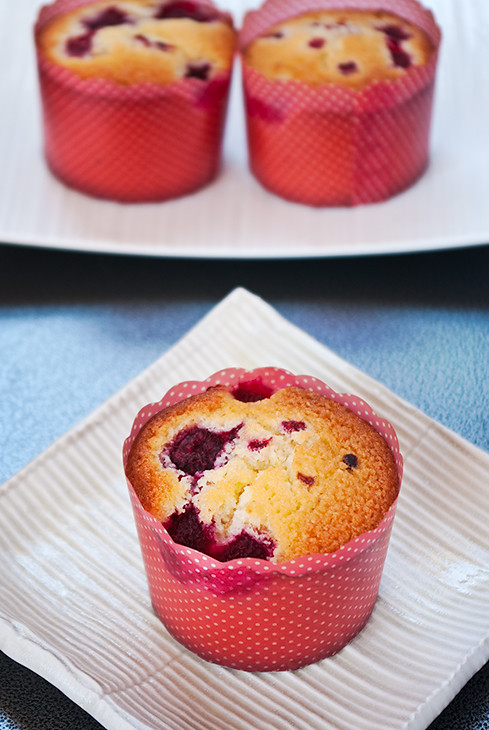
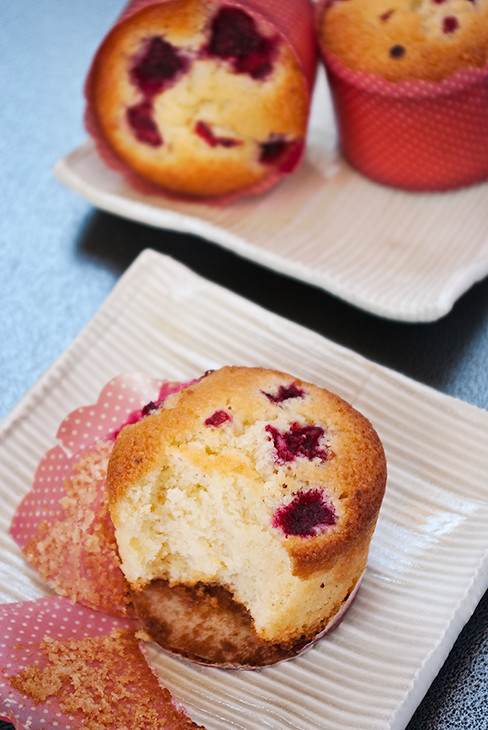
Friands, friands, friands. I'm never sure what I think about you, sure you're simple to make but you demand expensive ingredients such as almond meal and berries. Yes, you're a good way to use up excess egg whites but are you really worth it? Apparently my friends think you are, I still remain unsure.

Friands are an Australian and New Zealand treat, but like most things they're an adaptation of something else. Apparently they're based off financier; my source for this information is, naturally, wikipedia. Any information beyond this little snippet of trivia is hard to find.

In Australia you can buy tins specificity for making friands, they're typically oval shaped. However, it's not the shape that makes a friand a friand, it's the ingredients. Friands come in many shapes and sizes - why the oval shape has become associated with the friand I have no idea. I personally prefer to bake mine in cute paper cases because they're so easy to clean up when you've finished as there's no tray, except for a flat baking tray, to wash up.

07_10---Raspberry-Friands-3

I think these friands could use the addition of coconut, however everyone I mentioned this idea to shook their heads at me and said "no!" rather loudly. Next time I'll make them with coconut and we'll see how everyone reacts.

Raspberry & lemon friands

(adapted from Use Real Butter)
makes approximately 8

125g (4 oz) unsalted butter
110g (1 cup) almond meal
235g (1 2/3 cups) icing sugar
115g (3/4 cup) plain flour
1/2 teaspoon baking powder
1 teaspoon finely grated lemon zest
5 egg whites
45g (1/3 cup) frozen raspberries

Preheat oven to 180°C (350°F), place paper baking cups on a flat tray.

Melt butter in a small saucepan over low heat. Cook the butter until it is light golden in colour, remove from heat and set aside.

Combine the almond meal, icing sugar, flour, baking powder, and lemon zest in a medium bowl and whisk to combine. Stir in the egg whites and mix until well combined. Pour in the butter and stir until completely combined.

Spoon batter into paper baking cups, filling each cup just over 3/4 full. Scatter a few berries on top of each friand, resist pushing them into the batter. Bake friands for 15-20 minutes, or until they are golden on top. Cool on a wire rack.

Saturday, June 12

Poached pears with pain d'epice

poached pears with pain d'epice

Everyone seems to have a different way of poaching pears using completely different ingredients. I've tried a number of recipes some that use wine and some that don't, and this is my favourite. The poaching liquid can be made with or without wine, depending on what what happen to have on hand. I've done it both ways and have been equally happy with the taste.

Pears are one of my favourite fruits for cooking, I love the texture they get after they've been cooked and how the simply ooze taste. The great thing about poached pears is that it's incredibly simply to vary the flavours based upon your preferences. These pears taste distinctly of vanilla, cardamom, and lemon - all good things in my books. The original recipe is served with labneh and pistachios. I decided to serve them pain d'epice, making for a warming and spicy combination.

The poached pear recipe comes from Decadence: Desserts by Philip Johnson, which is one of my favourite books. I've made at least half the recipes over a number of years and I've only had one failure which was entirely my fault and still tasted amazing. The book itself isn't very large but the recipes are so good it just doesn't matter.

And now for the Pain d'Epice. traditionally contains rye flour, however I didn't have any in the cupboard so I had to resort to to using wholemeal flour. Texture-wise the top of this is kind of chewy and a little odd. I sliced off the top crust of mine as I didn't like it - the insides are quite tasty though. The aging it for a day or two helps to soften it up but, personally, I would prefer it it were softer from the beginning.

I greased and lined my tin but if I were to make this again I would omit the lining. The texture of the crust is much nicer in the parts that were directly in contact with the sides of the tin. I'm sure someone wiser than me knows why this is the case but until they tell me, I can't explain it!

Poached pears with pain d'epice

Poached pears

(adapted from Decadence: Desserts by Philip Johnson)

250ml (1 cup) water
250ml (1 cup) Sauvignon Blanc
300g (2 1/3 cups) caster sugar
4 cardamom pods, lightly crushed
1 cinnamon stick
2 star anise
Zest of half a lemon
1 vanilla bean, split lengthways, seeds scraped
3 medium sized ripe but firm pears

Combine the sugar, water, and wine in a medium sized saucepan over a medium heat and stir until the sugar has dissolved. Add the cardamom, cinnamon stick, star anise, lemon zest, vanilla bean, and vanilla seeds. bring to the boil, then reduce heat and simmer for 5 minutes.

Meanwhile, peel, halve, and core the pears leaving the stems intact.

Reduce the heat to low, add the pears, then cover with baking paper and a plate to keep the pears completely submerged. Poach gently for 12-15 minutes, or until tender. Using a slotted spoon, transfer the pears to a bowl, then pout half the poaching liquid over them. Set aside to cool.

Strain the remaining poaching liquid through a fine sieve and return to a saucepan over a medium heat. Discard the aromatics.

Bring the poaching liquid tot he boil, then reduce the heat and simmer until reduced by one-third. Set aside until required.

Pain d'epice

(adapted from Chez Panisse Desserts by Lindsey Shere)
makes one 23cm (9-inch) loaf.

160ml (2/3 cup) hot water
120ml (1/2 cup) honey
2 teaspoons granulated sugar
1/8 teaspoon salt
1 teaspoon baking soda
1/2 teaspoon baking soda
2 tablespoons cognac
1/2 teaspoon cinnamon
A pinch of ground cloves
A pinch of white pepper
Peel of 1 small orange
1/2 teaspoon freshly grated ginger
135g (1 cup) wholemeal flour
85g (3/4 cup) plain flour
70g (1/2 cup) lightly toasted, un-blanched almonds, coarsely chopped

Preheat oven to 200°C (400°F), grease a 23cm (9-inch) loaf pan.

In a large bowl, combine the 1/2 the wholemeal flour and 3/4 of the plain flour, whisking to combine.

Measure honey into a large jug and pour the hot water over, stirring well to combine. Stir in the sugar, salt, baking soda, and baking powder. Add the cognac, then all the spices and the orange peel.

Make a well in the center of the combined flours, and gradually whisk in the honey mixture, taking care that no lumps form. Whisk in the remaining flours, combine until the batter is just smooth. At this point, according to the recipe, the batter can be covered and set aside in a cool place for up to 5 days to age.

Just before baking, add the shopped almonds and stir until completely mixed. Scrape the batter into the prepared loaf pan. Bake in preheated oven at 200°C (400°C) for 10 minutes, then reduce the heat to 180°C (350°F) and continue to bake for 50 minutes or until well done an a skewer cones out clean.

Once cooked, remove the loaf from the pan and cool on a wire rack. brush loaves with warmed honey. Once cool, wrap the Pain d'Epice in plastic and age for 1-2 days before serving.

Friday, April 16

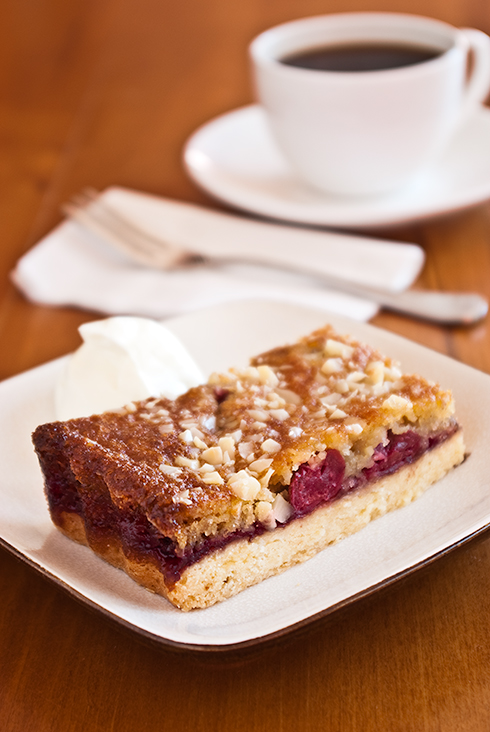
Cherry & almond slice

cherry and almond slice

Sour cherries are something I will one day try fresh. I've had sour cherry jam, sour cherry juice, sour cherry pie filling but I have never ever seen a fresh sour cherry. I'm sure they're available somewhere in Australia but that somewhere doesn't seem to be near me.

This slice was originally a raspberry slice, so you could very easily turn it back into one if you have raspberries on hand. I didn't, so jarred cherries it was. There's nothing really wrong with jarred cherries in my view but, obviously, fresh everything is better.

The cherries are one of my favourite fruits and yet cherry season somehow passed me by this year. The apricots did the same. Ordinarily summer would have been spent knee deep in apricots and yet I didn't have a single apricot between December and February. Where were all the apricots, I don't know! Summer is now over and autumn is definitely here so it's time to stop lamenting and get back to talking about slices.

04_10---Cherry-Slice-2

I've never really been a slice person, I make slices because other people like slice. Generally they're too sweet, or too dense, or the piece is too big, or too something else of me. This slice is nice, particularly when it's fresh. It's definitely best eaten the day it's made though it's okay the next day.

I made my slice in a loose bottom fluted tart tin, unfortunately a few sections stuck at the sides making a bit of a mess. If I were to make this again I'd follow the recipes recommendations and use a straight sided pan.

Cherry & almond slice

(adapted from Australia Gourmet Traveller, March 2005)
makes 16 slices

Base

100g (3.5 oz) butter, softened
110g (1/2 cup) caster sugar
1 egg
35g (1/4 cup) self-raising flour
150g (1 cup) plain flour
150g cherry jam

Topping

75g butter, softened
165g (3/4 cup) caster sugar
1 egg
1/2 teaspoon vanilla extract
180ml (3/4 cup) buttermilk
1 teaspoon bicarbonate of soda
75g (1/2 cup) self-raising flour
50gm (1/2 cup) ground almonds
200g sour cherries, fresh or jarred
50g almonds, blanched and roughly chopped

Grease the base and sides of a 20x30cm (8x12 inches) lamington pan. Line the base and long sides of the tin with baking paper, allowing the paper to extend 3cm (1 inch) over the long sides. Preheat the oven to 180°C (350°F).

For the base, beat butter and sugar in the bowl of an electric mixer until light and fluffy, around 3 minutes. Add the egg and beat until well combined. Sift the flours over the butter, then stir until combined.

With an offset spatula, spread the batter evenly over the base of the lined tin in a thin layer. Bake for 20 minutes or until light golden. Remove from oven and allow to cool in tin. Spread the cherry jam over the cooled base.

For the topping, beat the butter and sugar until light and fluffy, add the egg and almond extract and beat until just combined.

Add the buttermilk, combined sifted bicarbonate of soda, flour, and ground almonds and stir until smooth. Spoon the batter over the jam mixture in the pan. Place raspberries evenly over the batter then scatter with chopped almonds. Bake at 180°C (350°F) for 35-40 minutes or until the slice is golden and firm to touch. Cool in pan. Serve with whipped cream and coffee.

Sunday, November 8

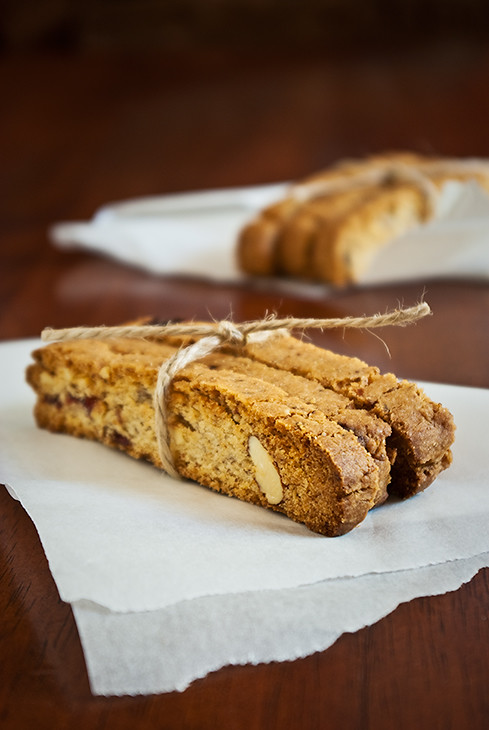
Vegan cranberry & almond biscotti

11_09---CranberryAlmondBiscotti

I'm not very good at vegan baking, in fact every time I start to make something vegan dairy ends up sneaking in in some way or another. I'll accidentally use milk instead of soy milk, I'll choose chocolate with milk in it, I'll make a frosting with butter - you get the gist. I'm not a vegan so it's not really a worry to me.

I've been seeing a number of recipes for vegan biscotti in various books and on various websites recently. In my mind biscotti is something that has to contain eggs, so when I saw a recipe for vegan almond biscotti I decided to give it a shot. I even used soy milk, though I can't stand the taste myself. Once baked, you'd hardly know it was there.

11_09---CranberrysString

Vegan cranberry & almond biscotti

(adapted from Veganomicon)
makes 30

80ml (1/3 cup) almond or soy milk
2 tablespoons ground flaxseed
150g (3/4 cup) sugar
125ml (1/2 cup) canola oil
1/2 teaspoon vanilla extract
1/2 teaspoon almond extract
245g (1 2/3 cup) all-purpose flour
2 tablespoons cornflour
2 teaspoons baking powder
1/2 teaspoon salt
40g (1/2 cup) died cranberries
60g (1/2 cup) almonds, chopped

Preheat over to 180°C (350°F), lightly grease a large baking sheet.

In a large bowl whisk together the milk and flax seeds for about 30 seconds. Add the sugar, oil, and extracts and mix until smooth. Sift in the flour, cornflour, baking powder, and salt.

Stir to mix all the ingredients, and just as a firm dough starts to form knead in the cranberries and almonds. Knead the dought briefly.

On the baking sheet, form the dough into a rectangle about 30 cm (12") long and 10 cm (10") wide. Bake dough for 28 minutes or until lightly puffed.

Remove the tray from the oven and allow to cool for a minimum of 30 minutes or until dough is firm.

Turn the own heat up to 190°C (375°F).

Transfer the cooled dough to a chopping board and using a large, heavy knife slice the dough into 1 cm (1/3") pieces. Do not use a sawing motion when slicing the dough, simply push down on the knife in a single motion.

Place the slices back on the baking sheet and bake for 12-15 minutes or until at the desired level of crispness. Flip biscotti halfway through baking.

Cool on slices trays for a few minutes before transferring to a wire rack. When completely cool, store in an airtight container.

Monday, September 21

Pear & almond tart

09_09---Pear-Tart-3

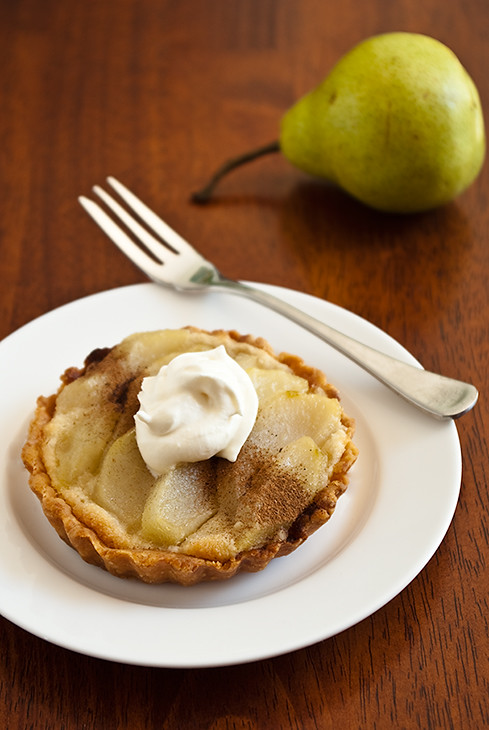
I started this last night after having a real hankering to poach pears, as well to retry the French tart dough recipe by David Lebovitz. I only managed to poach the pears last night, and worked on the tart crust before breakfast this morning. The tart crust works very well, but it's unfortunately not the prettiest thing in the world. Luckily, taste trumps looks any day.

I'm a big fan of pears, which is funny because in the past I would never eat them. Recently I've been wanting to bake pears into everything. There's something wonderful about baked pears that, for me, apples lack. So I headed out, bought some almond meal, and began my adventure. This tart isn't the prettiest in the world, I mostly put it down to my lack of experience so maybe someone else can do better? It's not really a worry though because it still tastes rather good!

Pear & almond tart

(Filling adapted from Simple Essentials: Fruit by Donna Hay)
makes six 10cm (4") tarts

1 quantity French Tart Dough divided into six 10cm (4") tart tins.

Poached pears

750ml (3 cups) water
330g (1 1/2 cups) sugar
1 tablespoon rose water
3 Packham pears, peeled, halved, and cored.

Place water and sugar in a large saucepan over a low-medium heat and stir until sugar has dissolved. Once dissolved simmer for 5 minutes. Start peeling your pears now, if you haven't already done so.

Add pears and simmer for 10 minutes, or until tender. Gently stir in the rose water and simmer for another 5 minutes. Remove pears and cool on paper towel.

Almond filling

35g butter, room temperature
60g caster sugar
1 egg
1 teaspoon vanilla essence
75g almond meal
1 tablespoon plain flour
1 tablespoon water

Cream butter and sugar in a large bowl until light and fluffy. Beat in egg and vanilla essence until thoroughly combined. Fold in almond meal, flour, and water.

Assembly

Preheat oven to 180°C (350°f)

Spoon almond mixture into pre baked tart crusts, slice pears thinly and lay them over the almond mixture, you should have enough pears to cover all six tarts. If you have any extra, slice the remaining pieces even smaller and use them to fill any gaps. The almond mixture should be fairly well covered. Bake tarts for 15-20 minutes or until almond mixture is a faint golden colour. Serve at room temperature with cinnamon and whipped cream.