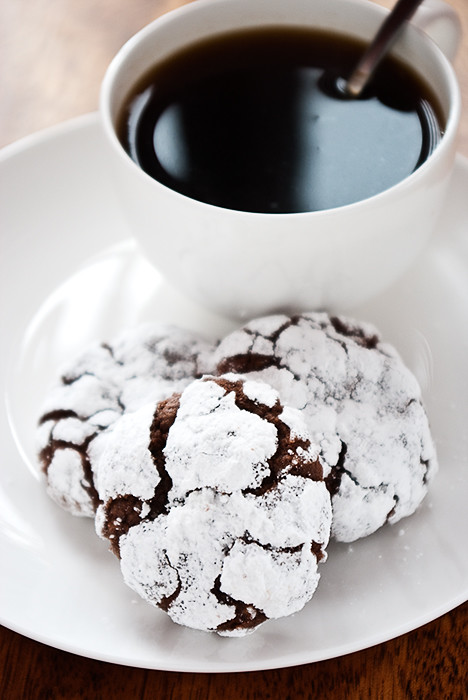
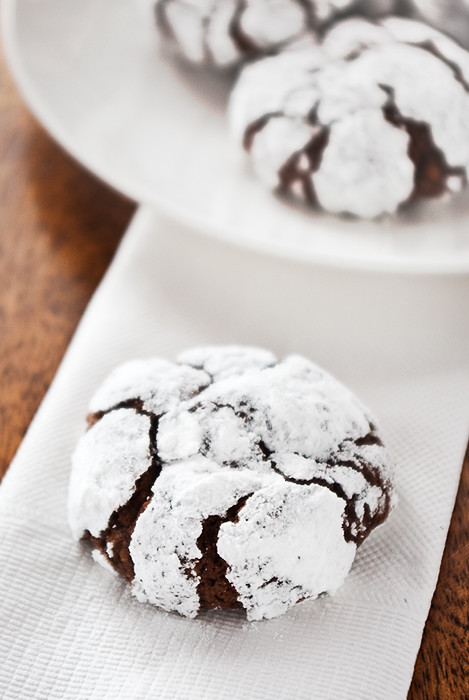
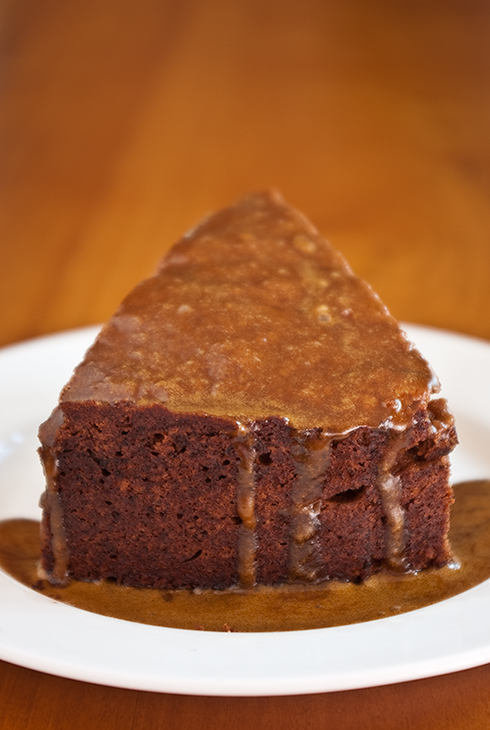
Showing posts with label chocolate. Show all posts

Saturday, March 31

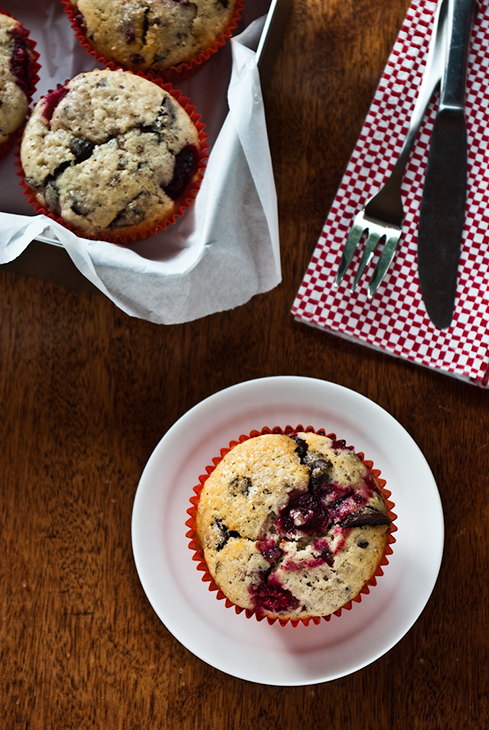
Chocolate and nut muffins

03_12---chocolate-nut-muffins

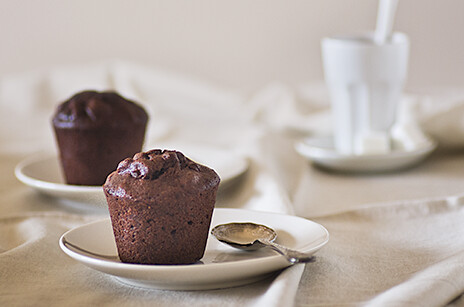
Typically I like my muffins light and fluffy with a crispy top, but there are times when I crave something dense and packed with delicious. Something that feels wicked in a way a light muffin never could. I think for those times I found the perfect recipe.

The recipe for these muffins was originally meant for a loaf tin, but mid-way through making I realised I didn't actually own a loaf tin. I know most people check these things before they start a recipe but, hey, I thought I owned one and the recipe calls for 10 minutes of beating so I figured I could grease and line the pan then.

Not owning a loaf pan didn't strike me as a big deal, I figured I could just make muffins instead... Then I realised I don't own a muffin pan either. Seriously, what kind of kitchen do I have? Fortunately, I do own a lot of dariole tins so I figured they would do, unfortunately they don't fit any of my cute muffin papers. Muffins without cute papers wrapping their bases taste the same but they're nowhere near as cute. So I vowed to buy a muffin tin, which I haven't done yet and probably won't do.
03_12---chocolate-nut-muffins-2

Not one to be deterred by a lack of appropriate equipment I decided to pucker on and boy was it worth it. These are chocolate and nut central. Yum yum.

If you do own the right equipment you can of course make this in a load pan. According to the recipe you'll need a 22cm x 12 cm (9" x 5") loaf pan and you'll need to bake the load for 60-70 minutes rather than 30-40.

Chocolate and nut muffins

  • 210g (1 1/3 cups) all-purpose flour
  • 7 tablespoons Dutch-processed cocoa powder
  • 1/2 teaspoons baking powder
  • 130 (2/3 cup) sugar
  • 140g (5 ounces) almond paste
  • 4 large eggs
  • 2/3 cup milk
  • 65g (1/3 cup) almonds, blanched and chopped
  • 70g (1/3 cup) pecans, toasted and chopped
  • 55g (1/3 cup) walnuts, chopped
  • 85g (3 ounces) bittersweet chocolate, chopped into small chunks
  • 185g (6 1/2 ounces) unsalted butter, melted and cooled

Centre an oven rack and preheat the oven to 180°C (250°F). Grease or line 12 standard muffin cups.

Sift together the flour, cocoa powder, and baking powder.

Put the sugar and almond paste in a mixer fitted with the paddle attachment and beat on medium speed until the almond paste breaks up and mixes with the sugar; it would resemble damp sand. Add the eggs one at a time, beating for about 2 minutes after each addition.

Replace the paddle attachment the paddle with the whisk attachment, increase the speed to high, and beat for 8-10 minutes, until the ingredients have formed an emulsion - the batter should resemble mayonnaise and the whisk will leave tracks.

Reduce the mixer speed to low and add the milk, mix until combine, and then add the dry ingredients. Continue mixing until everything is combined.

Working with a rubber spatula, fold in almonds, followed by the pecans, walnuts, and chocolate. Lastly, gently fold in the melted butter.

Spoon the batter into the prepared muffin tin. Bake for 30-40 minutes, or until a skewer inserted into the middle comes out clean.

Remove the muffins from the oven and let the cakes cool in the tin for 10 minutes before unmolding. Remove the muffins from the tins and cool to room temperature. The muffins can be served the same day, or wrapped in plastic wrap and allowed to 'ripen' for a day before serving.
Friday, February 24

Chocolate orange crème caramel

Untitled-1

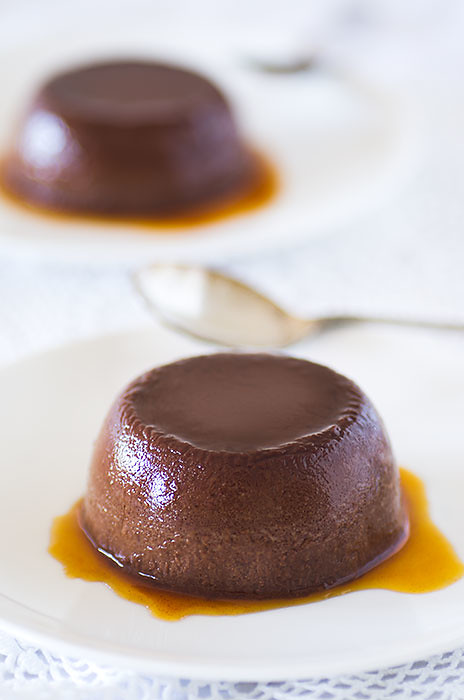
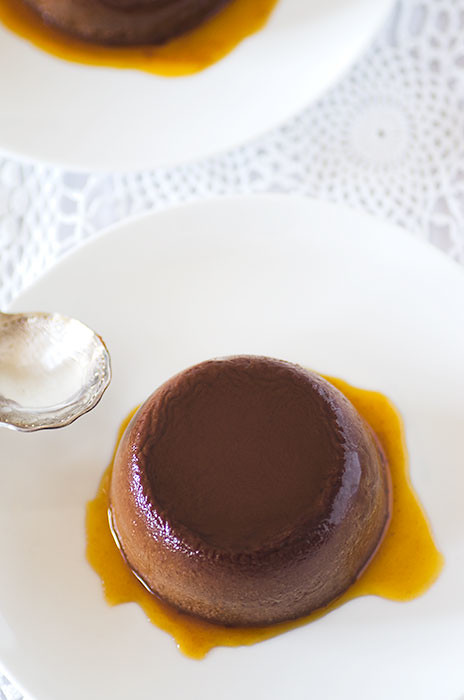
I wish I could make a perfect crème caramel, with beautiful smooth sides and the perfect amount of caramel pooling on the top and around the edges but I can't. I can make a tasty, delicious crème caramel but like most things I make it always has a certain degree of wonky-ness about it. In some ways it's quite charming but in others it's not the desired effect.

I read somewhere that having your caramel perfectly solid when you pour the custard into the ramekin helps achieve the smooth texture. So I attempted that. I poured the caramel into the ramekins, took a shower, got a haircut, and did a little bit of shopping. A few hours later, I made the custard. Surely, I said to myself, the caramel will be set by now and I'll have beautiful, smooth crème caramels.

cremecaramel

Well, apparently not. There must be some other trick I'm missing and if you know it (or any old wives tales about perfect crème caramels) I would appreciate some insight. Because, seriously, mine are pitted like nobody's business. They're adolescent crème caramels and they really want to become smooth skinned adults.

On the plus side though, they are delicious and taste just like jaffas.

Chocolate orange crème caramel

Adapted from The Art and Soul of Baking by Cindy Mushet

Makes four 125ml custards

For the custard
  • 340ml(1 1/3cups) full cream milk
  • 2 tablespoons sugar
  • Zest of 1 orange, grated
  • 2 large eggs
  • 115g (4oz) dark chocolate, finely chopped
For the caramel lining
  • 85ml (1/3 cup) water
  • 135gg (2/3 cup) sugar
  • 1/8 teaspoon cream of tartar
To flavour the custard

Heat the milk, sugar, and orange zest in a medium saucepan over low heat until the mixture begins to simmer. Remove from the heat, cover, and allow to steep for 1 to 1/2 hours, until the orange flavour is strong.

To make the caramel lining

Pour the water into a small saucepan and add the sugar and cream of tartar. Cook over medium heat, stirring constantly, until the sugar has dissolved and the liquid is clear.

Increase the heat to high and boil the syrup rapidly until it turns a deep golden brown. Remove from the heat and immediately divide the caramel among the cups, swirling to distribute the caramel halfway up the sides. Set the cups in a roasting pan and allow to cool for 10 minutes.

To make the custards

Preheat the oven to 160°C (325°F) and position an oven rack in the centre.

Uncover the saucepan of lime-infused milk and place it back over medium heat. Reheat until the mixture begins to simmer.

In a medium bowl, whisk the eggs. pour about 1/2 a cup of the hot milk mixture into the eggs, whisking constantly. Once blended, whisk in another 1/2 cup. Then, slowly pour in the rest of the milk mixture. Add the chocolate and continue to whisk until it is completely melted through.

Strain the mixture into a jug and discard the zest. Divide the custard among the cups in the pan. Pull out the oven rack, place the pan on it, then pout enough boiling water into the pan to come halfway up the sides. Cover the pan in aluminium foil, ensuring it does not touch the top of the cups. Push the rack back into the oven and close the door. Make the custards for 30-40 minutes or until the centres are no longer wobbly

Remove the foil and then the pan from the oven, being careful not to splash water on to the custards. Immediately remove the cups from the water bath and place them on a rack to cool. Once cool, cover in plastic wrap and refrigerate or at least 4 hours, until cold.

30 minutes before serving, remove the custards from the refrigerator and allow them to sit at room temperature. To unmold the custards, run a small knife around the edge of a cup. Place a serving plate over the top, then, holding the two together, invert the. The custard should slide out on to the plate. Repeat until all the custards are unmolded.

Sunday, January 22

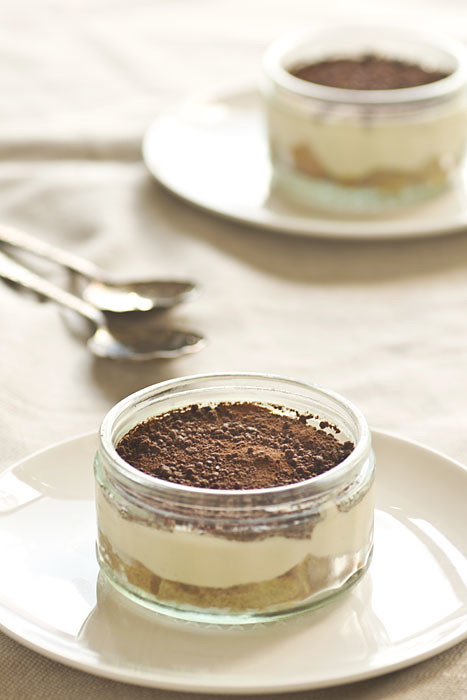
Tiramisu

Until last year I'd never had tiramisu. I'm not quite sure why not, I'd just never tried it. It's such a classic dessert and yet I'd never even tasted it.

Last year I made it, bu never photographed it because it was huge, and in a pie dish, and kind of fell apart when it was dished. It was also all eaten before I got the chance to even attempt to make it aesthetically pleasing.

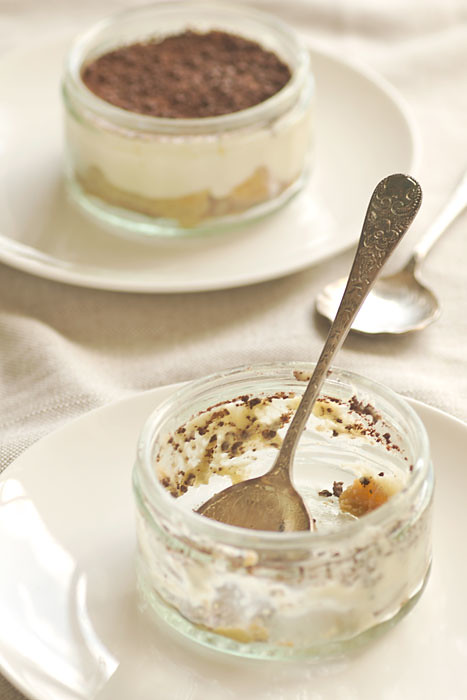
This time, I decided to make an effort to ensure at least some of my tiramisu was dressed up enough to be photographed. As result, my photos are some what misleading. This recipe actually makes a rather large tiramisu and I didn't serve it all in cute, tiny glasses. No, that would have involved a lot of washing up and me actually having enough small, glass ramekins - which I don't.

I don't know if this is the best tiramisu recipe out there as I have no benchmark to compare it to. However,, my untainted palette thinks this is very good, extremely rich, and best enjoyed in small to medium quantities with friends.

Tiramisu

From Goons with Spoons

Makes one 22cm x 33cm (9" X13") cake

  • 4 eggs, separated
  • 250ml (1 cup) heavy cream
  • 110g (1/2 cup) white sugar
  • 125ml (1/2 cup) port
  • 250ml-500ml (1-2 cups) espresso or strong coffee
  • bittersweet chocolate, grated
  • mascarpone cheese
  • about 30 ladyfingers

Add two teaspoons of sugar to the hot coffee, set aside to cool.

In a heatproof bowl, whisk the egg yolks by hand until they lighten in colour, about 2-3 minutes. Add the sugar and port, whisk until completely incorporated.

Simmer about an inch of water in a small pot, place the bowl of egg yolk mixture on top; make sure the bottom of the bowl is not touching the water. Heat the egg yolk mixture, whisking the entire time. Allow the custard to thicken to ribbon stage, about 5 minutes, it should fall off the whisk when you lift it and remain on top of the custard for a moment.

In a large bowl, beat the mascarpone until smooth. Add the custard and whisk to combine.

In a separate bowl, whisk the cream to soft peaks. Fold the cream into the mascarpone mixture; ensure there are no streaks in the mixture.

In a clean bowl, beat the egg whites to firm peaks. Fold the beaten egg whites into the mascarpone mixture. Set aside.

Pour the coffee into a medium sized shallow bowl. Place the dish you'll be putting the finished tiramisu in next to the bowl of coffee. Dip a ladyfinger into the coffee for a second, flip the ladyfinger to the other side for another second, then pull it out and place it in the serving dish. Try to avoid letting the coffee drip off the ladyfinger. Repeat until you have a layer of ladyfingers covering the bottom of the serving dish.

Spread a generous layer of mascarpone cream over the top of the lady fingers. Sprinkle the cream with a layer of chocolate. Repeat with another layer of ladyfingers, cream, and chocolate. Cover the tiramisu and refrigerate for 3 hours.

Tuesday, May 10

Fudgy brownies

05_11---Brownies

Daylight savings is the bane of my existence sometimes. I really, really want to photograph what I make, talk a walk round the lake, feed the ducks, and generally enjoy the sunshine but I can't because as I drive home everyday the sun is rapidly sinking behind the horizon and often by the time I get out of the car it's completely gone.

As I'm by no means an early riser the entire point of daylight savings is lost on me. When I leave for work, daylight savings for not, it's light anyway. I would much rather it were light(ish) when I returned home. Still, no point whining as someone out there probably benefits from it and even if I don't at least I have a window at work. Better windows then I have at home, in fact. I wish I could take my photos there but that would be really, really weird.

05_11---Brownies-3-Edit-copy

So daylight savings makes it does make it hard to get things that require light done. And as I don't own any lighting equipment and can hardly justify buying any it means so many things I make neve g et photographed.

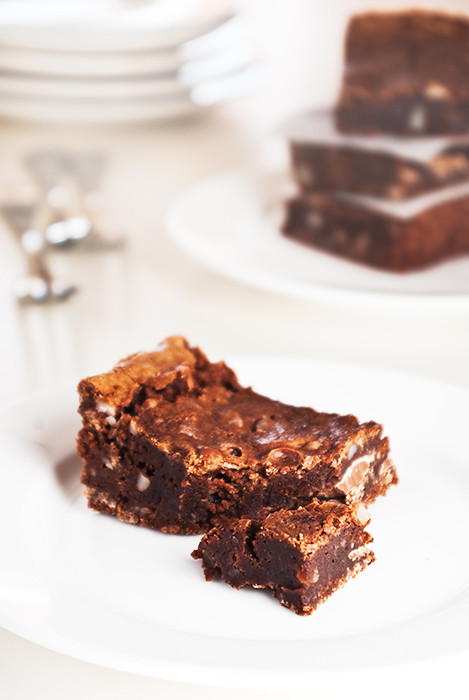
Anyway no point whining because, as you can probably see, there's brownies to be had. Tasty, tasty, fudgy chocolate brownies. Yum. It might be cold and dark but it's totally okay.

Fudgy brownies

(From The art and soul of baking by Cindy Mushet)
Makes one 20cm (8") brownie

115g (4 oz) unsalted butter
115g (4 oz) bitter-sweet chocolate
55g (2 oz) unsweetenedchocolate
200g (1 cup) sugar
2 eggs, at room temperature
1 1/2 teaspoons vanilla extract
70g (2 1/2 oz) plain flour
pinch of salt
105g (3 3/4 oz) chocolate chips or chunks
55g (2 oz) macadamia nuts

.

Preheat the oven to 180°C (350°F). Line a 20cm (8") cake pan with baking paper across the bottom and up two of the sides, then lightly coat with non-stick spray

Bring 5cm (2") of water to the boil in a saucepan. Place the butter, bitter-sweet chocolate, and unsweetened chocolate in a heatproof bowl and set it over the water. Turn off the heat and stir the chocolate until it is melted and the mixture is smooth.

Remove the chocolate mixture from the heat and whisk in the sugar. Whisk in the eggs, one at a time, stirring well to incorporate. Whisk in the salt and flour. Stir until the batter turns from dull and broken to smooth and shiny. Whisk in the chocolate chips and nuts.

Scrape the batter into the prepared tin and spread evenly. Bake for
35 to 40 minutes or until a skewer inserted into the middle comes out with a few moist crumbs clinging to it. Transfer to a rack and cool completely.

When the brownie is cool, run a thin knife around the edges of the pan. Grasp the edges of the baking paper and gently pull upward. Set the brownies on a cutting board and slice into 16 even pieces, then serve or store in an air tight container for up to 3 days.

Saturday, March 19

Chocolate, walnut, & hazelnut macaroons

03_11---choc-hazelnut-macaroons

I'm on a mission. That mission is to find the best biscuit made with egg whites and no yolks. The problem is, I don't even know where to start. Sure, I can make macarons, macaroons, or tuiles but I'm after something more homely. Something more biscuit-y; something squishy and awesome.

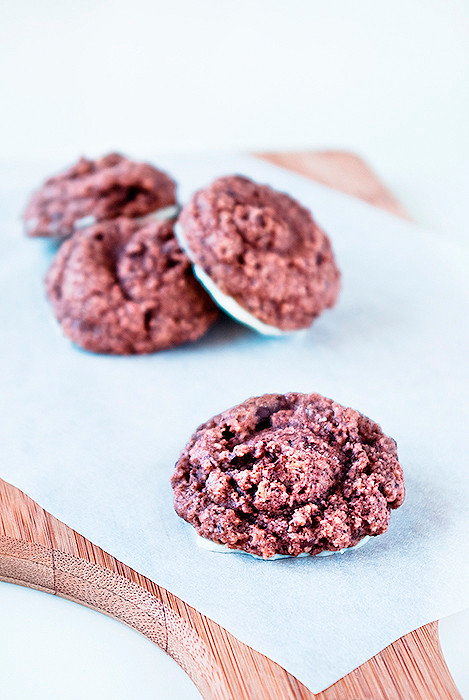
There biscuits aren't quite there but they're pretty good. I mean, with chocolate, almonds, and hazelnuts you can't exactly go wrong. They're somewhat squishy but not biscuit-y enough for me. But that's okay because my hunt has only just started, and it wouldn't be much fun if my quest was over after the first attempt, would it?

So if any of you lovely people out there have recipes for biscuits that use egg whites but no egg yolks send them my way! I'm super keen to give whatever wonderful recipes you have a shot.

03_11---choc-hazelnut-macaroons2

Chocolate, walnut, & hazelnut macaroons

(adapted from Biscuits and Macaroons by the Australian Women's Weekly)
makes about 20 biscuits

100g almond meal
100g hazelnut meal
2 egg whites
110g (1/2 cup) caster sugar
1 teaspoon vanilla
1 tablespoon gluten free flour
4 teaspoons cocoa powder
90g (3 oz) dark chocolate, finely chopped
60g (2 oz) white chocolate

Preheat the oven to 150°C (300°F). Grease two oven trays and line them with baking paper.

Beat the egg whites until soft peaks form, gradually add the sugar, beating until dissolved after each addition. Stir in the vanilla extract, sifted flour, ground almonds & hazelnuts, and chopped chocolate in two batches.

Transfer the resulting batter into a piping bag and pipe evenly sized rounds about2.5cm (1 inch) in diameter on to the prepared trays. Bake for about 25 minutes, then cool on trays.

Once cool, melt the white chocolate, and spread over the bases of the macaroons. Place chocolate side down, on a tray lined with a fresh piece of baking paper and stand at room temperature to set. Once set, peel from the baking paper and store in an air tight container for up to a week.

Friday, January 21

Chocolate, walnut, & oat biscuits

01_11---Chocolate,-walnut,-and-oat-biscuits

It is so hot right now. It's so hot that after three hours of sitting at room temperature the chocolate on these biscuits has not solidified. When I go to pick one up and end up with melted chocolate all over my hands, not that that's a bad thing, it's just is messy.

In heat like this I'm mad to have the oven on to begin with, especially in a house that lacks all forms of air-conditioning. I don't even own a fan. However, I'm not one to resist a craving for chocolate chip biscuits. There are times when not having chocolate chip biscuits is worse than heatstroke.

Apparently I'm never allowed to make these again as, according to J, they are "too delicious" and it's "impossible not to eat the whole batch". If that's not a seal of approval, I don't know what is. It's safe to say what these biscuits lack in beauty they more than amply make up for in taste.

Chocolate, walnut, & oat biscuits

(from Tartine by E. M. Prueitt & C. Robertson)
makes about twenty-four 6 cm (2 1/2 inch) biscuits

170g (6 oz) bitter-sweet chocolate
145g (1 cup) plain flour
1/2 teaspoon baking powder
1/2 teaspoon baking soda
85g (1 cup) traditional rolled oats
115g (1/2 cup) unsalted butter, softened
175g (1/2 cup + 1/3 cup) sugar
2 teaspoons treacle
1 large egg
1 tablespoon milk
1 teaspoon vanilla extract
1/2 teaspoon salt
60g (1/2 cup) walnuts, coarsely chopped

Coarsely chop the chocolate into 1/2 cm (1/4 inch) pieces using a serrated knife. Place chopped chocolate in a bowl and chill in the freezer until required.

In a mixing bowl, stir together the flour, baking powder, baking soda, and oats.

Using a stand mixer fitted with the paddle attachment, beat the butter on medium high speed until light and creamy. Slowly add the sugar and beat on medium speed until light in the mixture is fluffy and light in colour. Stop the mixer and scrape down the slides as required. Add the treacle and beat until well combined. Add the egg and combine well. Beat in the milk, vanilla, and salt, then stop the mixer and scrape down the sides of the bowl.

Add the flour mixture and beat on low speed until well incorporated. Stop the mixer, scrape down the sides, then fold in the chocolate and walnuts using a spatula.

Turn the dough out on to a surface covered in baking paper. Shape it into a log about 4cm (1 1/2 inches) in diameter. Wrap the log in baking paper or cling wrap and place in the freezer for at least 4 hours, or overnight.

When you are ready to bake, preheat the oven to 180°C (350°F). Line two flat trays with baking paper.

Remove the dough from the freezer and slice it into 1/3cm (1/4 inch) rounds and arrange on the lined baking trays about 4cm (1 1/4 inches) apart. Bake for 8-10 minutes, or until the biscuits are lightly browned but the centres remain pale. Cool on trays for 10 minutes, then transfer to a wire rack.

Thursday, November 25

Spiced éclairs with milk chocolate glaze

Spiced Chocolate Eclairs

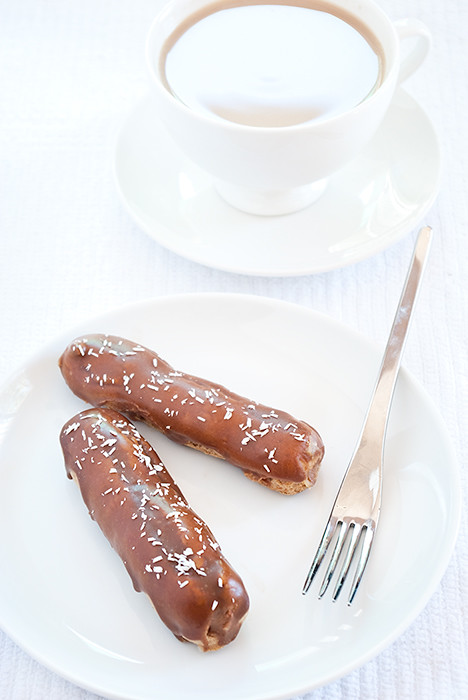
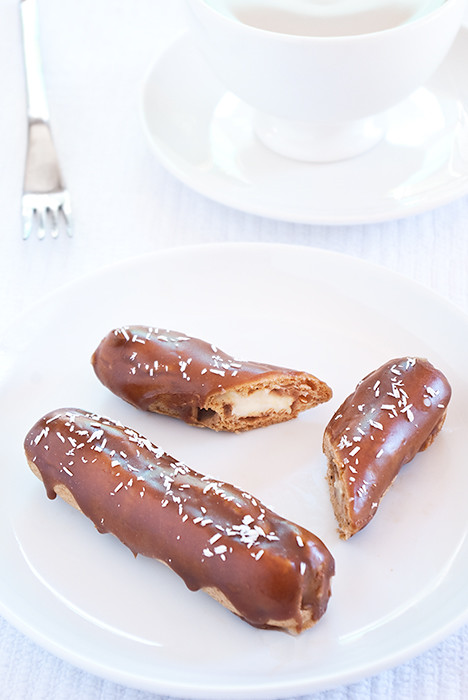
Éclairs, éclairs, éclairs- you much maligned things. It's not your fault you're sometimes deemed as boring or passé. It's really not, and I know those hurtful words are untrue. I hope one day you become as popular as the macaron and there's a global trend to make you in all different flavours and wacky shapes. You deserve it. I wish my rendition of you would start this trend but alas, I have broken no new ground today.

Regardless, these éclairs are all round delicious and incredibly easy. A few months ago I was shocked to discover just how simple choux pastry was. I thought "wow, this couldn't be easier, why was I so afraid?" Little did know an easier recipe does exist because this recipe uses a stand mixer. A stand mixer! You don't even have to bet the eggs into the cooked dough yourself, seriously. It's that simple.

That being said, I actually like the other recipe better but maybe that's because I made it in a better kitchen, with better things, and a better oven. So it just seems better. Or maybe it was just a better recipe - I'm leaning towards the latter.

11_10---Spiced-Eclairs-2

Spiced éclairs with milk chocolate glaze

(adapted from The Art & Soul of Baking)

Vanilla crème pâtissière

375ml (1 1/2 cups) milk
1 vanilla bean
1 large egg
2 large egg yolks
85g (6 tablespoons) sugar
35g (1/4 cup) plain flour
30g (2 tablespoons) unsalted butter, cold

Pour the milk into a medium saucepan. Use the tip of a paring knife to cut the vanilla bean lengthwise. Turn the knife over and use the dull side to scrape the seeds into the saucepan, then add the pod. Heat the mixture until it just begins to simmer. Remove from the heat and let steep for 30 minutes.

Heat the milk to just below boiling point and remove from the heat. In a medium bowl, whisk together the egg, egg yolks, and sugar until well blended. Add the flour and whisk vigorously until the mixture is very smooth. Pour 125ml (1/2 cup) of the hot milk mixture into the yolk mixture, whisking constantly to temper the eggs. Slowly pour the yolk mixture into the remaining hot milk, whisking all the while.

Heat the mixture, whisking constantly to prevent it from lumping, until it reaches a boil. Continue to cook and whisk for another minute, until the pastry cream is very thick. Remove from the heat and whisk in the butter. Strain the cream through a fine strainer set over a medium bowl to remove any lumps.

Press a piece of cling wrap directly on to the surface of the pastry cream, then set aside to cool to room temperature. Once the pastry cream as completely cooled, transfer it to the refrigerator until required.

Pâte à choux

115g (4 oz) unsalted butter, chopping into 1cm (1/2") pieces
250ml (1 cup) water
1/4 teaspoon salt
140g (1 cup) plain flour
1 teaspoon cinnamon
1/4 teaspoon ground cloves
1 teaspoon sugar
4 large eggs, plus one egg extra

Preheat the oven to 200°C (400°F) and position two racks in the top and lower thirds of the oven. Line two trays with baking paper.

Cook the butter, water, and salt in a medium saucepan, stirring from time to time to ensure the butter melts evenly. When the butter as melted, increase the heat and bring to the boil. Immediately remove from the heat and add the flour, cinnamon, cloves, and sugar all at once. Beat vigorously with a wooden spoon until the dough comes together in a mass around it. Place the pan back over medium heat and continue to cook, beating it until the dough has dried out slightly and a thin film forms on the bottom of the pan, about a minute.

Transfer the dough to the bowl of a stand mixer. Beat on medium speed for 1 minute to slightly cool the dough. In a medium bowl, beat the 4 eggs together until you can't distinguish the yellow from the white. With the mixer on medium, add the eggs a couple of tablespoons at a time, allowing each addition to blend completely before continuing. When the eggs are incorporated, the mixer should be shiny and elastic.

Spoon the dough into a pastry bag fitted with a 1.25cm (1/2 inch) plain round tip. Pipe the dough into 12cm (4") by 2.5cm (1") rectangles. To disconnect the flow of dough slice a lightly oiled knife across the opening of the tip.

Lightly beat the remaining egg to blend thoroughly. Brush a light coating over the top of the piped dough, being careful that the egg does not drip down the sides as it will glue the eclairs to the baking paper. Bake both trays of eclairs for 20 minutes, then reduce the temperature to 180°C (350°F) and switch the trays between the racks. Bake for a further 20 minutes. Reduce the oven temperature again, to 150°C (300°F) and bake for 10-15 minutes longer to dry out the insides. The éclairs should be deep brown. Remove from the oven and transfer the eclairs to a rack to cool.

When completely cool, spoon the crème pâtissière into a clean and dry pastry bag fitted with a bismarck or plain 0.5cm (1/4") plain tip. If using a bismarck tip, make a small hole in one of the short ends of the éclair. Then, insert the end of the bismarck as far as it will go. Squeeze firmly as you slowly pull the tip out of the pastry. If using a plain tip, make two evenly spaced holes in the bottom of an éclair with the tip of a paring knife. Insert the plain tip into each one, squeezing firmly to fill the centre. Repeat to fill remaining éclairs.

Milk chocolate glaze

115g (4 oz) milk chocolate, finely chopped
125ml (1/2 cup) heavy whipping cream

Place the chocolate in a small bowl that is wide enough to accommodate an éclair. Bring the cream to the boil in a small saucepan. Immediately pour over the chocolate and let the mixture sit for 1 minute. Whisk the mixture until it is completely smooth and blended. Cool for 10 minutes before using.

Turn the éclairs upside down, dip the top of each one halfway into the chocolate glaze, then lift it and let the excess drip back into the bowl. Set the éclair right side up on a serving platter or lined baking tray and allow to set for 30 minutes. Refrigerate until required.

Saturday, November 6

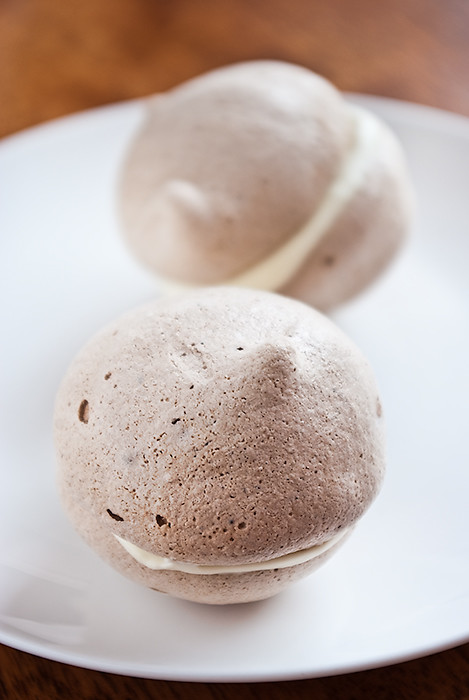
Chocolate-orange meringues with orange cream

11_10---Choc-meringue-3

So, needless to say I never got around to photographing my birthday cake which is a real pity because it was rather epic. On the plus side, it does mean I need to make it again some time in the future. Assuming I can afford all the ingredients; half a kilo of good chocolate, twelve eggs, and four cups of cream are not the core ingredients for a cheap cake. Nor are they the ingredients for a cake that you should consume on a regular basis, through part of me would like to try.

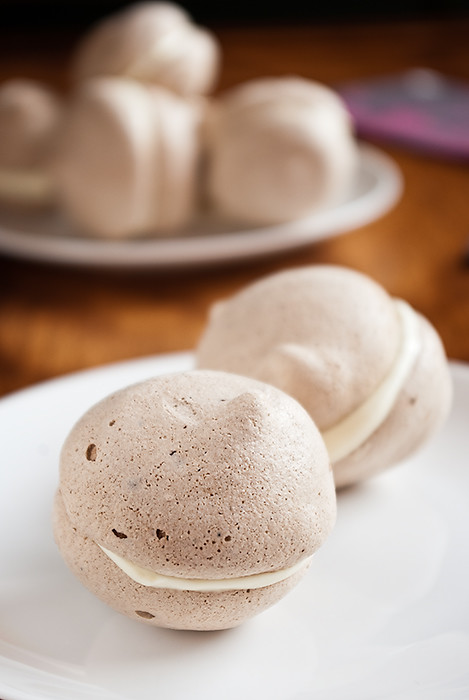
This cake of mine left me with a fair few egg whites to use up - so what better way than meringue? Especially considering prior to making these I had never made meringue before. Sure, I've made meringue based icings and what not but never meringue that is nothing more than meringue.

11_10---Choc-meringue

That said, I'd like to think that these are more than meringue because they are! They're meringue filled with cream. Admittedly that's really not a huge step up from plain old meringue but it's a step nonetheless. A small step for a small person, I guess.

Speaking of small steps - in about two-and-a-half weeks I have finished my degree. That's four years of degree over in a matter of weeks. Can anyone recommend any good celebration desserts? If they're somehow related to the number four, even better. Maybe your favourite four ingredient dessert, or maybe a cake that somehow uses four cups of cream? Help is appreciated!

Chocolate-orange meringues with orange cream

makes about 20

Chocolate-orange meringues

(adapted from Macaroons & Biscuits by the Women's Weekly)

3 egg whites
155g (3/4 cup) caster sugar
1 tablespoon sifted cocoa powder
2 teaspoons orange rind, finely grated
2 teaspoons orange liqueur

Preheat oven to 120°C (250°F), grease oven trays and line with baking paper.

Beat the egg whites in the bowl of an electric mixer until soft peaks form. Gradually add the sugar, beating until dissolved between each addition. Fold the cocoa powder, orange rind, and liqueur through the egg whites.

Transfer the mixture to a piping bag, then pipe equal sized rounds onto the lined trays. Bake for 1 hour, then cool on trays.

Orange cream

(adapted from Gourmet Traveller, July 2007)

65ml milk
2 tablespoons freshly squeezed orange juice
1 tablespoon Grand Marnier
3 pieces orange rind
1 egg yolk
60g (1/4 cup) caster sugar
15g (4 teaspoons) cornflour
100ml (3.4 fl. ounces) double cream

Combine the milk, orange juice, Grand Marnier, and orange rind in a small saucepan and bring to just below the boil. Remove from the heat and set aside for 15 minutes to infuse.

Combine the egg yolks and sugar in a bowl and whisk for 1-2 minutes, add the cornflour and whisk to combine.

Reheat the milk to just below the boil, then strain over the egg mixture, whisk to combine then return to the pan and whisk over medium heat for 3-4 minutes, or until thick and smooth. Transfer to a bowl, cover with plastic wrap and cool. When completely cold, whisk in the cream. Continue whisking until thick and smooth. Refrigerate until required.

Assembly

Using a teaspoon, scoop out the centre of the meringues and set aside. Fill a piping bag with orange cream, and pipe enough cream to fill the hole in the meringue. Sandwich two filled sides of meringue together and refrigerate until required.

Thursday, October 21

White chocolate & blueberry muffins

10_10---Blueberry-Lemon-Muffins

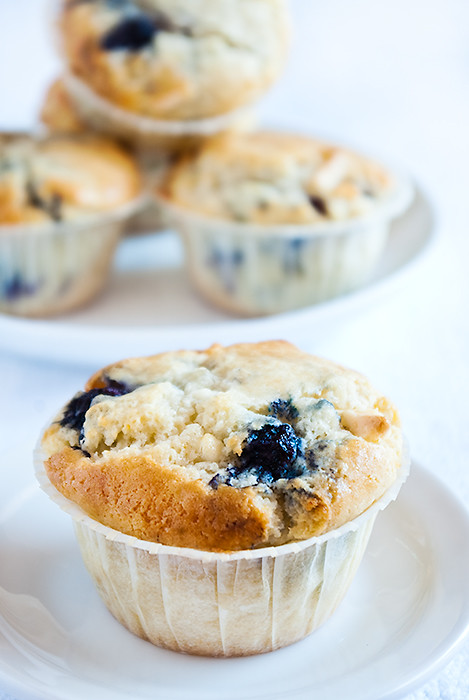
Stress baking can take two forms. When you stress bake you can either make something super complicated and inevitably mess it up a lot, or you can make something incredibly simple and mess it up but only a little bit. Yesterday I opted for the latter - what I ended up with were these muffins which, despite my small mishap, are delicious and fill some kind of void in my stomach.

I'm sure I'm not the only one who stress bakes (or cleans, or sews.) Stress baking helps to take my mind off whatever is causing the stress. And I end up with something to eat too - something that too often gets forgotten when I'm stressed or worried. We all have bad habits.

Stress baking is the same as nervous baking, which is the same as worry baking. They're all caused by different things but the result is essentially the same. Regardless of what brings on the kitchen frenzy, the result is always something tasty with something ever so slightly wrong with it. I do all these kinds of baking but mostly I do 'for fun' baking.

Truthfully, I wasn't stress baking at all yesterday. I was nervous/excited baking. Nervous baking is better than nervous giggling because no one else knows you're doing it.

What do you know when you're stressed or nervous about something?

So, this recipe is incredibly simple and will probably become one of my go to recipes when I need something quick and easy. When I made mine I accidentally doubled the oil, the recipe I've included has the correct amount of oil. If you do, for some reason, put in twice as much oil, don't worry, your muffins will be fine.

(Also, yesterday was my birthday which would make me 22 now. I'm currently making an awesome mousse cake - expect pictures!)

White chocolate & blueberry muffins

(adapted from Simple Essentials: Chocolate by Donna Hay)
makes 9 small muffins

150g (1 cup) self-raising flour, sifted
80g (1/3 cup) caster sugar
125ml (1/2 cup) sour cream
1 egg
1/2 teaspoon finely grated lemon zest
30ml (1/8 cup) vegetable oil
125ml (1/2 cup) milk
1 cup frozen blueberries
1/2 cup chopped white chocolate

Preheat oven to 180°C (350°F). Line 10 standard (125ml, approx) muffin cups with papers.

Place the flour and sugar into a bowl and mix to combine. Combine the sour cream, egg, lemon zest, vegetable oil, and milk in a separate bowl and whisk together. Stir the sour cream mixture into the flour mixture until just combined. Fold through the blueberries and white chocolate.

Spoon the batter into the muffin tins, then bake for 25-30 minutes or until a skewer inserted into the centre of a muffin comes out clean.

Sunday, September 26

Walnut & coffee biscotti with white chocolate

09_10---Walnut-&-Coffee-Biscotti-2

It's been a week of baking failures, first I tried to make baked ricotta cheesecake (disaster!) and then I tried to make chocolate and beetroot cake (even more of a disaster!) So, needless to say, I was feeling rather disheartened. It's not fun to fail!

So, to cheer myself up I decided to make something that couldn't possibly go wrong - biscotti. Luckily for me, nothing did go wrong and I redeemed myself in the eyes of well... myself.

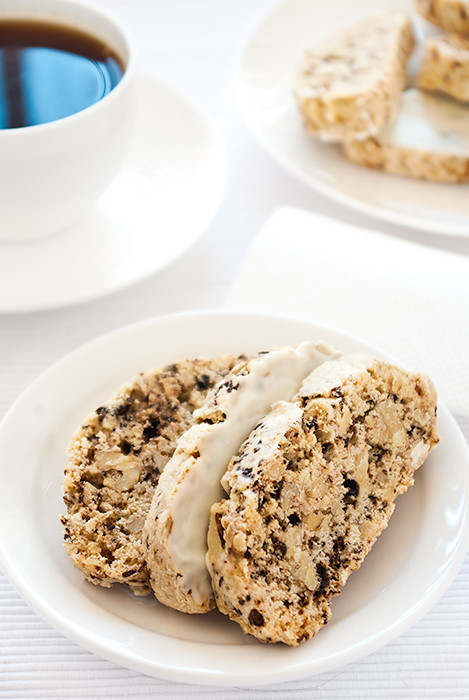
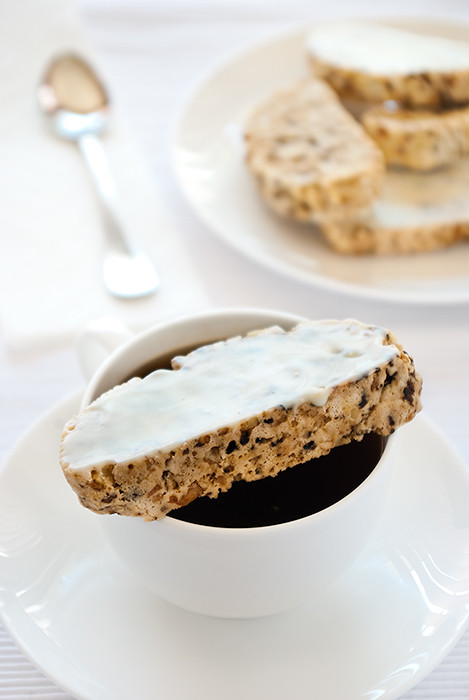
I love biscotti, there's something lovely about it. Maybe it's the fact that it needs to accompany a cup or tea or coffee, two things that I rather like. This biscotti isn't bad, but it's certainly let down by the fact that it contains instant coffee, however I'm not sure how to get the coffee flavour and the speckled look without using it. This biscotti is certainly pretty and the use of white chocolate rather than dark makes it deliciously sweet - nicely offsetting the bitterness of the coffee.

If you don't mind the instant coffee taste, this biscotti is rather good. Dripped in coffee it makes for a tasty, tasty afternoon treat.

09_10---Walnut-&-Coffee-Biscotti

Walnut & coffee biscotti with white chocolate

(adapted from Biscuits and Macaroons by the Australian Women's Weekly)
makes about 20

110g (1/2 cup) caster sugar
1 egg
75g (1/2 cup) plain flour
35g (1/4 cup) self-raising flour
4 teaspoons instant coffee
100g (1 cup) walnuts, coarsely chopped
60g (2 oz) white chocolate

Preheat the oven to 180°C (350°F), line an oven tray with baking paper.

Whisk the sugar and egg in a medium bowl until combined. Sift the flours over the egg mixture, then stir through. Stir in the coffee granules and walnuts. Shape the dough into a 20cm (8 inch) log and place it on the prepared tray. Bake for 30 minutes, then cool on tray.

Reduce the oven to 150°C (300°F).

Using a serrated knife, cut the log diagonally into 1cm (1/2 inch) slices. Place the slices, in a single layer on to the tray. Bake for 30 minutes, turning the biscotti halfway through so ensure both sides are cooked. Cool on wire racks.

Melt chocolate in a heatproof bowl over freshly boiled water. Spread one side of each biscotti and stand at room temperature until set. Serve with coffee.

Thursday, August 19

Mexican chocolate crackle biscuits

08_10---Mexican-Crackle-Biscuits2

Dear internet, meet my new favourite biscuit. New favourite biscuit, meet the internet. Don't be shy, introduce yourself. It's not that hard to say "hi, all name is Mexican chocolate crackle biscuit".

I've developed quite and affinity for these biscuits, just looking at them makes me feel pleasant. It's not an irrational attraction I'm feeling towards these biscuits either. My attraction is perfectly justified; these biscuits are darn good.

I bookmarked this recipe many months ago with the intention of making them as soon as I could. Needless to say, like many of my plans, I never got around to it. In the meantime I made many other things. The truth is, I completely forgot about my plans to make these biscuits. I wish I hadn't.

08_10---Mexcian-Crackle-Biscuits

I've made biscuits that look just like these before but they were never as good as these are. I think I could eat a whole batch of these myself, but I won't because I fear my teeth will fall out. The wonderful combination of chocolate, cinnamon, and ancho chile keeps me coming back for more. Not to mention the sugar, oh the sugar. There's nothing good for you about these biscuits but they taste so lovely that it's completely ok.

I think next time I have an event of some form I'm going to hand these out as thank you for coming presents. That way more people will get to try them. Spread the love, or something.

Mexican chocolate crackle biscuits

(adapted from The Art & Soul of Baking)
makes about 20 biscuits

20g (1 1/2 tablespoons) butter
2 teaspoons coffee liqueur
85g (3 oz) bitter-sweet chocolate, roughly chopped
1 large egg
50g (1/4 cup) granulated sugar, plus 50g (1/4 cup) extra
50g (1/3 cup) all-purpose flour
45g (1/4 cup) whole almonds, lightly toasted
1/2 teaspoon cinnamon
1/4 teaspoon baking powder
1/4 teaspoon anco chile powder
45g (1/3 cup) unsifted icing sugar

Bring 5cm (2in) water to the boil in a small saucepan. Place the butter, liqueur, and chocolate in a heat-proof glass bowl. Turn off the heat, then set the glass bowl over the steaming water. Stir with a spatula until the mixture is smooth. Remove from saucepan and let cool slightly whilst you whip the eggs.

Place the eggs and 50g (1/4 cup) of the granulated sugar in the bowl of a mixer and whip, on high speed until the mixture is very light in colour, about 5 to 6 minutes. Scrape the melted chocolate mixture into the eggs and whip until well blended, about 1 minute. Scrape down the bowl.

Place the flour, nuts cinnamon, baking powder, and chile powder in the bowl of a food processor and process until the nuts are finely chopped, about 60 to 90 seconds. Add the flour mixture to the eggs and beat on low speed until just combined. Stir mixture gently with a spatula to ensure all the flour is incorporated. At this point the dough should vaguely resemble a thick mousse. Cover the bowl and refrigerate for 1 to 2 hours, or until firm.

Preheat the oven to 160°C (325°F), line a biscuit tray with baking paper.

Roll tablespoon sized amounts of dough into balls. Place the remaining 50g (1/4 cup) of granulated sugar in a small bowl and the icing sugar in another. Roll each ball of dough in the granulated sugar and then in the icing sugar. Be generous with the icing sugar, ensuring that each ball enough is cover with enough icing sugar so that you cannot see the dough underneath. Space the balls 5cm (2in) apart on the baking trays.

Bake the biscuits for 11-14 minutes, rotating the tray halfway through. The biscuits should be puffed and cracked when they are fully baked, if you nudge them they should slide on the tray rather than stick. Transfer to a wire rack and let cool completely.

Tuesday, June 1

Dark chocolate & raspberry muffins

dark chocolate raspberry muffins

Muffins are hard to photograph. They're not inherently pretty in the same way layered cakes, individual tarts, and cupcakes are. Muffins are kind of messy and don't have a singular defining visual feature - or at least mine don't.

Nevertheless, what they lack in visual beauty they often make up for in taste.These muffins aren't elegant or stunning but they are amazingly tasty. They're packed full of raspberries and chocolate, two things that never fail disappoint me.

When I making these I honestly doubted that I would be able to fit all the raspberries in but I could and I did. Each muffin has around eight raspberries and a whole bunch of chocolate. Eight doesn't sound like that many raspberries but bear in mind that these are cooked in a standard muffin tin.

I used demerara sugar to sand the tops of these though, if you don't have any on hand, you can use raw sugar as suggested by the original recipe. I prefer the taste of demerara sugar and I think the large grains are quite beautiful. My muffins had quite a crisp top, I imagine raw sugar would give a similiar texture.

Truthfully, I don't really have much else to say about these muffins. They speak for them-self.

Dark chocolate & raspberry muffins

(adapted from Bourke Street Bakery by Paul Allam & David McGuinness)
makes 10 standard muffins

265g (1 + 3/4 cups) plain flour
1 + 1/3 teaspoons baking powder
200g (1 cup) caster sugar
205 (7.2 oz) butter
320ml (1 + 1/3 cups) buttermilk
2 eggs
150g (5 oz) dark chocolate, roughly chopped
140g (5 oz) raspberries, fresh or frozen
55g (1/4 cup) demerara sugar

Preheat the oven to 190°C (375°F). Line a 12-hole standard muffin tin with paper cases.

Place the flour, baking powder, and sugar in a bowl and whisk well to combine.

Melt the butter in a small saucepan over a low heat, then remove from the heat and stir in the buttermilk. Using a whisk, stir in the eggs, one at a time, whisking to combine. Pour the buttermilk mixture over the dry ingredients and whisk to combine, using a large spoon, gently fold through the chocolate.

Using a 1/4 cup spoon mixture into prepared muffin tins. Cover each muffin with raspberries, pressing them into the batter slightly. Spoon remaining batter over the raspberries. Sprinkle the tops with demerara sugar.

Reduce the oven temperature to 180°C (350°F) and bake for 25-30 minutes or until the muffins are well risen and firm.

Remove muffins from the oven and allow to cool for 10 minutes before eating. Muffins are best served warm.

Sunday, March 28

Caprese with coffee glaze

Caprese with Coffee Glaze

I'm not a fancy person most of the time, I like my food simple but delicious. I like my cake rich but not too sweet. I like this cake, a lot. Especially with the coffee glaze, coffee and chocolate is a combination that can't be beat.

This cake is moist, dense, and chocolate-y. All good things, it's perfect with a cup of coffee. It belongs in a café. I would love to have a café near my house that served cake like this one. My wallet, on the other hand, would not.

I'm finding more and that I cannot justify buying cakes from cafes. The knowledge that most of them are factory produced and shipped over 1000 kms (600 miles) to cafes in my city (rightfully) horrifies me. I think this speaks volumes of many of the cafes in my city that, undoubtedly, make delicious coffee but insist on serving awful mass produced cake. It makes me feel like such a snob but I can't help it. I suppose this isn't really a bad thing to be snobby about though!

03_10---Chocolatecake

Caprese with coffee glaze

(from The Four Seasons of Italian Cooking by A.J. Battifarano and Alan Richardson)
makes 8-10 servings

115g (4 ounces) semisweet chocolate
115g (4 ounces) butter
75g (1/2 cup) sugar
4 large eggs, separated
1 cup ground almonds
1/3 cup all purpose flour

Preheat oven to 180°C (350°F) degrees. Butter a 20 cm (8") round cake tin and line the base with a round of baking paper. Butter the paper and lightly coat the pan with flour.

Melt the chocolate in a double boiler over barely simmering water and let cool to room temperature.

Beat the butter and sugar in a large bowl with a electric mixer at a high speed until it is light anf fluffy. Beat in the egg yolks, one at a time. Combine the almonds with the melted chocolate and blend the mixture into the batter. Add the flour and mix on a low speed until completely combined. Wash and dry the beaters.

In a separate bowl, beat the egg whites at medium speed until they are stiff but not dry. Using a large rubber spatula, stir one quarter of the egg whites into the chocolate batter. Gently fold in the remaining egg whites, being careful not to over blend.

Pour the batter into the prepared cake tin and bake for 40 minutes, or until a toothpick inserted into the centre fo the cake comes out clean. Transfer the cake to a rack to cool for 10 minutes, then unmold and cool completely.

Serve with coffee glaze.

Coffee Glaze

1 teaspoon instant coffee
30ml (1/8 cup) boiling water
35g (1/4 cup) icing sugar, sifted

combine instant coffee with boiling water and whisk until all lumps are gone. Pour coffee mixture into the sifted icing sugar and whisk until smooth.

Thursday, March 11

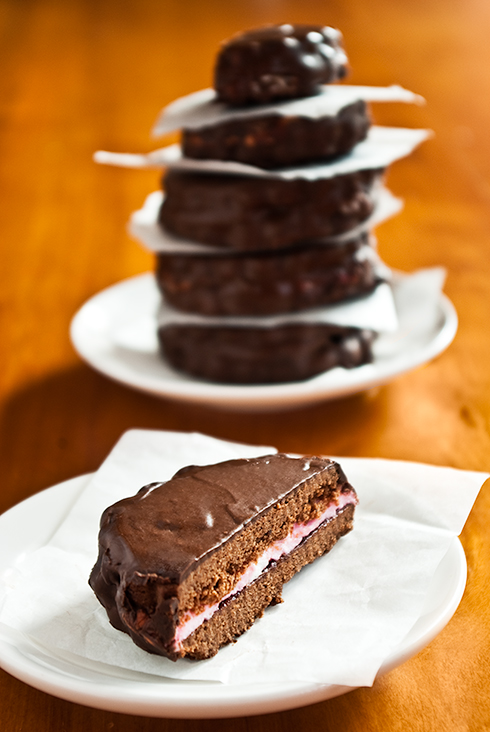
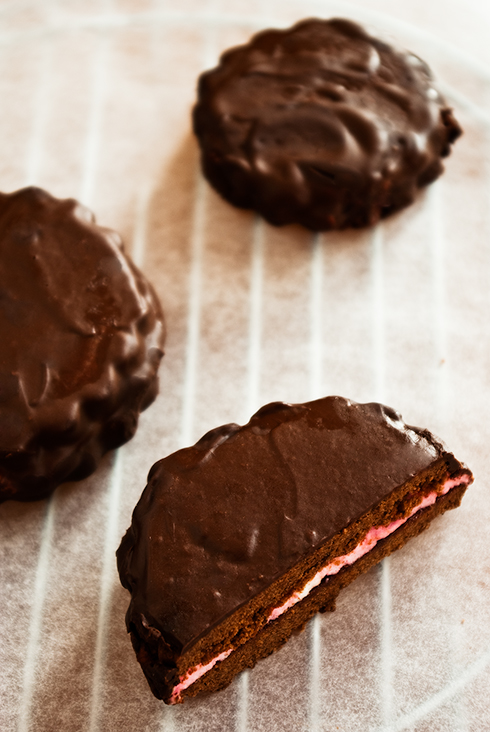
Home-made chocolate wagon wheels

homemade wagon wheels

Wagon Wheels inhabit a special place in my imagination. I remember them from childhood as a treat that I always wanted but never got. I remember them as being delicious. So, imagine my disappoint when I eat a Wagon Wheel for the first time in years only to discover that they're, well, not actually that delicious.

I find this happens with a lot of childhood treats, either things just don't taste like they used to or my tongue has gotten pickier. I have a feeling it's a combination of the two. Still, wahtever the reason the disappointment is immense. It's like a betrayal but a whole lot less exaggerated.

wagon wheels

From the betrayal often stems motivation and this time is no exception. When browsing through Cookies by the Australian Woman's Weekly I found a recipe for "Choc-mallow Wheels", knowing they actually meant wagon wheels I vowed to make them.

And the next day I did. An accomplishment for sure, it's not often that I vow to do something and actually do it.

Home-made chocolate wagon wheels

(from Cookies by the Australian Woman's Weekly)
Makes 14

125g (4.4 oz) butter, softened
165g (3/4 cup, firmly packed) brown sugar
1 egg
225g (1 1/2 cups) plain flour
35g (1/4 cup) self-raising flour
25g (1/4 cup) cocoa powder
28 marshmallows
80g (1/4 cup) raspberry jam
375g (13 oz) dark chocolate
1 tablespoon vegetable oil

Beat the butter and sugar in the bowl of electric mixer until lightened in colour and texture. Beat int he egg. On the lowest speed, or by hand, stir in the sifted flours and cocoa powder, in two batches.

Turn the dough out on to a floured surface and knead until smooth. Roll between two sheets of baking paper until 3 mm (1/8") thick. Cover and refrigerate for 30 minutes.

Preheat the oven to 180°C (350°F). Grease two oven trays and line with baking paper.

Using a 7 cm round fluted cutter, cut 28 rounds from the dough. Place 3cm (1") apart on trays. Bake for 12 minutes and then cool on wire racks.

Turn half the biscuits base-side up and place back on oven tray. Use scissors to cut marshmallows in half horizontally. Press four marshmallow halves, cut side down, onto biscuit bases. Bake for 2 minutes.

Spread remaining halves with jam and press, jam-side down, onto the softened marshmallows. Stand for 20 minutes or until marshmallows are firm.

Melt the chocolate in a medium heatproof bowl over a saucepan of simmering water. Remove from heat and stir in the oil.

Dip the biscuit wheels into the chocolate and, using a metal spatula smooth away any excess chocolate. Place on baking paper-lined trays to set.

Monday, February 22

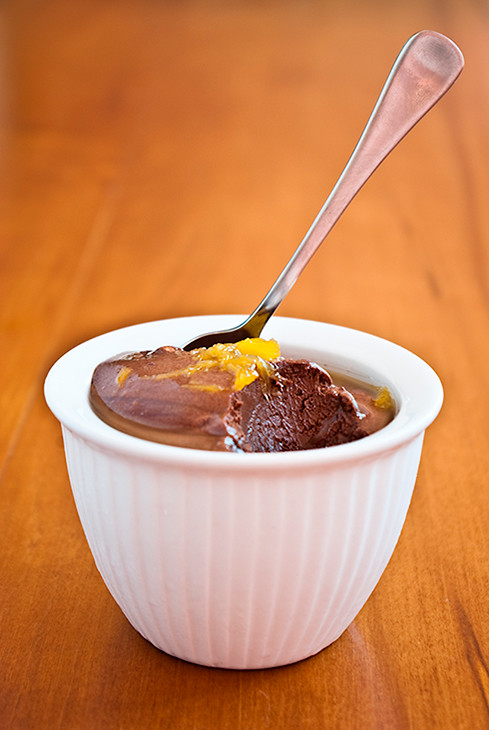
Chocolate mousse with orange syrup

02_10---Chocolate-Mousse

Right, this is ridiculous. I've made yet another chocolate dessert, why, why, why. Why do all my desserts always turn out chocolate filled?

This dessert was brought on by a conversation about mousse with my boyfriend. He loves mousse, in fact his favourite childhood memory involves mousse from Pizza Hut. years later,Pizza Hut all you can eat bars have since vanished and so have their mousse. Anyway, it turned out he'd never had homemade mousse yet alone made it. So we set about making it, he insisted it be chocolate mousse like the stuff that came "out of the mousse machine".

Mousse is incredibly easy to make. There are only a few ingredients and even less steps. There's not a whole lot that can go wrong and I'm sure, even if it doesn't quite work out, it'd still taste delicious.

02_10---Chocolate-Scoop

Chocolate mousse with orange syrup

(adapted from Delicious Magazine, March 2010)
Serves 4-6

Chocolate mousse

150g dark chocolate, 60%-70%
1 egg
30ml cognac
250ml (1 cup) single cream

Place the chocolate in a heat proof bowl set over a saucepan of simmering water until the chocolate melts. Once melted, stir gently until smooth.

Place the eggs in a separate heat proof bowl over a pan of gently simmering water. Using a balloon whisk, whick until light for 2-3 minutes or until light and fluffy. Gently whisk the chocolate mixture into the eggs and stir in the cognac. Remove from heat and set aside.

Using electric beaters, whip the cream to soft peaks. Gently fold into chocolate mixture. Pour Mousse into four 185 ml custard cups, cover, and chill for at least 1 hour.

Orange syrup

110g (1/2 cup) caster sugar
2 tablespoons water
1 teaspoon corn flour
Juice of half an orange
1 1/2 oranges, segmented

Place the caster sugar and water in a small suacepan over a low heat. Stir until sugar dissolves. Increase heat ro medium and cook, without stirring for 2-3 minutes.

Dissolve the cornflour in the juice, stirring to form a smooth paste. Return sugar syrup to low heat and stir in the cornflour mixture, then stir in the orange segments To serve, pout over mousse.

Tuesday, February 9

Self -saucing chocolate puddings

02_10---Self-Saucing-Chocolate-Pudding-1

For someone who isn't a choco-holic I sure make a lot of chocolate desserts, I think it's because you can count on chocolate desserts to taste nice and be fulfilling.

This is another recipe from Simple Essentials: Chocolate by Donna Hay, I've made a fair few recipes from this book and they're yet to disappoint. Donna Hay is wonderful because, on the whole, you can count on the recipes to be nice. They're fairly basic and not always utterly amazing but on the whole they're just plain nice. Nice is good.

This recipe is no exception to the niceness of Donna Hay. As usual I've made a few alterations; I halved the original recipe, added more sauce, and changed the baking dishes entirely. I also used rice malt rather than malted milk powder; it's cheaper. The sauce did overflow a bit, so be sure to place the ramekins on a baking tray.

02_10---Self-Saucing-Chocolate-Pudding---Eaten

Self saucing pudding is one of my favourite dishes. it's very homely and this one is no exception. There's a nice mix of textures in it, partly helped by the small ramekins. The top is quite crunchy, the centre cake-y, and the bottom is super saucy. Delicious.

Self -saucing chocolate puddings

(adapted from Simple Essentials: Chocolate by Donna Hay)
makes four 250ml ramekins

65g butter
138g granulated sugar
1 egg
128g plain flour
1 1/8 teaspoon baking powder
30g cocoa powder
1/4 cup almond meal
3 teaspoons rice malt
1/2 cup milk

sauce

45g brown sugar
1 tablespoon rice malt
1 tablespoon cocoa powder
1 cup water, freshly boiled

Preheat oven to 170°C (340°F), grease four 250ml deep ramekins.

Place the butter and sugar in a bowl and beat until pale. Add the egg and beat until smooth.

Sift the flour, cocoa powder, and baking powder over the butter mixture. Add the almond meal, rice malt, and milk. Beat until smooth. Spoon the pudding mixture into four ramekins.

To make the sauce, place the sugar, malt, and cocoa into a bowl, pour over the boiling water and stir to combine. Spoon over the pudding mixture Bake for 25-30 minutes or until well risen and cooked when tested if a skewer. Serve immediately.

Thursday, February 4

Flourless chocolate cupcakes with raspberry syrup

02_10---Flourless-Chocolate-Cake

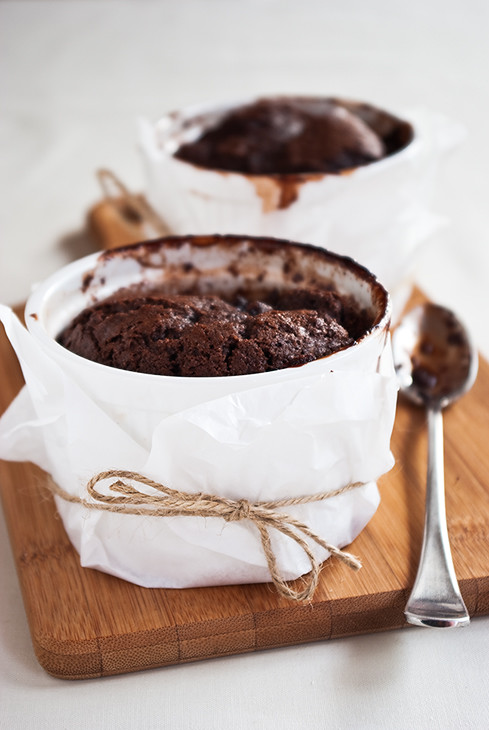
Long time no update, I suppose life sometimes gets in the way of baking, and by life I mean holidays. So no complaints there. There's nothing like a holiday away from home to cheer you up, though flourless chocolate cake comes close.

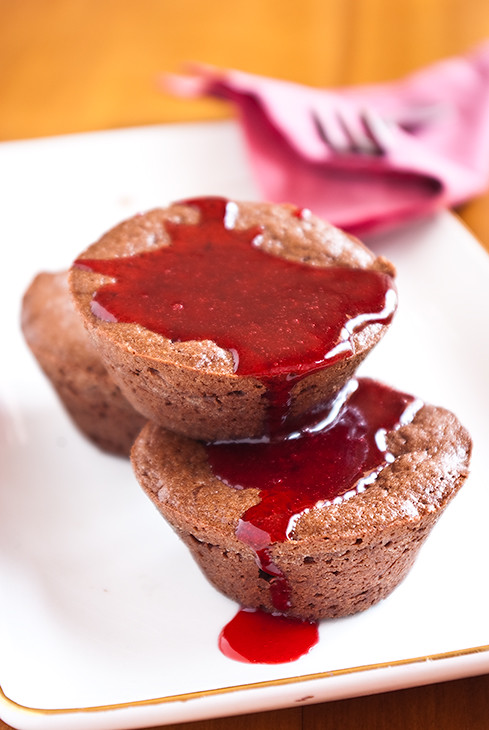
Back from holidays means back to work, so cupcakes are definitely appreciated as a pick me up. These cakes are deliciously bite size. They're large enough to be satisfying but small enough that you don't feel guilty going back for seconds. They're quite rich but not too the point that it's unbearable. They smell deliciously like chocolate.

I halved the recipe as most recipes tend to make too much for two people. I also made the cakes in smaller tins as the original made six Texas muffin sized cakes which seemed way to big for me. I ended up with ten mini cakes - though I probably should have filled each hole slightly so the cakes would be taller and fewer. Be wary of my baking times with this recipe, as my oven is quite inaccurate. You should be fine if you keep at eye on the cakes whilst they bake.

02_10---Flourless-Chocolate-Cake---Eaten

The original recipe called for chocolate glaze to top the cake. If you're a choco-holic this is a great suggestion but I'm not - so I substituted raspberry syrup for the topping instead. Chocolate and raspberry is a match made in heaven!

Flourless chocolate cupcakes with raspberry syrup

Flourless chocolate cupcakes

(adapted from Simple Essentials: Chocolate by Donna Hay)
makes 10 cupcakes

100g dark chocolate, chopped
80g butter
3 eggs, separated
85g almond meal
85g white sugar

Preheat oven to 170°C (340°F), grease a 16 cup, 75ml (1/3cup) muffin pan or a 12 cup 125ml (1/2 cup) pan if you don't have a 75ml one.

Place the butter and chocolate in a small saucepan and stir, over a low heat, until chocolate is melted and smooth. Allow to cool slightly, then stir in the egg yolks, almond meal, and 2/3 of the sugar. Set aside.

Place the egg whites in the bowl of an electric mixer and beat until soft peaks form. Gradually add the remaining sugar and beat until glossy. Fold the egg whites into the chocolate mixture.

Spoon the mixture into 10 of the holes in the muffin tin. Bake for 15-20 minutes or until a skewer comes out clean and cakes are set. Remove cupcakes from the oven and cool for 10 minutes in tins, remove cupcakes from tins and allow to cool on a wire rack. When throughly cooled, serve with raspberry syrup.

Raspberry syrup

110g (1/2 cup) granulated sugar
125ml (1/2 cup) water
1 cup raspberries, frozen or fresh

Combine sugar and water in a small saucepan and stir over a low heat until sugar dissolves. Add raspberries and bring mixture to the boil. Stir raspberries to break them up. Boil, without stirring, for 5 minutes or until mixture has thickened.

Strain raspberries into a bowl though a fine sieve. Use the back of a spoon to force remaining raspberry mixture though. Discard the seeds Serve over cupcakes.

Tuesday, December 1

Chocolate earl grey shortbread

11_09---Earl-Grey-Choc-Shortbread

I have never liked Earl Grey tea so I'm not sure what drove me to make these. I suppose they sounded nice in theory and I was curious as to how they would taste. I knew that I should have trusted my gut instinct and listened to the voice that said "you know, you don't like Earl Grey one little bit" but I didn't. Instead, I went out and bought Earl Grey tea explicitly for the purpose of making these biscuits. Maybe I thought these biscuits would convert me. Well, they didn't. I still can't stand Earl Grey tea.

However, these aren't all bad. The texture is amazing though not at all the like shortbread I normally make. These little biscuits crumble a bit when broken and also dissolve in the mouth. I know I would love these if it weren't for the Earl Grey tea in them, so if you like Earl Grey you'll probably adore these! I fully intend to make them again without the the tea.

Chocolate earl grey shortbread

(adapted from The Art & Soul of Baking)
makes 18-25 biscuits

50g (1/4 cup) granulated sugar
1 tablespoon good-quality Earl Grey tea leaves
115g (4 oz) butter, cold and cut into pieces
105g (3/4 cup) all-purpose flour
20g (3 tablespoons) unsweetened cocoa powder
1/8 teaspoon salt
3 tablespoons sanding sugar, optional
200g (7 oz) dark chocolate

place the sugar and tea leaves in the bowl of a food processor and grind for 1 minutes, or until the leaves are finely chopped. Add the butter, flour, cocoa powder, and salt and process for about 45 seconds. Scrape down the bowl and process for a further 15-30 seconds or until the dough looks uniformly dark and forms large, shaggy clumps. Alternatively, combine with a pastry blender until the dough reaches the same consistency.

Turn the dough out on to the bench and knead gently several times to bring the mixture together.

Squeeze the dough into a log about 30cm (12") long and about 2.5cm (2") in diameter. Gently roll it back and forth until smooth. If the dough becomes sticky, place it in the refrigerator for 15-20 minutes to firm up.

Sprinkle sanding sugar on to the bench, alongside the log and roll the dough in the sugar to coat evenly. Cut a piece of cling wrap about 10cm longer than the log and center the log at one of the long ends. Roll the log tightly and twist the ends of the wrap to secure. Insert the log into a cardboard paper towel roll to help the dough keep its shape. Refrigerate for 2 hours.

Preheat the oven to 150°C (300°F), fine a baking tray with paper.

Remove the dough from the fridge and side it out of the cardboard. Using a thin knife, slice it into 1cm (3/8") rounds. Place the biscuits 2.5cm apart on the baking tray. Bake for 30 minutes,rotating the tray halfway through. Remove tray from oven and transfer the biscuits to a wire rack to cool.

Once cooled, melt chocolate and using a fork, flick the chocolate over the biscuits to decorate.

Thursday, November 19

White chocolate & macadamia biscuits

11_09---WhiteChocMac

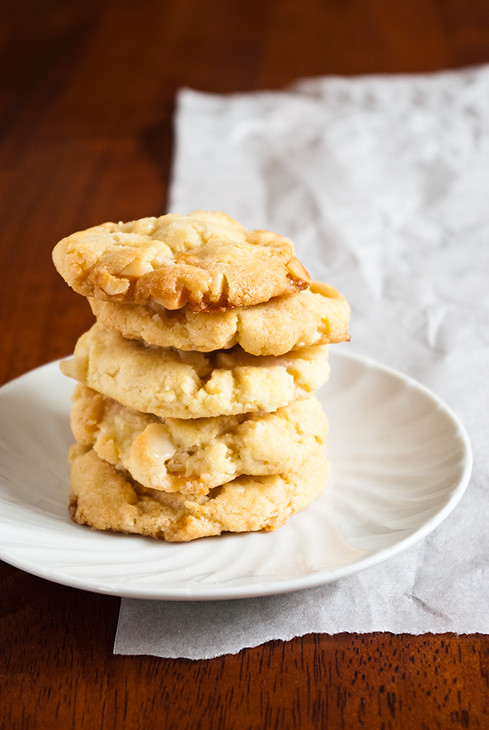
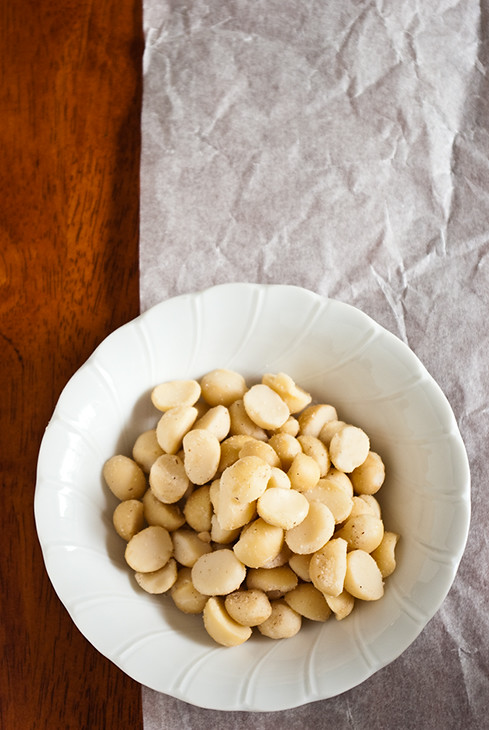
If there's one thing Australia has brought to the world it's the macadamia nut. The macadamia nut is without a doubt my favourite nut; it's buttery and tasty without being overwhelming. It also goes amazingly well with white chocolate. Actually, it goes amazingly well with pretty much anything.

As a child we had a macadamia tree on our property in upper northern New South Wales. The macadamia tree is one of the two things I miss about living up there; the other is the mulberry tree. As I child we would climb the macadmia tree and pick of the nuts. I distinctly remember a large portion of the nuts being rotten when we cracked them open but when we did find good ones it was completely worth it!

11_09---WhiteChocMacIngred

Unfortunately neither macadamias nor mulberries grow where I now live. Luckily macamdias can easily be purchased and I do so regularly. Mulberries are less easy to find and, when I do find them, too damaged looking to buy.

White chocolate & macadamia biscuits

(adapted from Simple Essentials: Chocolate by Donna Hay)
makes 22-30 biscuits

125g (4 oz) butter, softened
1/2 teaspoon vanilla extract
220g (1 cup) white sugar
1 egg
150g (1 cup) plain flour, sifted
150g (1 cup) self-raising flour, sifted
140g (1 cup) macadamia nuts, chopped
200g (7 oz) white chocolate, chopped
50ml (1/4 cup) water, extra

Preheat oven to 180°C (350°F), grease and line two large cookie trays.

Place the butter, vanilla, and sugar in a bowl and beat until light and creamy. Add the egg and beat to combine. Add the flours, nuts, and chocolate and beat to combine. If the mixture is too sandy and does not form a dough, gradually add the water until the mixture is the right consistency to roll.

Roll 1 or 2 tablespoon sized balls, place balls on baking trays about 5cm (2") apart; flatten with the palm of your hand.

Bake biscuits for 12-15 minutes or until lightly golden. The biscuits will be soft when removed from the oven, cool on trays.

Friday, October 23

Chocolate, raspberry, & macaroon tarts

07_09---MacaroonChocolateTarts

I actually made these quite a while ago but I figure there's no harm in adding them to the blog. I've been a bit sick over the last week so I haven't had a chance to cook, let alone photograph anything. I do remember these being delicious so I think they're worth sharing. There's no harm in sharing things for the past, right?

I'm a sucker for coconut and I'm always surprised when I meet people who don't like it as much as I do. I'm not sure what it is about coconut that I find so irresistible but if something has coconut in it, I'm there.

I'm also a sucker for chocolate and raspberries despite only having had fresh raspberries a few times in my life. I adore anything with frozen ones in it, so I can only imagine how good fresh ones are!

These tarts turned out quite different to the picture in the book, in the book they've sunken and collapsed in on themselves. They look good both ways, so if yours sink it's not a big deal.

Cramming the macaroon mixture into the cases was quite hard, I think the tart tins I own are shallower than the ones used in the book but I didn't realise this until after cramming all the mixture in. I'll never quite understand why books don't specify the height of tart tins, so if you're using 2cm (2/3") tart tins you'll probably end up with 7 tarts. You can cram the mixture into 6 tart tins but it's not really worth the effort. If you're using 2.5cm (1") tins you should be fine, though I haven't tried it.

Chocolate, raspberry, & macaroon tarts

(adapted from Simple Essentials: Chocolate by Donna Hay)
makes six 8cm (3 1/4") x 2.5cm (1") or seven 8cm (3 1/4") x 2cm (3/4") tarts

Macaroon base

3 egg whites
165g (5 3/4oz) sugar
255g (7 7/8oz) unsweetened, dessicated coconut

Preheat oven to 140°C (280°F).

Combine the egg whites, sugar, and coconut in a large bowl. Once thoroughly mixed divide evenly between the tart dishes. Press mixture firmly over the base and up the sides, using the back of a spoon if necessary.

Bake for 25-30 minutes or until macaroon shells are firm and lightly golden.

Raspberry chocolate filling

125ml (4 fl oz) single cream
125g (4oz) dark chocolate, chopped
2 eggs
2 tablespoons caster sugar
2 tablespoons self raising flour
200g (7 oz) raspberries, fresh or frozen

Turn oven temperature up to 160°C (320°F)

Place the cream and chocolate in a saucepan over a low heat and stir until smooth. Remove from heat and set aside. Place the eggs and sugar in a bowl and beat, using an electric mixer, until light and creamy. Fold in the flour and chocolate mixture.

Spoon the chocolate mixture into macaroon shells and top with raspberries. Bake for 25 minutes or until the filling is firm. Cool in tins.