Sunday, June 5

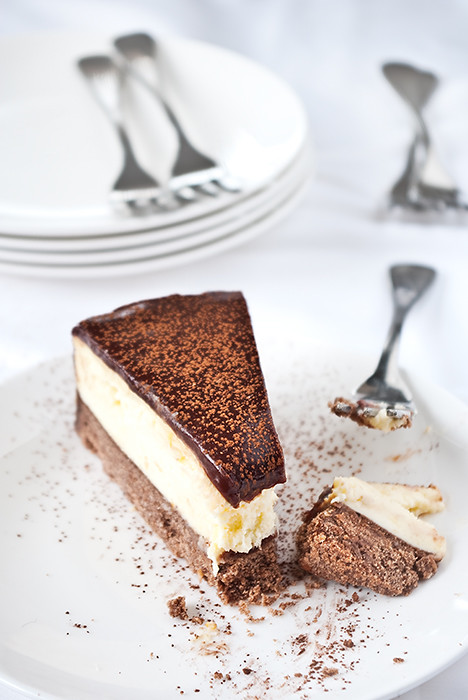
Chocolate & orange cheesecake

06_11---Chocolate-orange-cheesecake2

I came home the other day super stressed (thanks work, I love you but sometimes you kill me!) and with an intense hankering for cheesecake. Unwilling to go out and buy a cheesecake I decided to make one knowing full well it wouldn't be done by the end of the day. I also knew the next day would be busy and so coming home to an almost finished cheesecake would be good. Knowing I would be able to finish it the next day made me very happy because at least it meant I would have finished something over that course of the week.

I've written before about the wonders of stress baking and my attitude hasn't changed. Baking (or doing anything productive really) is a great way to unwind after a busy week.

Sure, baking is sometimes really stressful in itself but it's enjoyable and distracting stress that results in tasty treats. The other benefit of stress baking late at night is that you get to have something tasty, decadent, and downright bad for you for breakfast. Like cheesecake. Cheesecake for breakfast is like the grown up version of ice cream or doughnuts for breakfast.
06_11---Chocolate-orange-cheesecake

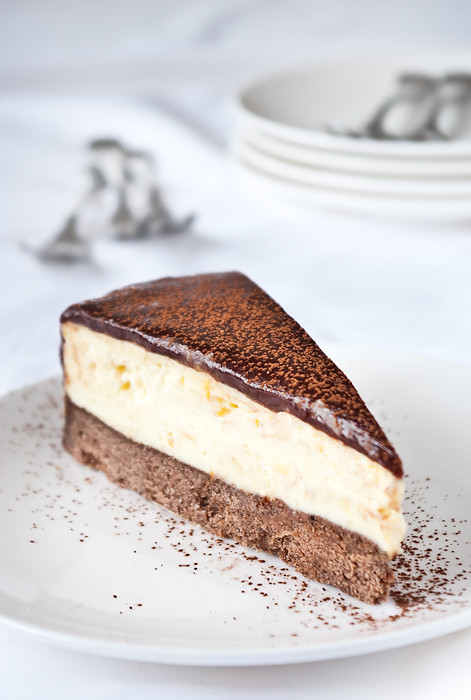
This cake is crazy rich, as many cheesecakes are. The chocolate glaze however takes it to the next level so it may not be for everyone. However, if you're after something decadent this is an unmistakable winner.

The recipe is predominately from Tartelette with the super sweet chocolate topping coming from Gourmet Traveller.

Chocolate & orange cheesecake

adapted from Tartelette & Gourmet Traveller
Makes one 26cm (10") cheesecake

For the base
  • 125g butter, very cold and cut into cubes
  • 40g sugar
  • 150g plain flour
  • 10g cocoa powder

Preheat the oven to 180°C (350°F). Grease and line the base and sides of a 26cm (10") springform pan.

Work the butter, sugar, flour, and cocoa with a food processor or your fingers until it resembles damp sand. Pour the mixture into the prepared pan and using your fingers or the back of a spoon press it firmly into the bottom of the pan. Bake for 40 minutes, then cool completely on a wire rack without removing it from the pan.

For the cheesecake batter
  • 500g cream cheese, softened
  • 70g butter, softened
  • 3 tablespoons creme fraiche
  • 125g sugar
  • Zest of one orange
  • 1 1/2 tablespoons cornflour, sifted
  • 3 eggs, seperated

Preheat the oven to 160°C (325°F). Place a large toasting tray full of freshly boiled water on the lowest rack of the oven. Position another rack in the centre of the oven.

Combine the cream cheese, butter, creme fraiche, sugar, orange zest, and cornflour in the bowl of an electric stand mixer. Beat on medium-low to combine, being careful not to incorporate too much air. Add the egg yolks on at a time beating until just combined between each addition. Set the cream cheese mixture aside.

Beat the egg whites until stiff peaks form. Gently fold into the cream cheese mixture.

Pour the batter over the prepared base. Wrap the springform pan tightly in aluminium foil. Place the springform pan on the middle rack of the oven and bake for 1 1/2 hours. When the time is elapsed, turn the oven off and open the door a crack. Allow the cake to cool in the oven for 30 minutes. Transfer the cake to a wire rack and cool to room temperature, then refrigerate it for a few hours or overnight.

For the chocolate topping
  • 185ml water
  • 130g castor sugar
  • 15g citruspectin
  • 30g liquid glucose
  • 75g 70% cocoachocolate, roughly chopped

Heat the water in a small saucepan to 60°C, add 25g of sugar and all the pectin, whisk continuously until the mixture comes to the boil.

Add the glucose and remaining sugar, continue to whisk until the mixture once again comes to the boil and starts to thicken. Remove the saucepan from the heat and stir in the chocolate. Allow to cool for 5 minutes.

Pour the chocolate mixture over the prepared cheesecake. Cool to room temperature then cover with cling wrap, being careful that it does not touch the surface, and refrigerate until set.
Monday, May 23

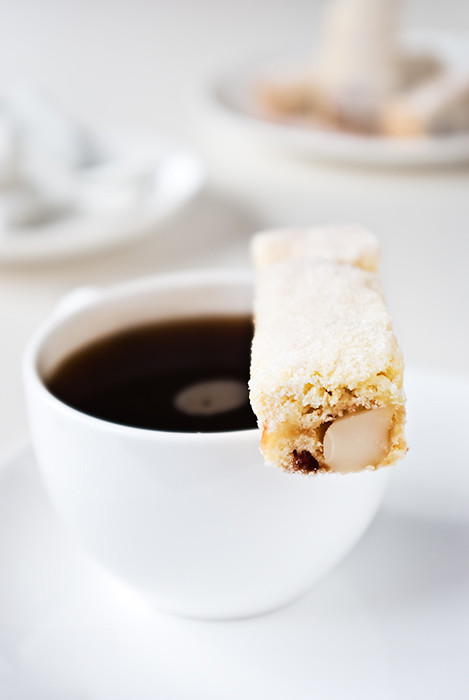
Cranberry nougat shortbread

05_10---Shortbread

I'm a sucker for shortbread, particularly the cheap, super sweet, shop bought stuff with sugar on top that show sup everywhere around christmas. I love it. I can eat it by the packet and because of this I never buy it. I know if I were to buy it I would eat it all.

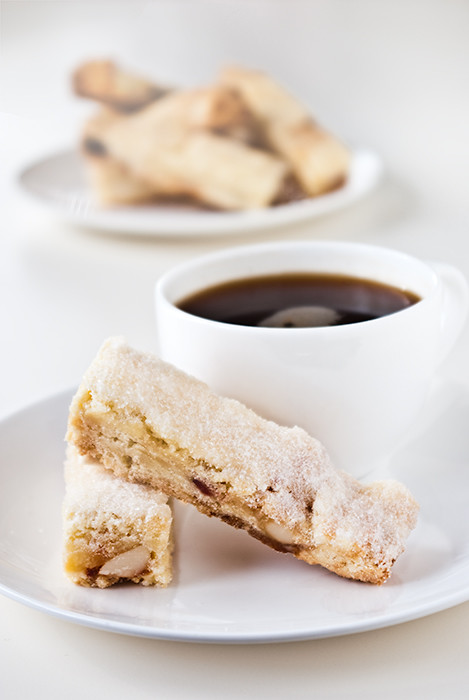
To fulfil my craving for shortbread I decided to make my own. These are not quite like the shop version, which might be a good thing. I'm not sure.

The original recipe claims you can use rice flour, corn flour, or potato starch as the additional starch. I used corn flour but I think I would have preferred to use something else as I'm not much of a fan of the texture of cornflour. Rice flour apparently gives the biscuits more crunch, which I would have enjoyed.

05_10---Shortbread-2

As far as the actual shortness of the biscuit is concerned this are definitely spot on. They're super flake-y, and if you made them without nougat they would just fall apart in your mouth. I like the crunch the nougat and nuts brings but everyone is different.

This recipe calls for super soft butter, I softened mine in the microwave as it's freezing at the moment and I doubted that it would soften at room temperature. Apparently a tiny amount of melting isn't a problem but don't over do it!

Cranberry nougat shortbread

Adapted from Tartine by Elisabeth M. Prueitt & Chad Robertson
Makes about 36 biscuits

  • 225g (1 cup + 2 tablespoons) very soft unsalted butter
  • 1/2 teaspoon salt
  • 255g (1 3/4 cup + 2 tablespoons) plain flour
  • 75g (1/2 cup + 1 tablespoons) corn, rice, or potato flour
  • 200g (7oz) soft cranberry nougat
  • 70g (1/3 cup) granulated sugar
  • 55g (1/4 cup) granulated sugar, extra

Preheat the oven to 160°C (325°F), grease a line a 15cm by 25cm (6" by 10") baking tin.

In a small bowl, sift together the flour and chosen starch. Remove 1/4 of a cup and place in a small bowl with the nougat.

Rub the nougat and flour together with your hands until lumps to size of peas form. Set aside.

Place the butter in a separate mixing bowl. The butter should be very soft, about the consistency of mayonnaise or whipped cream. Add the salt and mix well with a wooden spoon so that the salt dissolved completely. Add first lot of sugar to the butter and mi until just combined, then add the flour and mix until a smooth dough forms. Finally, add the nougat pieces and mix until just combined.

Pat the dough evenly into the prepared baking dish. The dough should be no more than 1.5cm (2/3") thick. Bake until the top is lightly browned, about 30 minutes. The middle of the shortbread should remain fairly light. Let cool on a rack until warm to touch.

Sprinkle the remaining sugar over the shortbread, tilting the dish so that the sugar fully and evenly coats the top. Tip out any excess sugar. With a thin, sharp knife, cut the short bread into rectangular fingers about 1cm (1/2") wide and 5cm (2") long. It is best to cut the shortbread while it is still warm. Cool completely before removing from the baking dish,

The first biscuits may be difficult to remove but the remainder should come out easily. Store in an airtight container for up to 2 weeks.

Tuesday, May 10

Fudgy brownies

05_11---Brownies

Daylight savings is the bane of my existence sometimes. I really, really want to photograph what I make, talk a walk round the lake, feed the ducks, and generally enjoy the sunshine but I can't because as I drive home everyday the sun is rapidly sinking behind the horizon and often by the time I get out of the car it's completely gone.

As I'm by no means an early riser the entire point of daylight savings is lost on me. When I leave for work, daylight savings for not, it's light anyway. I would much rather it were light(ish) when I returned home. Still, no point whining as someone out there probably benefits from it and even if I don't at least I have a window at work. Better windows then I have at home, in fact. I wish I could take my photos there but that would be really, really weird.

05_11---Brownies-3-Edit-copy

So daylight savings makes it does make it hard to get things that require light done. And as I don't own any lighting equipment and can hardly justify buying any it means so many things I make neve g et photographed.

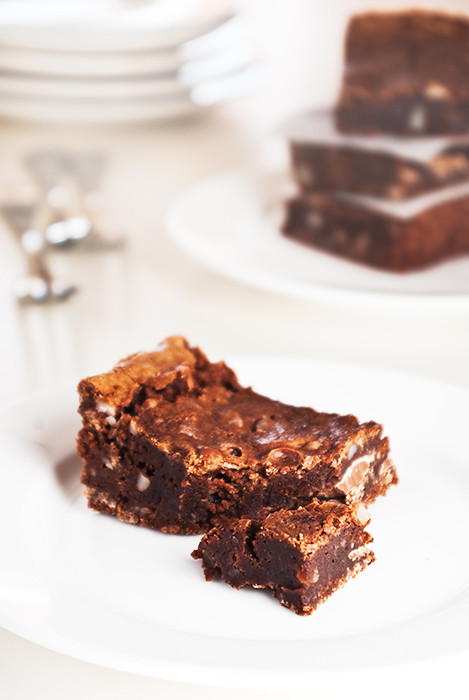
Anyway no point whining because, as you can probably see, there's brownies to be had. Tasty, tasty, fudgy chocolate brownies. Yum. It might be cold and dark but it's totally okay.

Fudgy brownies

(From The art and soul of baking by Cindy Mushet)
Makes one 20cm (8") brownie

115g (4 oz) unsalted butter
115g (4 oz) bitter-sweet chocolate
55g (2 oz) unsweetenedchocolate
200g (1 cup) sugar
2 eggs, at room temperature
1 1/2 teaspoons vanilla extract
70g (2 1/2 oz) plain flour
pinch of salt
105g (3 3/4 oz) chocolate chips or chunks
55g (2 oz) macadamia nuts

.

Preheat the oven to 180°C (350°F). Line a 20cm (8") cake pan with baking paper across the bottom and up two of the sides, then lightly coat with non-stick spray

Bring 5cm (2") of water to the boil in a saucepan. Place the butter, bitter-sweet chocolate, and unsweetened chocolate in a heatproof bowl and set it over the water. Turn off the heat and stir the chocolate until it is melted and the mixture is smooth.

Remove the chocolate mixture from the heat and whisk in the sugar. Whisk in the eggs, one at a time, stirring well to incorporate. Whisk in the salt and flour. Stir until the batter turns from dull and broken to smooth and shiny. Whisk in the chocolate chips and nuts.

Scrape the batter into the prepared tin and spread evenly. Bake for
35 to 40 minutes or until a skewer inserted into the middle comes out with a few moist crumbs clinging to it. Transfer to a rack and cool completely.

When the brownie is cool, run a thin knife around the edges of the pan. Grasp the edges of the baking paper and gently pull upward. Set the brownies on a cutting board and slice into 16 even pieces, then serve or store in an air tight container for up to 3 days.

Monday, April 18

Blackberry crème caramel

04_11---Blackberry-creme-caramel-Edit-copy

Crème caramel isn't something I see often in flavours outside of the usual vanilla, unlike it's seemly more popular cousin the crème brulee for which I've seen seemly numerous (and delicious sounding!) variations.

There was a time last year where it seemed like every man, woman, and dog wanted a blow torch to make crème brulee. Everyone just had to have one because they just had to make crème brulee. At this time I was working in a cookware shop and we'd regularly sell out of blow torches (Masterchef, you make Australian's mad!). I would have so many stressed out people looking desperately hunting for the last blow torch in the area. "I'm sorry, we're all sold out" I'd say, "you could try crème caramel instead, it's just as easy." Sometimes people would respond well to this, but most of the time they'd be adamant that they just had to make crème brulee. I suppose I can't blame them really, I know what it's like to be utterly determined to make something.

04_11---Blackberry-creme-caramel-2

That being said, I honestly do think crème caramel is just as easy. Sure, there's caramel to make and if you're anything like me making caramel makes you extremely paranoid and scared of messing it up. I've made caramel many times before but even so, every time I freak out. What if it crystallizes, or burns, or catches on fire? I know in reality it doesn't really matter if any of these things happen because I'd just wash the pot and start again. But still, the mere thought of it.

In fact, I did crystallise the caramel for this. Massively so. So, I stamped my feet a bit and down the sink it went. Then I started again. And, voila, no crystallisation. Sure, I undercooked the caramel a bit and it wasn't quite as golden as it should have been but who cares?

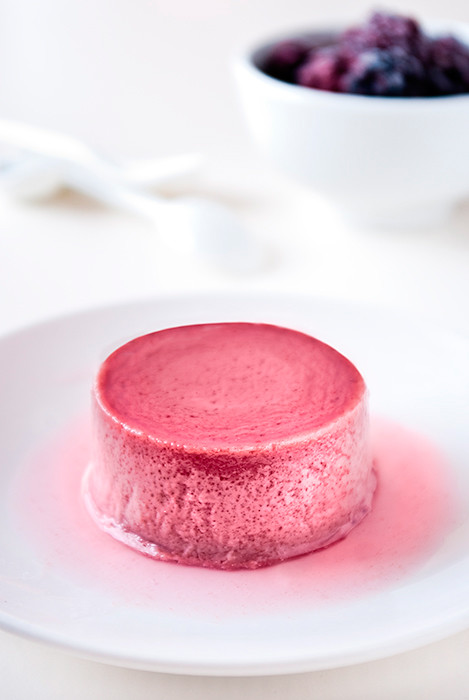
So, after puckering on I had crème caramel. That was blackberry flavoured. That was also rather weird but mostly delicious. Seriously folks, time to move beyond the usual vanilla flavoured treats into the realm of berries, ginger, coconut, or anything really.

Also, I'm wondering how normal, more skilled people than I remove crème caramels from their containers? Every book I'm read says to carefully loosen them out with a knife but I just can't do this without ruining them. Instead, I just whack a plate on top, invert, and shake, shake, shake until I hear a satisfying sound that resembles a suction cap coming loose. Is it an elegant technique? No, no really so if you have a better one, let me know!

Down side is that after making this I have even more egg whites to use up. Time to continue on my quest to find an awesome biscuit that uses lots of egg whites.

Blackberry crème caramel

(adapted from Desserts by Christine Manfield)
makes six 150ml creme caramels

For the syrup

125ml water
200g castor sugar
1/4 teaspoon cream of tartar

for the custard

350ml pouring cream
50ml water
150ml blackberry pureee
2 eggs
6 egg yolks
75g castor sugar
Freshly boiledwater, extra

Preheat the oven to 150°C (300°F).

Pour sugar, water, and cream of tartar for the syrup into a medium saucepan. Place over medium heat and stir until the sugar has dissolved and the liquid is clear. Increase the heat to high and boil rapidly, without stirring, until the caramel turns a deep golden brown.

Remove from the heat and immediately divide among the custard cups, swirling each cup to distribute the caramel halfway up the sides. Set aside to cool for 10 minutes.

To make the custard, place the cream in a small saucepan, place the blackberry puree and the water in another saucepan and bring both pans to just below simmering point.

In a separate bowl, gently whisk the egg yolks, eggs, and castor sugar. Slowly pour the hot cream into the egg mixture, stirring constantly. Add the hot blackberry mixture in the same way. Pass the custard through a fine sieve into a jug, then pour it into the prepared custard cups.

Place the custard cups in a roasting tray and transfer it into the oven. Fill the roasting rack with freshly boiled water so that it comes halfway up the sides of the custard cups. Bale for 45 minutes or until just set. Remove the custards from the oven and leave them to sit in the water bath until cool. Once cooled, stand on a tray and cover in plastic wrap then refrigerate for 5 hours to set before serving.

To serve, suspend each crème caramel in hot water for 30 seconds, then place a plate on top and invert - shaking gently if required.

Monday, April 4

Basbousa

Basbousa

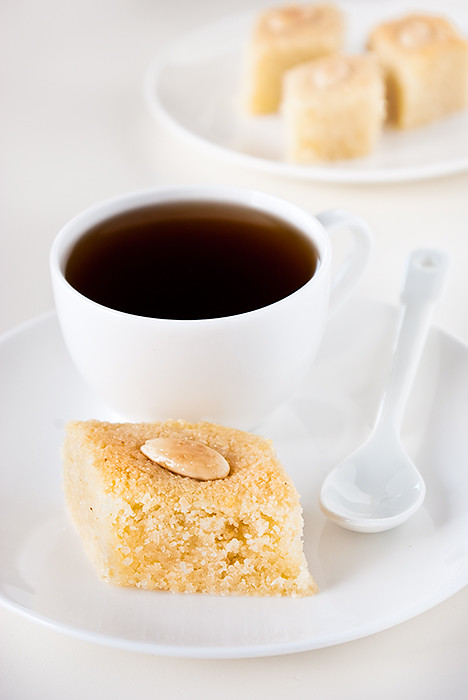
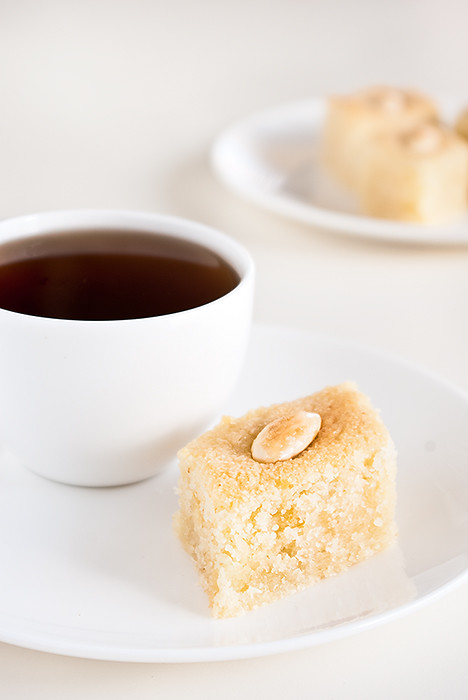
I'm taking a short detour from my barely started quest to find the perfect egg white biscuit recipe to bring you what is probably one of simplest things I've made in a long time. This tasty slice is a breeze to make and, providing you have a sweet tooth, down right delicious.

As it's really quick to make this is an excellent dessert for an impromptu dinner with guests. You know,the ones where you decide an hour or two beforehand that you want to have a guest or two around for dinner and somehow you have to cook a meal, make a dessert, set the table, and make the house presentable. The kind of dinners you can only have with close friends because otherwise you look flustered and slightly disorganised and, in my case, everyone knows that's already the case so there's no harm done.

When I cook I try to make things I've never had before and this is no exception. I've had very similar things but they've always been more complicated to make, involving hot pots, stoves, and all that jazz. Is this really requires for the cake is a minute or two of time and a bowl. The syrup is done in a pinch too. What more can you ask for?

Basbousa

Basbousa

(from Food Safari by Maeve O'meara)
makes 25-30 pieces

For the cake

2 1/2 cups coarse semolina
1 cup dessicated coconut
1 cup (220g) caster sugar
1/2 cup (75g) self-raising flour
200g thick yoghurt
200g unsalted butter, melted
1 teaspoon vanilla extract
25-30 blanched almonds
milk, if required

For the syrup

1 1/2 cups (330g) sugar
1 cup (250ml) water
1 teaspoon lemon juice
1 teaspoon rosewater

Preheat the oven to 190°C (375°F), grease and line the base of a 30cm x 20cm x 4cm (12" x 8" x 1") baking tin.

Mix the semolina, coconut, flour, yoghurt,melted butter, and vanilla in a bowl. The mixture should be stiff but not dry, if it is too difficult to stir add a little milk.

Spread the mixture into the baking pan, then cut it diagonally into diamonds about 5cm (1") wide. Place an almond in the centre of each diamond.

Bake the cake for 3040 minutes, or until golden on top.

Whilst the cake is cooking, begin the syrup. Combine the sugar and water in a small saucepan over medium heat, stirring until all the sugar has dissolved. Bring the mixture to the boil, then reduce the heat and simmer for 5 minutes. Remove from the heat and stir in the lemon juice and rosewater.